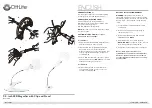


Magnification, or SIZE of the image being viewed, is adjusted by
turning the Size Control (large middle knob below the screen).
Turn RIGHT to make image LARGER
Turn LEFT to make image SMALLER
The size setting is retained when turning OFF the unit and will start
with that setting when you power ON the machine.
Magnification can also be adjusted by using the programmable SIZE
PRESET feature. This feature allows you to save your favorite SIZE
setting in the camera. A default Size Preset is programmed by the
factory. It is activated by pushing IN on the Size Control (”Preset ON”
is briefly displayed on the screen).
To program your own preferred Size Preset level, first turn the
Size Control to the desired magnification level. Next, PUSH AND
HOLD IN on the Size Control until “Preset Saved” appears on the
screen (approx. 4 SECONDS).
Confirm your Size Preset is saved by turning the Size Control to
a different setting (as soon as you adjust the Size Control, the
camera will reset to manual Size adjustment and “Preset Off”
appears on screen). Now press IN once on the Size Control and
the size should adjust to your saved setting.
Adjusting Magnification
When first learning to use the camera system, place printed
material on the Viewing Table and adjust the Size Control to
the smallest magnification setting. Then begin turning the
Size Control to increase the size of the image until you are
able to read the text.
6
Size Control
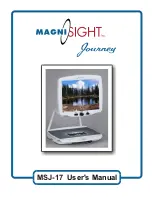
Summary of Contents for Journey MSJ-17
Page 1: ...MSJ 17 User s Manual ...