background image

Playable Discs  7

Region Codes and Color Systems

DVDs must meet the requirements for Region Codes and Color Systems before you can use them
with the DVD Player. DVDs must be labeled for ALL regions or for Region 1 in order to play on this
DVD Player.You cannot play Discs that are labeled for other regions.These symbols must appear on
your DVDs, or you cannot play the DVD in this DVD Player.

The number inside the globe refers to a region of the world. Region 1 represents the United States,
Canada, upper regions of North America, Bermuda, the U.S.Virgin Islands, and small regions near
Australia.
Furthermore, recordings are made according to different color systems throughout the world.The
most common color systems are NTSC, which is used primarily in the United States and North
America, PAL, and SECAM.
This DVD Player is compatible with NTSC and PAL. Make sure the Discs you play were recorded in
NTSC or PAL and your TV is NTSC or PAL compatible.You must set the DVD Player’s TV TYPE  to  be
compatible with your TV and the Disc.

Details are on page 36.

The color system of the DVD may appear

on the DVD or on the Disc case.

Playable Discs

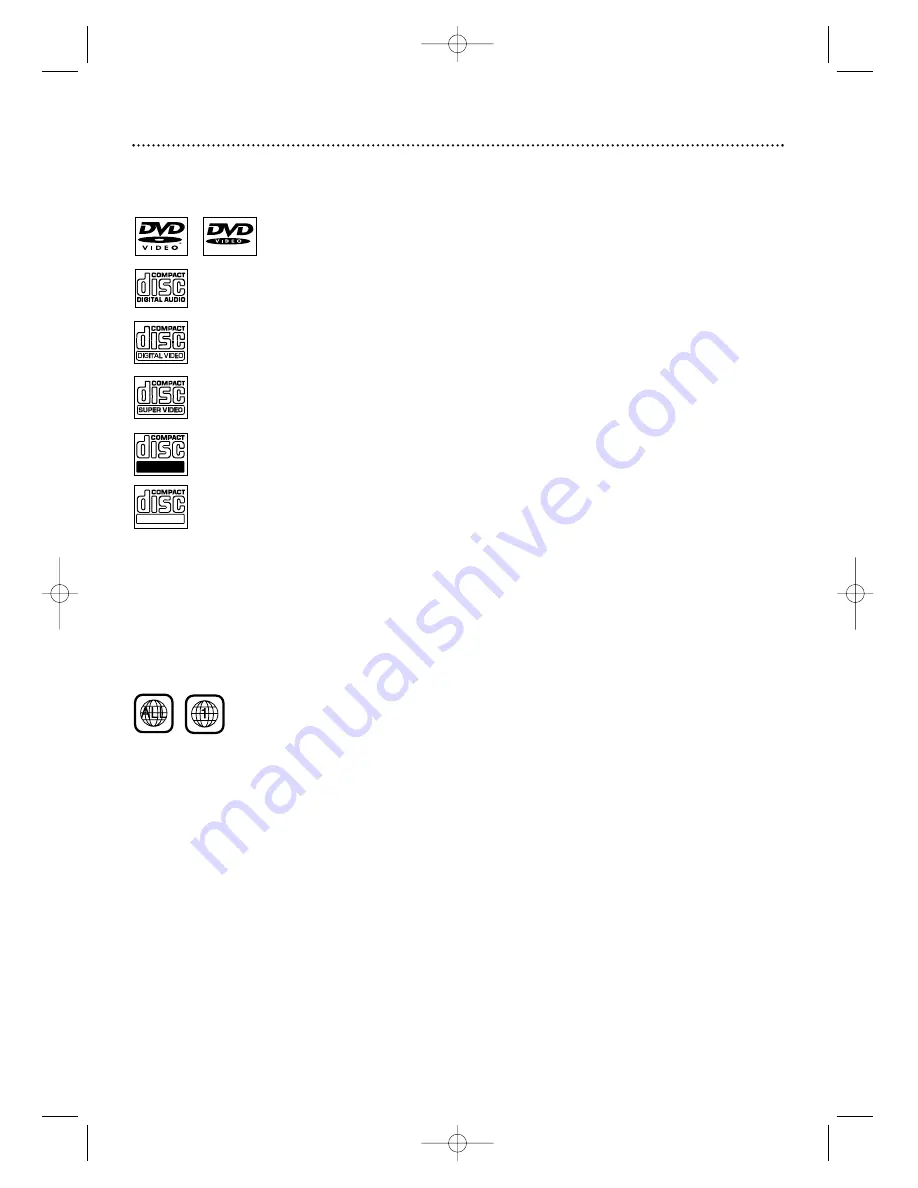
This DVD Player will play various types of Discs. Look for these logos on your Discs to determine
whether the Disc will play on the Philips DVD Player.

DVD

(Digital Video  Disc)

Audio CD

(Compact Disc Digital Audio)

Video CD

Super Video  CD

CD-R (CD-Recordable)

CD-RW (CD-Rewritable)

Recordable

ReWritable

 MDV450  25/09/2002  9:46 AM  Page 7

Summary of Contents for MDV450

Page 1: ...ES CAN HELP YOU GET THE MOST FROM YOUR NEW PRODUCT BY EXPLAINING HOOKUPS FIRST TIME SETUP FEATURE OPERATION DO NOT ATTEMPT TO RETURN THIS PRODUCT TO THE STORE FOR FAST HELP CALL US FIRST 1 800 705 2000 THANK YOU FOR MAKING US A PART OF YOUR HOME MDV450 DVD PLAYER IMPORTANT RETURN YOUR WARRANTY REGISTRATION CARD WITHIN 10 DAYS SEE WHY INSIDE MDV450 25 09 2002 9 46 AM Page 1 ...

Page 2: ...product you must return your Warranty Registration Card within 10 days So please mail it to us right now Know these safetysymbols This bolt of lightning indicates uninsulated material within your unit may cause an electrical shock For the safety of everyone in your household please do not remove product covering The exclamation point calls attention to features for which you should read the enclos...

Page 3: ...2 Repeat Repeat A B 23 DVD Audio Language 24 DVD Subtitle Language 25 DVD Disc Menu Language 26 Parental Controls Password 27 Parental Controls Disc Lock 28 Parental Controls Levels 29 Programmed Playback 30 Preview 31 Smart Navigator JPEG and MP3 Features 32 DVD Player Setup Options TV Display 33 Video Output 34 Video Mode 34 35 TV Type 36 Speaker Setup 3D Sound 37 SPDIF LPCM 96K Setup 38 DVD Pla...

Page 4: ...ere is no guarantee that interference will not occur in a particular installation If this equipment does cause harmful interference to radio or television reception which can be determined by turning the equipment off and on the user is encouraged to try to correct the interference by one or more of the following measures 1 Reorient or relocate the receiving antenna 2 Increase the separation betwe...

Page 5: ...antenna discharge unit size of grounding conductors location of antenna discharge unit connection to grounding electrodes and requirements for the grounding electrode See figure at right 15 Lightning For added protection for this product during a lightning storm or when it is left unattended and unused for long periods of time unplug it from the wall outlet and disconnect the antenna or cable syst...

Page 6: ...tic heating equipment and direct sunlight When placing the DVD Player in a cabinet allow about one inch of space all around the DVD Player for ventilation Leave enough room in front of the DVD Player for the disc tray to open completely If the DVD Player is brought directly from a cold to a warm location or is placed in a very damp room moisture may condense on the lens inside the DVD Player If th...

Page 7: ...ding to different color systems throughout the world The most common color systems are NTSC which is used primarily in the United States and North America PAL and SECAM This DVD Player is compatible with NTSC and PAL Make sure the Discs you play were recorded in NTSC or PAL and your TV is NTSC or PAL compatible You must set the DVD Player s TV TYPE to be compatible with your TV and the Disc Detail...

Page 8: ...er Video CDs DVD Disc Menus Some explanations in this manual describe the DVD Disc Menus which vary among DVDs Movie producers set these menus and not all DVDs have menus If the DVD has a menu access the Disc Menu by pressing the DISC MENU button on the remote control Details are on page 19 DVD Player Menus Some instructions explain how to use the DVD Player s Setup menu to set up features of the ...

Page 9: ...ks and connectors on the other equipment Determine how to choose different Audio and Video In channels on your other equipment so you can see and hear the DVD Player on the TV Stereo etc Disconnect all equipment from the power outlets Connect the equipment to the power outlets only after you have finished hooking up everything Never make or change connections with equipment connected to the power ...

Page 10: ...cks on the DVD Player and to the left right AUDIO IN jacks on the TV Match the cable colors to the jack colors 3 Plug the power cords of the DVD Player and the TV into an active power outlet Press the POWER ON OFF button on the front of the DVD Player to turn on the DVD Player 4 Turn on the TV power Set the TV to the correct Video In channel See your TV owner s manual for details Or change channel...

Page 11: ...our TV owner s manual for details Or change channels at the TV until you see the DVD screen saver on the TV Hookups cont d 11 Connecting to a TV Only TV has an S Video In Jack Back of TV example only LEFT AUDIO IN S VIDEO IN RIGHT AUDIO IN LEFT AUDIO IN S VIDEO IN RIGHT AUDIO IN 2 1 3 On the TV the S Video In jack may be labeledY C S Video or S VHS super video If your TV has a single Audio In jack...

Page 12: ...into an active power outlet Press the POWER ON OFF button on the front of the DVD Player to turn on the DVD Player 4 Turn on the TV power Set the TV to the correct Component Video In channel See your TV owner s manual for details Or change channels at the TV until you see the DVD screen saver on the TV On the TV the component video in jacks may be labeledYUV or Pr Cr Pb CbY and may be green blue a...

Page 13: ...s to the jack colors 3 Plug the power cords of the DVD Player Stereo and the TV into an active power outlet Press the POWER ON OFF button on the front of the DVD Player to turn on the DVD Player 4 Turn on the Stereo power and set your Stereo to the correct Audio In channel or sound source Refer to the Stereo owner s manual for details 5 Turn on the TV power Set the TV to the correct Video In chann...

Page 14: ...n active power outlet Press the POWER ON OFF button on the front of the DVD Player to turn on the DVD Player 4 Turn on the Stereo power and set your Stereo to the correct Audio In channel or sound source Refer to the Stereo owner s manual for details 5 Turn on the TV power Set the TV to the correct Video In channel See your TV owner s manual for details Or change channels at the TV until you see t...

Page 15: ...udio CD press PLAY 3 3 to start playback If you are playing a Video CD that has Playback Control press the DISC MENU button to access the menu or index of the Video CD Press the Previous 4 Next 3 4 1 2 or Number buttons to select an item then press OK Follow the instructions provided by the Video CD Not all Video CDs have Playback Control See the Disc case or menus for details 5 To stop playback a...

Page 16: ...angles must be available on the Disc Details are on page 22 POWER 2 2 Button Press to turn on or off the power of the DVD Player DISPLAY Button Press during playback to see current disc information on the TV screen Details are on pages 19 21 and 37 SYSTEM MENU Button Press to access or remove the Setup Menu of the DVD Player 341 2 Buttons Press to select items in a menu Press 1 or 2 for fast rever...

Page 17: ...URE Press repeatedly to choose Picture settings You may choose BRIGHT STANDARD SOFT or PERSONAL Details are on pages 34 35 PREV ious 4 4 button Press to return to previous Chapters or Tracks Details are on page 19 NEXT button Press to select the next Chapter or Track Details are on page 19 STOP 7 7 button Press once to stop Disc playback Play will resume from the same point the next time you start...

Page 18: ... Stereo Details are on pages 10 13 COAXIAL jack Connect a digital audio coaxial cable not supplied here and to the Digital Audio Coaxial In jack of a Stereo Details are on page 14 S VIDEO VIDEO OUT jack Use an S video cable not supplied to connect this jack to the S Video In jack of your TV Details are on page 11 OPTICAL jack Connect a digital audio optical cable not supplied here and to the Digit...

Page 19: ...ious Tracks Chapters B To go directly to any Track Chapter during playback press the Number buttons to enter the Track Chapter number then press OK Play will resume from the beginning of the Track Chapter you selected If you enter an invalid number the may appear in the top left corner of the TV screen The current Track Chapter will continue to play Or an incorrect Track Chapter may begin to play ...

Page 20: ...ormal speed press 1 repeatedly Sound will be intermittent and FR 2X FR 4X or FR 6X will appear on the TV screen FR represents Fast Reverse You can not reverse an Audio CD at eight times the regular playback speed When you reach the beginning of a Track during Fast Reverse normal playback resumes automatically You can not use Fast Reverse to go to previous Tracks 2 To return to normal playback spee...

Page 21: ...rent DVD is a two hour movie and you want to jump to the middle of the movie press 0 1 0 0 0 0 then press OK The movie will resume playing at an hour into the movie 4 Press DISPLAY to remove the information from the top of the screen DVD VIDEO CD AUDIO CD T 1 3 C 12 30 TC 00 37 58 3D OFF T 1 3 C 12 30 TC 00 37 58 3D OFF 3 1 4 2 3 When you press DISPLAY the counter will appear in the Information bo...

Page 22: ...e picture to regular size press the ZOOM button so that ZOOM OFF appears briefly in the top left corner of the TV screen DVD Camera Angle Some DVDs include scenes recorded from different angles To watch segments from a different angle follow these steps The DVD must have multiple angles available Check the DVD Disc case or Disc menu for details and availability 1 During DVD playback press the ANGL...

Page 23: ...egin press REPEAT A B A B SET A or A TO B SET A will appear in the top left corner of the TV screen 3 When the Disc reaches the point at which you want to end the segment press REPEAT A B again A B SET B or A TO B SET B will appear in the top left corner of the TV screen The segment will begin playing repeatedly On a DVD make sure the entire A B segment is within a single Title On a Video CD or Au...

Page 24: ...that does not show in this AUDIO menu choose the language at the DVD Disc menu or by pressing the AUDIO button on the remote control repeatedly Details on DVD Disc menus are on page 19 6 Press SYSTEM MENU to remove the menus DVD AUDIO F ENGLISH SUBTITLE FRENCH DISC MENU SPANISH PARENTAL CHINESE PASSWORD JAPANESE DEFAULTS SMART NAV MAIN PAGE PREFERENCES PAGE SET PREFERENCE TO ENGLISH 2 6 3 5 1 Some...

Page 25: ... subtitle languages If the DVD has subtitles in languages other than those listed in the SUBTITLE menu choose the language in the DVD Disc menu or by pressing the SUBTITLE button on the remote control repeatedly Details on DVD Disc menus are on page 19 6 Press SYSTEM MENU to remove the menus DVD AUDIO SUBTITLE F ENGLISH DISC MENU FRENCH PARENTAL SPANISH PASSWORD CHINESE DEFAULTS JAPANESE SMART NAV...

Page 26: ...though the DVD Player shows ENGLISH CHINESE FRENCH SPANISH and JAPANESE the Disc menu will appear in the selected language only if it is available on the current DVD Check the DVD case for details on available languages If the Disc menu is available in languages other than those listed for DISC MENU choose the language in the DVD Disc menu Details on DVD Disc menus are on page 19 6 Press SYSTEM ME...

Page 27: ... the first time you have set a password press 3 3 0 8 The box beside NEW PASSWORD will be highlighted automatically Press the Number buttons to enter a new four digit password of your choice The box beside CONFIRM PWD will be highlighted automatically Press the Number buttons to enter the same new four digit password you just entered for the NEW PASSWORD 7 Press OK to save the new password 8 Press...

Page 28: ...VD Player cannot play unless you enter your four digit password INPUT PASSWD will appear on the TV screen to prompt you to enter your password Password details are on page 27 5 Press SYSTEM MENU to remove the menus DISC LOCK F UNLOCK PROGRAM LOCK VFD DIM OSD LANG SCR SAVER MAIN PAGE GENERAL PAGE DISC UNLOCK 1 5 2 4 Two sided DVDs may have a different ID for each side To unlock the entire Disc unlo...

Page 29: ...ering a password however DVDs rated PG 13 R NC 17 or X ADULT cannot play unless you enter your password Select NO PARENTAL if you want the DVD Player to play all DVDs regardless of their movie rating You will not have to enter a password in order to play a DVD 6 A screen will prompt you to enter your password Press the Number buttons to enter your four digit password then press OK Password details...

Page 30: ...u enter an incorrect Track number in one of the previous Program positions press 34 1 2 to select the Program position Press any Number button to clear the box Use the Number buttons to reenter the correct Track number you want 6 When you have entered all the Tracks you want in the Program press 4 1 and or 2 to select PROG at the bottom of the PROGRAM PLAY PAGE Then press OK This will store the Tr...

Page 31: ...SC Press Number button 2 to select DISC then press OK This accesses a screen showing up to nine miniature pictures Each picture represents a Track the picture will likely be a scene from the beginning of the Track Select a Track by pressing Previous 4 4 or Next Press a Number button then press OK to start playing a specific Track number This will be useful if you want to go directly to a Track but...

Page 32: ...t NO MENU or WITH MENU then press OK If you select NO MENU the Disc will play the JPEG or MP3 files in the order in which they are recorded on the Disc 1 2 3 etc Select WITH MENU to play the JPEG or MP3 files in the selected folder 5 Press SYSTEM MENU to remove the menus JPEG and MP3 Features After you open one JPEG picture each subsequent file will appear automatically You may use the Number butt...

Page 33: ... these steps 1 Press SYSTEM MENU 2 Press 4 repeatedly to select SETUP VIDEO OUTPUT then press OK 3 TV DISPLAY will be selected Press 2 4 Press 3 or 4 to select NORMAL PS NORMAL LB or WIDE then press OK Select NORMAL LB letterbox if you want to see the picture with black bars at the top and bottom of the screen This looks like the picture you see when watching movies in a theater This setting is po...

Page 34: ...1 ChooseYCBCR if you connected the Player sYCBCR VIDEO OUT jacks to your TV s ComponentVideo In jacks as described on page 12 5 Press SYSTEM MENU to remove the menus TV DISPLAY VIDEO OUTPUT F S VIDEO TV TYPE YCBCR VIDEO MODE BRIGHTNESS CONTRAST SATURATION VIDEO OUTPUT PAGE VIDEO OUTPUT YCBCR 1 5 2 4 Video Mode Just as you can adjust your picture on your TV you can adjust some picture elements at t...

Page 35: ...the picture Choose a more negative CONTRAST value 1 to 4 to blur the distinction between black and white in the picture The picture will not seem as sharp For SATURATION choose a more positive value 1 to 4 to increase the color in your picture You will notice in the menu that as you increase the SATURATION the blue of the menu is a deeper brighter blue However to decrease the color in the picture ...

Page 36: ...to select SETUP VIDEO OUTPUT then press OK 3 Press 4 to select TV TYPE then press 2 4 Press 3 or 4 to select MULTI NTSC or PAL then press OK Choose NTSC if your TV is NTSC compatible and your DVDs are recorded in NTSC Choose PAL if your TV is PAL compatible and your DVD is recorded in PAL Choose MULTI if your TV is compatible with both NTSC and PAL and you want the DVD Player to automatically sele...

Page 37: ...t have Dolby Pro Logic If you selected D R C press 3 or 4 to select ON or OFF then press OK To level the volume during Disc playback choose ON There will not be such a large range between the loudest and softest parts of the sound To hear the highs and lows of the volume set D R C to OFF 5 Press SYSTEM MENU to remove the menus SPEAKER SETUP PAGE STEREO DOWNMIX DOWNMIX F STEREO D R C LT RT MAIN PAG...

Page 38: ... OUTPUT AS 96K 1 5 2 4 SPDIF Setup SPDIF is the Sony Philips Digital Interface or a method of transferring digital audio If you connected the DVD Player to a Stereo using the OPTICAL or COAXIAL jack as shown on page 14 you need to adjust the SPDIF OUT setting as described below If you are not using the OPTICAL or COAXIAL jack no adjustment is necessary 1 Press SYSTEM MENU 2 Press 4 repeatedly to s...

Page 39: ... OSD LANG on screen display language then press 2 4 Press 3 or 4 to select ENGLISH or CHINESE then press OK 5 Press SYSTEM MENU to remove the menus DISC LOCK PROGRAM VFD DIM OSD LANG F ENGLISH SCR SAVER CHINESE MAIN PAGE GENERAL PAGE SET OSD LANGUAGE TO ENGLISH 1 5 2 4 Helpful Hint If you accidentally select CHINESE and need ENGLISH follow these steps 1 Press SYSTEM MENU 2 The top line will be sel...

Page 40: ...IM F 100 OSD LANG 70 SCR SAVER 40 MAIN PAGE GENERAL PAGE SET TO 100 LEVEL 1 5 2 4 Screen Saver The Screen Saver is the moving DVD logo that appears on yourTV screen when playback is stopped It prevents damage to yourTV screen caused by leaving a still image on theTV too long 1 Press SYSTEM MENU 2 GENERAL SETUP will be selected Press OK 3 Press 4 repeatedly to select SCR SAVER screen saver then pre...

Page 41: ... Press 4 repeatedly to select PREFERENCES then press OK 4 Press 4 repeatedly to select DEFAULTS then press 2 to select RESET then press OK The original settings of the DVD Player will be restored 5 Press SYSTEM MENU to remove the menus AUDIO SUBTITLE DISC MENU PARENTAL PASSWORD DEFAULTS F RESET SMART NAV MAIN PAGE PREFERENCES PAGE LOAD FACTORY SETTINGS 2 5 1 3 4 MDV450 25 09 2002 9 46 AM Page 41 ...

Page 42: ... Player to a TV using S Video cable as described on page 11 set VIDEO OUTPUT to S VIDEO If you connected the DVD Player to a TV using Component video cable red green and blue as described on page 12 set VIDEO OUTPUT to YCBCR If the VIDEO OUTPUT setting is incorrect for example you used S Video cable but VIDEO OUTPUT is set to YCBCR the picture may be black and white until you correct the VIDEO OUT...

Page 43: ...ol Details are on page 8 The DVD Player will not select some features such as Angles Subtitles or multi language Audio The feature may not be available on the Disc If it is not the will appear on the TV screen Check the Disc case to see if the Disc has the feature If the Disc does not have the feature the DVD Player cannot create the feature This is not a malfunction of the DVD Player The DVD Play...

Page 44: ...x may have no effect For example some DVDs are two sided with one side playing in widescreen format and the other side playing in a normal format OPTICAL Jack Converts electrical signals into optical signals before sending the audio to the Stereo Receiver Optical audio is not prone to external electrical influences and has less noise reducing adverse effects on external equipment Keep the protecti...

Page 45: ...it rate fs 16 22 05 24 32 44 1 48kHz Analog Sound Stereo Full decoding of Dolby Digital multichannel surround sound AUDIO PERFORMANCE DA Converter 24 bit Signal to Noise 1kHz 90dB Dynamic range 1kHz 80dB DVD fs 96 kHz 4 Hz 44 kHz fs 48 kHz 4 Hz 22 kHz Super Video CD fs 48 kHz 4 Hz 22 kHz fs 44 1 kHz 4 Hz 20 kHz Video CD Audio CD fs 44 1 kHz 4 Hz 20 kHz LASER Type Semiconductor laser GaAIAs Wavelen...

Page 46: ... the product is officially distributed by Magnavox In countries where Magnavox does not distribute the product the local Magnavox service organization will attempt to exchange the product although there may be a delay if the appropriate product is not readily available MAKE SUREYOU KEEP Please keep your sales receipt or other document showing proof of date of purchase Attach it to the owner s manu...

Page 47: ...ojas 6 12420 Mercantile Avenue El Paso TX 79928 ATTENTION DVD PLAYER EXCHANGE A replacement will be sent to you via UPS within 48 business hours of Magnavox receipt of the product When it is necessary for you to ship the product to Magnavox for exchange you will pay the shipping costs for shipment to Magnavox Magnavox will pay the shipping costs when returning a product to you EXCHANGE INSTRUCTION...

Page 48: ...tle language 25 Limited warranty 46 47 LPCM 96K setup 38 MP3 files and features 32 MUTE button 16 Next button 16 17 19 NTSC 7 36 Number buttons 16 19 OK button 16 OPEN CLOSE button 17 OPTICAL jack 14 18 Package contents 6 PAL 7 36 Parental controls disc lock 28 Parental controls levels 29 Parental controls password 27 PAUSE button 16 21 PCM 38 PICTURE button 17 34 Picture settings 34 35 PLAY butto...

Reviews: