background image

EN

 - 

22

7.

BASIC PLAYBACK

7.1. Playing Back a Disc


1. Insert a disc (refer to “How to Insert a Disc” on page 21).

• For Blu-ray Disc™ / DVD / audio CD or a disc containing only one type of file, playback will start automatically. If 

not, press 

[

(PLAY)]

.

• Some discs may show a Title or a Disc Menu. In this case, refer to “Using the Title / Disc / Pop Menu” on page 25.

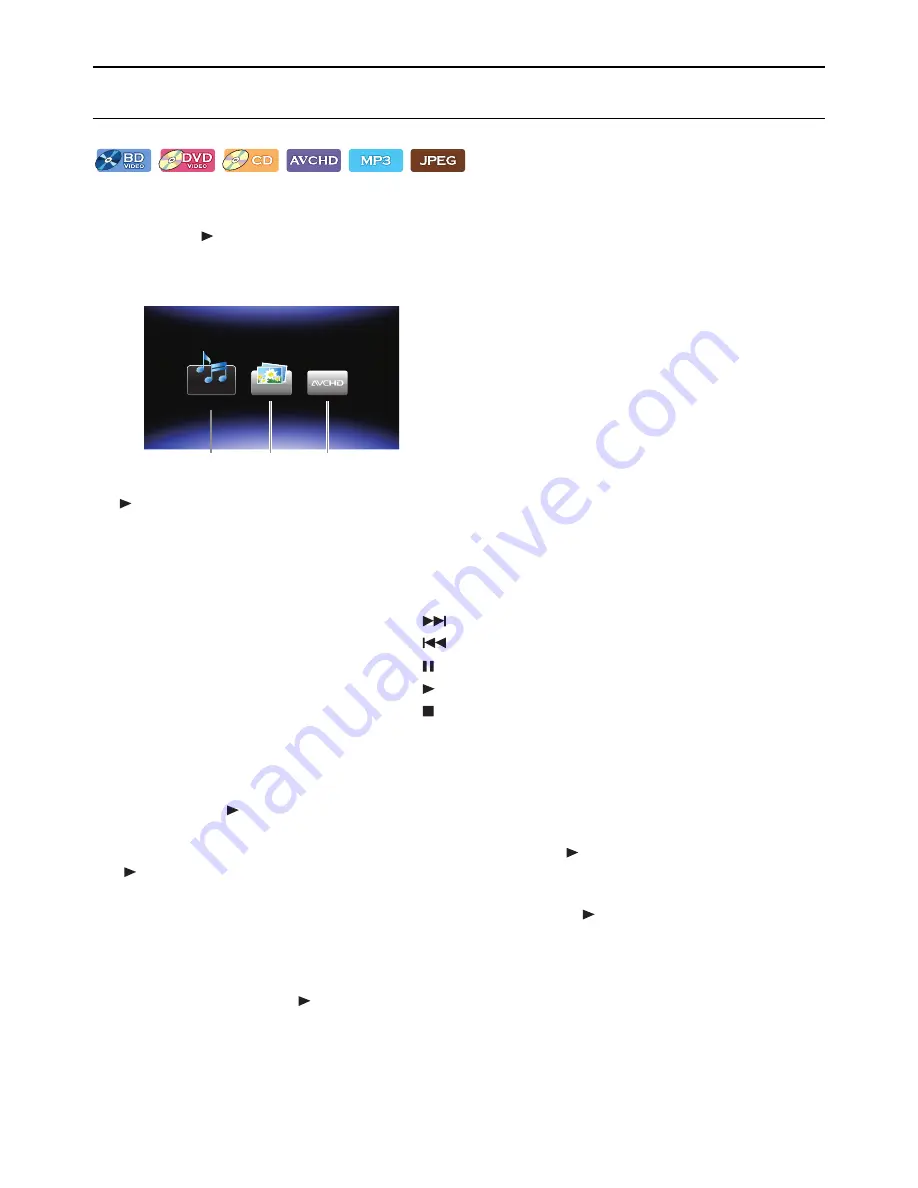
2. Select the type of the file you want to play back, then press 

[OK]

.

a.  For “Music”, Track / File list will be displayed. Select a Group (folder) or Track / File you want to play back then press 

[

(PLAY)]

 or 

[OK]

 to start playback.

• Refer to “Music File List” on page 20 and “How to Navigate through the Track / File List” on page 20.

b.  For “Photo”, thumbnail screen will appear.

• Refer to “Picture File List” on page 20 and “How to Navigate through the Track / File List” on page 20.

c.  For “AVCHD”, playback will start automatically.

Playback will be in Resume-On-Stop mode.

Resume-On-Stop Mode

Blu-ray Disc™ / DVD / AVCHD

When you press 

[

(PLAY)]

 next time, the playback will start from the point where it has been stopped.

Audio CD

Playback will start from the point where it is stopped next time you press 

[

(PLAY)]

. If you press 

[OK]

 instead of 

[

(PLAY)]

, playback will start from the beginning of the Track / File instead of resuming from the stop point.

MP3 / JPEG / KODAK Picture CD

Playback will start from the beginning of the current file next time you press 

[

(PLAY)]

 or 

[OK]

.

D

Note

Playback will also Stop and the Home Menu will appear when you press 

[HOME]

.

For BD-Java application, the Resume-On-Stop may not be available.

If you press 

[OK]

 instead of 

[

(PLAY)]

, playback can be started from the beginning of the disc even if it was in the 

Resume-On-Stop mode.

Resume-On-Stop mode remains in effect even after Power is Turned Off, but will be cancelled once the disc is ejected.

With regard to the multi-border BD-RE/-R, additionally recorded sections cannot be recognized.

With regard to the multi-border DVD-RW/-R, additionally recorded sections may not be recognized.

Music

a

b

c

To Skip to the next Track / File:

Press 

[

(SKIP)]

.

To Skip to the previous Track / File:

Press 

[

(SKIP)]

.

To Pause playback:

Press 

[

(PAUSE)]

.

To Return to Normal playback:

Press 

[

(PLAY)]

.

To Stop playback:

Press 

[

(STOP)]

.

continued on next page

Summary of Contents for MBP5320F

Page 1: ...Owner s Manual MBP5320F Blu ray Disc DVD Player with Built in WiFi 2012 Funai Electric Co Ltd...

Page 2: ...he Title Disc Pop Menu 25 SPECIAL PLAYBACK 26 Fast Forward Fast Reverse 26 Slow Forward Playback 26 Step by Step Playback 26 Repeat Playback 27 Slide Show 27 PiP BONUSVIEW Setting 28 Enjoying BD Live...

Page 3: ...materials in accordance with your local recycling regulations Batteries should never be thrown away or incinerated but disposed of in accordance with your local regulations concerning chemical wastes...

Page 4: ...e Internet in addition to the BONUSVIEW function The various functions differ depending on the disc Pop Menu Some BD videos have a Pop Menu which is a navigation menu that can be called up and be oper...

Page 5: ...nt version of software on your unit can be seen on the Product Info screen To access Product Info follow the procedure below 1 Press HOME 2 Use to select Settings then press OK 3 Use to select Others...

Page 6: ...ra keyboard mouse etc When connecting a USB Memory Stick connect it directly to the USB Input Do not use a USB extension cable D Note Due to new ENERGY STAR requirements this unit will automatically t...

Page 7: ...le 9 STOP button Press to Stop playback 10 NUMBER buttons Press to select a Chapter during playback Press to enter Numbers or letters in the input field 11 NET APP button Press to display the network...

Page 8: ...different batteries may have different voltages Make sure that the and ends of each battery match the indications in the battery compartment Remove batteries from battery compartment when the remote i...

Page 9: ...oes not appear Setup Menu 1 Category 2 Menus Options Displays options for the highlighted item on the left whenever available Play Menu During playback press MODE to display the Play Menu e g Blu ray...

Page 10: ...e TV Please refer to the TV s user s manual If the TV receives no Audio signal after properly connecting the unit and the TV with an HDMI cable make sure the TV input is not an HDMI DVI Input terminal...

Page 11: ...p HDMI Audio Connection 2 Channel Analog Audio Connection Use an audio cable not supplied to connect the AUDIO OUT jacks on the unit to the audio input jacks on the connected device HDMI IN VIDEO OUT...

Page 12: ...setting A Bitstream LPCM BD Audio Mode setting A HD Audio Output Mix Audio Output HD Audio Output Mix Audio Output Media Audio Source Which audio format can be output depends on the compatibility of...

Page 13: ...on can be affected by other devices using radio frequencies Play contents from DLNA certified home media servers Video streaming services Netflix VUDU YouTube Network update Wired Connection C Caution...

Page 14: ...table operation of the wireless network Our player supports infrastructure mode when using a wireless router This unit does not support ad hoc mode Other radio devices or obstacles may cause interfere...

Page 15: ...nit welcome screen only appears the first time you Turn On the unit 5 2 Initial Setup Please follow the instructions below to complete the initial setup 1 While welcome screen is displayed use to sele...

Page 16: ...iones Spanish Param tres French From here on please select one of the following items you can find on screen 3 Use to select Playback English Reproducci n Spanish Lecture French then press OK 4 Use to...

Page 17: ...os Blu ray Disc BD video BD RE ver 2 1 Recorded in BDMV format BD R ver 1 1 1 2 1 3 Recorded in BDMV format Unfinalized disc may not be played back DVD video DVD RW finalized video mode discs only DVD...

Page 18: ...s unit does not support NTFS file system This unit may not read USB Memory Sticks formatted on a computer If that is the case please reformat the USB Memory Sticks on this unit and try again Please no...

Page 19: ...The sound on the high density Super Audio CD layer cannot be heard Playability of dual discs is not guaranteed This unit cannot play back the disc contents protected by Windows Media Digital Rights Ma...

Page 20: ...us symbol 5 Media type 6 Group folder File list Picture File List 1 Current File number Total number of Files 2 Playback status symbol 3 Media type 4 Group folder File list thumbnails File List DATAxx...

Page 21: ...Disc 1 Press OPEN CLOSE to Open the disc tray 2 Place the Disc on the disc tray with its label side facing up 3 Press OPEN CLOSE to Close the disc tray It may take a while to load the disc Align the...

Page 22: ...the point where it has been stopped Audio CD Playback will start from the point where it is stopped next time you press PLAY If you press OK instead of PLAY playback will start from the beginning of t...

Page 23: ...Do not disconnect the USB Memory Stick or switch the unit to Standby mode while a content on the USB Memory Stick is being accessed It may result in malfunction or loss of the stick s data If you con...

Page 24: ...you want to play back then press PLAY or OK to start playback If you select a folder select a file in the folder and then press PLAY or OK to start playback Refer to Guide to File List on page 20 To...

Page 25: ...24 the selected photo will display and go to the next photo within 10 seconds For a folder that only contains photo files thumbnails may be displayed For photo files every press of will turn the imag...

Page 26: ...s are not available 8 2 Slow Forward Playback 1 During playback press PAUSE Then press FORWARD Every time you press FORWARD the playback speed changes at 3 different levels 2 Press PLAY to return to N...

Page 27: ...a Disc on page 22 2 Open the folder which contains the desired JPEG files 3 Use to select a desired file to be played back then press PLAY or OK An image will be played back from the selected file an...

Page 28: ...ion Connect a USB Memory Stick with at least 1 GB of available memory before using BD Live features on a Blu ray Disc Do not disconnect the USB Memory Stick while using BD Live features D Note You mus...

Page 29: ...buttons Direct Search Chapter Search During playback of a Title enter the Chapter number you want to search using the NUMBER buttons Playback of the Chapter will start in a few seconds D Note As for...

Page 30: ...the disc case Follow the steps below to switch the Subtitle language during playback 1 During playback press SUBTITLE 2 Use to select Primary Secondary or Style then press OK You can also change the...

Page 31: ...ired audio stream channel You can also change the setting by pressing AUDIO repeatedly For audio CD you can select following options 3 Press RETURN to Exit D Note The Secondary Audio will not be outpu...

Page 32: ...ay Menu Play Menu can be called up by pressing MODE 8 14 Black Level You can adjust the Back Level setting to make the black parts of the pictures as bright as you prefer You can select On or Off 1 Du...

Page 33: ...to display the Play Menu 2 Use to select CLEAR then press OK 3 Use to select your desired setting e g Blu ray Disc 4 Press RETURN to Exit D Note This function can also be set during Netflix VUDU YouT...

Page 34: ...ME to Exit D Note The Network Service Disclaimer is displayed when first using a network service and its acceptance is applied to all network services 9 2 Information on Network Services For detailed...

Page 35: ...ess HOME to Exit Refer to the following table for the types of settings you can customize The item highlighted in gray is the default setting Category Menus Options Video Out TV Aspect 4 3 Letter Box...

Page 36: ...ech Korean Danish Norwegian Dutch Polish English Portuguese Finnish Romanian French Russian German Slovak Greek Spanish Hungarian Swedish Icelandic Turkish Irish Other Disc Menu Bulgarian Italian Chin...

Page 37: ...ory Menus Options Others Software Update Disc Network USB Memory Stick Automatically check for latest software On Off Quick Start Mode On Off Product Info Initialize Reset Settings Format USB Memory S...

Page 38: ...connecting it to a modem which was previously connected to any other network device e g a router PC etc you may have to power cycle the modem unplug the modem s and or router s AC plug from its AC out...

Page 39: ...other devices e g PC connected via LAN cable and assign the same DNS address 7 Use to select Next then press OK 8 Use to select Yes or No for proxy server then press OK If you use a proxy server sele...

Page 40: ...ssary settings Please make a note of your SSID Service Set Identifier wireless network name and its WEP WPA WPA2 key before proceeding with the setup Easy Connect WPS cannot be used when the Security...

Page 41: ...y entry screen will appear Enter the WEP WPA WPA2 password of the selected wireless network using Cursor buttons Number buttons and Color keys then press RED to confirm the password If you do not know...

Page 42: ...s Number buttons and Color keys then press RED to confirm the password If you do not know the WEP WPA WPA2 key for your wireless network please confirm the sticker on the router The WEP WPA WPA2 key e...

Page 43: ...via an HDMI cable 11 3 HDMI Video Resolution Set the resolution of the video signal being output from the HDMI OUT jack You can select the desired Video Resolution among the settings listed below Auto...

Page 44: ...yback then press OK 3 Use to select BD Rating Level then press OK 4 Use the NUMBER buttons to enter your 4 digit password 5 Use to select your desired option then press OK After selecting Age Setting...

Page 45: ...e new 4 digit password 7 Use to select OK then press OK 8 Press HOME to Exit To temporarily disable parental lock Some discs allow you to temporarily disable parental lock With these discs the message...

Page 46: ...Yes and press OK 8 The unit will restart automatically then software update will start It may take a while to complete the updating 9 After the update finishes this unit will restart Remove the disc o...

Page 47: ...OK 6 Confirmation message will appear Press OK to complete the setting 7 Press HOME to Exit C Caution Do not remove the USB Memory Stick while executing Format USB Memory Stick or USB Memory Stick Era...

Page 48: ...the correct Input Video source Perform the HDMI hotplug Disconnecting the HDMI cable from the display device Turn On both devices and replug the HDMI cable back in Check with the TV manufacturer if t...

Page 49: ...the settings in Parental menu The password for rating level has been forgotten Enter the default password 4737 then your forgotten password will be cleared Then to change password go to Password Chang...

Page 50: ...r 48 kHz Cannot find an MP3 file Make sure that the selected folder does not contain more than 9 999 files for Blu ray Disc DVD USB Memory Stick and 999 files for CD Make sure that the file extension...

Page 51: ...d Movies or TV episodes to the instant Queue Visit on your PC You may add from the player or visit and login to your account by web The picture quality of a Netflix streaming movie does not improve ev...

Page 52: ...a 4860 I K Occitan 6149 Telugu 6651 Bhutani 5072 Icelandic ICE 5565 Oriya 6164 Thai 6654 Bihari 4854 Indonesian 5550 Oromo Afan 6159 Tibetan 4861 Bislama 4855 Interlingua 5547 Panjabi 6247 Tigrinya 66...

Page 53: ...x depth 11 1 x 1 5 x 7 8 inches 280 0 x 38 0 x 196 0 mm Weight 2 56 lbs 1 16kg Operating temperature 41 F 5 C to 104 F 40 C Operating humidity Less than 80 no condensation Terminals USB input TYPE A...

Page 54: ...OF MERCHANTABILITY OR FITNESS FOR A PARTICULAR PURPOSE ACCURACY VALIDITY TIMELINESS LEGALITY SUITABILITY OR QUALITY OF ANY CONTENT OR SERVICE MADE AVAILABLE THROUGH THIS PRODUCT IN NO EVENT SHALL COMP...

Page 55: ...nts or antistatic spray intended for analog records Cleaning the Disc Lens If this unit still does not perform properly although you refer to the relevant sections and to TROUBLESHOOTING in this user...

Page 56: ...n the United States and other countries x v Color and x v Color logo are trademarks of Sony Corporation Java and all Java based trademarks and logos are trademarks or registered trademarks of Oracle a...

Page 57: ...OR WAS OBTAINED FROM A VIDEO PROVIDER LICENSED TO PROVIDE AVC VIDEO NO LICENSE IS GRANTED OR SHALL BE IMPLIED FOR ANY OTHER USE ADDITIONAL INFORMATION MAY BE OBTAINED FROM MPEG LA L L C SEE HTTP WWW M...

Page 58: ...ell as copyright and trade secret protection for certain aspects of such technology Cinavia is a trademark of Verance Corporation Copyright 2004 2010 Verance Corporation All rights reserved by Verance...

Page 59: ...Some discs are compatible with more than one region or all regions Router A networking device which distinguishes the IP address assigned to each device and routing and forwarding information in the c...

Page 60: ...o archivo actual Durante la reproducci n pulse dos veces sobre la tecla para volver al t tulo cap tulo pista o archivo anterior Durante la reproducci n de archivos JPEG p lselo para volver al archivo...

Page 61: ...del control remoto Use el control remoto suministrado No se garantiza la operaci n de control remoto en cualquier otro control remoto tal como un control remoto universal 19 2 Encontrar el Canal de V...

Page 62: ...nection de la p gina 38 Si selecciona Inalambrico vea informaciones mas detalladas en el punto Wireless Connection de la p gina 40 C mo restablecer el Idioma OSD Puede restablecer el idioma OSD si sel...

Page 63: ...KING MATERIALS ANYACCESSORIES EXCEPT REMOTE CONTROL ANY COSMETIC PARTS COMPLETEASSEMBLY PARTS DEMO OR FLOOR MODELS FUNAI CORP AND ITS REPRESENTATIVES ORAGENTS SHALL IN NO EVENT BE LIABLE FORANY GENERA...

Reviews: