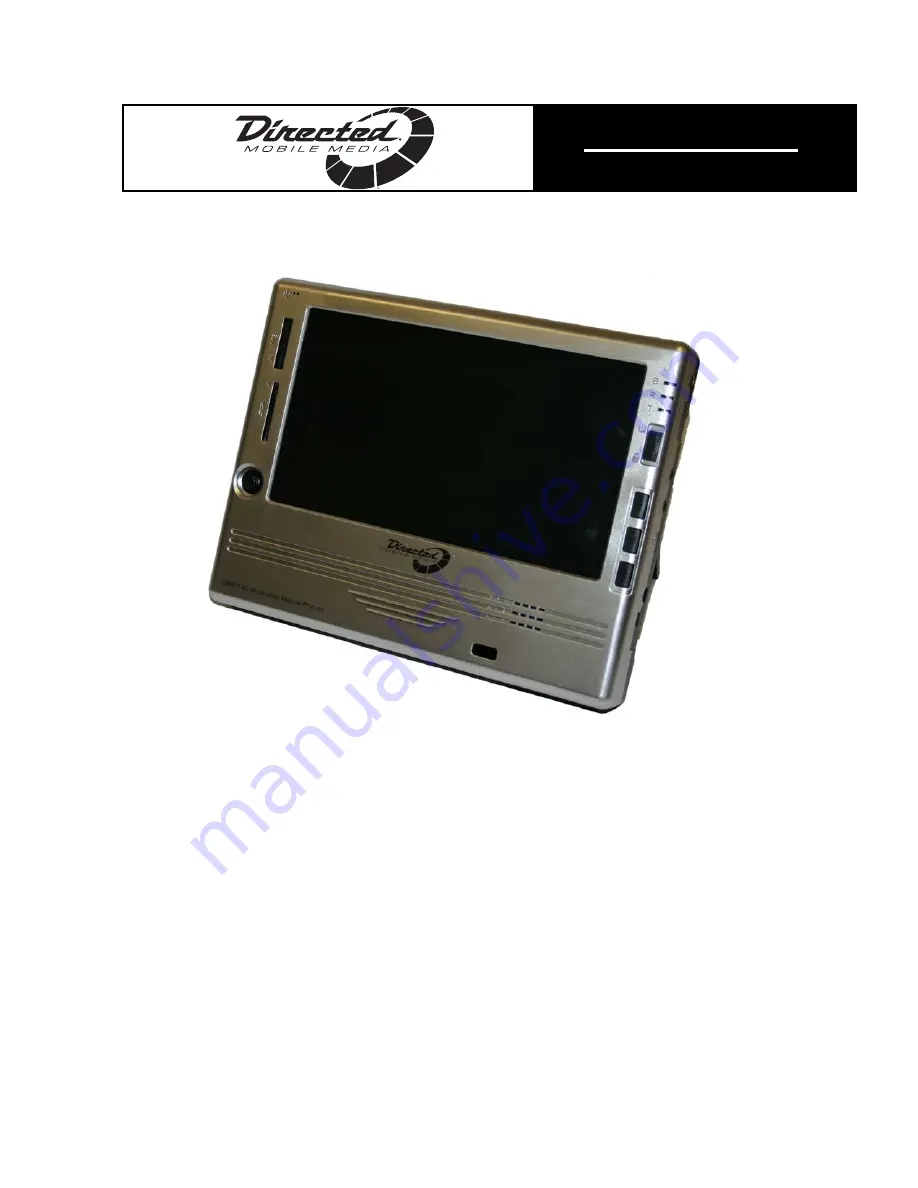
background image

7

7””  D

Do

occkkaab

bllee  M

Meed

diiaa  P

Pllaayyeerr

4

40

0G

GB

B  H

Haarrd

d  D

Drriivvee

M

MO

OD

DE

EL

LS

S  D

DM

MP

P7

74

40

0//D

DM

MP

P0

04

40

0

O

O W

W N

N E

E R

R ’’ S

S    G

G U

U II D

D E

E

IIN

NS

ST

TA

AL

LL

LA

AT

TIIO

ON

N  G

GU

UIID

DE

E

© 2005 Directed Electronics, all rights reserved   N90740  09-05

A

AP

PP

PL

LIIC

CA

AB

BL

LE

E  F

FO

OR

R

M

MO

OD

DE

EL

LS

S

OHV901

OHV901A

OHV1021

OHV1021A

OHV1202

OHDW17.2

OHD901A

OHD1021A

Summary of Contents for DMP040

Page 1: ...S S D DM MP P7 74 40 0 D DM MP P0 04 40 0 O O W W N N E E R R S S G G U U I I D D E E I IN NS ST TA AL LL LA AT TI IO ON N G GU UI ID DE E 2005 Directed Electronics all rights reserved N90740 09 05 A AP PP PL LI IC CA AB BL LE E F FO OR R M MO OD DE EL LS S OHV901 OHV901A OHV1021 OHV1021A OHV1202 OHDW17 2 OHD901A OHD1021A ...

Page 2: ...oftware camcorders discs speakers accessories or vehicle electrical systems cosmetic damage or damage due to negligence mis use abuse failure to follow operating instructions accidental spills or customer applied cleaners damage due to environmental causes such as floods airborne fallout chemicals salt hail windstorms lightning or extreme temperatures damage due to accidents road hazards fire thef...

Page 3: ... Lock Switch 13 SD MMC MS Card Slot 14 Remote Control 15 Li Ion Battery Recharging DMP740 only 16 Battery Consumption Reference DMP740 Only 17 Utility CD 18 Connect Disconnect from PC 19 Connect the Media Player to Computer 19 For Systems with Windows 98SE 22 Format Media Player and disk maintenance 22 Safely Disconnect from Computer 23 Basic Usage 24 Power On and Off 24 Volume Adjustment Music 24...

Page 4: ...tronics all rights reserved Record Tab 45 System Tab 46 Info Tab 48 Specifications 49 Upgrade Software 50 Upgrade Firmware 51 Dockable Media Player Installation 52 Remote Usage when Docked 53 Dockable Media Player Removal 55 ...

Page 5: ...to the unit The unit has been exposed to moisture The unit is not functioning or you can not get functions to work correctly according to this guide The unit has dropped and damaged 5 DO NOT use the unit in the following situations death or injury could result While driving a vehicle While operating machinery Viewing videos photos while walking In any situations or environments requiring concentra...

Page 6: ...0 does not have a built in battery or built in LCD screen and requires an external device such as a dockable overhead video monitor to view videos photos and the menu screens Following are the main features of the these media players V Vi id de eo o P Pl la ay ye er r supports MPEG 4 SP DivX 3 11 4 x 5 x Motion JPEG and WMV 9 SP ML format video playback A Au ud di io o P Pl la ay ye er r supports ...

Page 7: ...are included when you open the box If any item is damaged or miss ing please contact your dealer directly G Ge et t S St ta ar rt te ed d introduces the function keys the LCD Display status in different modes and how to recharge the Li Ion battery LCD battery DMP740 only C Co on nn ne ec ct t a an nd d R Re em mo ov ve e f fr ro om m C Co om mp pu ut te er r describes how to connect and remove the...

Page 8: ...ery should be charged O ON NL LY Y with the provid ed adapter N NO OT TE E The accessories listed above may change without notice N NO OT TE E The DMP040 will have 2 AV in out cables DMP740 or DMP040 USB Cable Stereo Earphones Handy Bag AC Adapter Driver and Recovery CD AV in out Cable Audio Line In Cable Remote Control ...

Page 9: ...d 2005 Directed Electronics all rights reserved 9 9 G Ge et tt ti in ng g S St ta ar rt te ed d O OV VE ER RV VI IE EW W D DM MP P4 47 70 0 S SH HO OW WN N 19 20 21 22 ...

Page 10: ... pushed up and held for about 5 seconds till the unit resets and turns off Lock Switch Push down with power On to lock all keys All key press commands are disabled to prevent unwanted operation 8 R Key Press to start stop recording adjust brightness during video playback or to adjust volume during video or music playback 9 M Key Press to go back to Main Menu 10 E Key Press to stop or return to the...

Page 11: ... sp pl la ay ys s Power on the media player the main menu on LCD will display after the boot up animation Following are the instructions for each menu option NOTE For the DMP040 the displays will show on an attached video device M MA AI IN N M ME EN NU U 1 Menu List List function options such as Video Music Photo etc 2 Alarm Indicates alarm clock is set 3 Speaker Indicates speaker On or Off 4 Volu...

Page 12: ...play additional titles V VO OI IC CE E A AV V R RE EC CO OR RD DI IN NG G 14 Recording Time Recording elapse time hh mm ss 15 Recording Quality Indicate selected and operating recording quality S SE ET T U UP P M ME EN NU U 16 Scroll bar Mean more tabs are available 17 Tabs Include Display Photo Record System and Info Tabs 18 Setting Items List tab item for adjusting 19 Setting Options Show settin...

Page 13: ...al data to it Simply connect the media player to your computer and use Windows Explorer to copy and manage your data L Lo oc ck k S Sw wi it tc ch h The media player has a lock to avoid accidental operation Slide the Power Lock Switch down to the lock position while power is on If any control button on the unit is pressed the Locked message displays to indicate all function keys are disabled Power...

Page 14: ...40 displayed on a connected video unit for the DMP040 N No ot te e Use only one card slot at a time N No ot te e If you pull a memory card from the slot while you are viewing a video picture or listening to an MP3 file the unit may lock up To reset the unit slide the power switch up and hold for 5 seconds this will power the unit off Slide the switch up again to power the unit back on Also if you ...

Page 15: ...ute the audio S T press to select previous next item on menu list These two buttons function the same as pushing the Navigator button up down WW XX press to rewind fast forward the playback These two buttons function the same as pushing Navigator button left right X press to play or pause the playback This button functions the same as pressing down with the Navigator button IMAGE press to change t...

Page 16: ...and the charge indicator on the battery icon will disappear Disconnect the AC Adapter from the player N NO OT TE E Charge o on nl ly y with the supplied AC Adapter N NO OT TE E You can still operate while recharging but the recharging time will be longer N NO OT TE E The unit should not be left on the AC adapter for long periods of time after battery is fully charged This could damage the battery ...

Page 17: ...Y The media player uses a 2200 mAhr 11 1 V 3 Cell rechargeable Li Ion battery The battery usage will vary depending on the operating mode A fully recharged battery has the following typical playback recording times Video Playback Video Record can be used for about 3 hours Music Playback Music Record can be used for about 7 hours Battery Charge Indicator Full Discharged ...

Page 18: ...dle Free trial version of DivX Create Bundle provides the tools to create and play DivX videos with advanced features User Manual User manual in PDF format Adobe Reader Adobe Reader for opening PDF files USB Driver for Windows 98SE USB Driver for Windows 98 operating system System Recovery Format and restore the media player system back to factory default settings Exit Exit and close the Setup pro...

Page 19: ... up to power on the media player Wait until the main screen displays The DMP040 will require use of the AC Power Adapter 2 Plug the mini end of the supplied USB cable to the media player and the other end to your computer s USB port 3 Once connected to your computer the media player should be detected by your computer operating system automatically You will see the following message showing on the...

Page 20: ...a player on your computer Refer to Upgrading Software Firmware section of this manual for installation instructions for this driver 4 After connection is initialized the following window will display on your computer 5 Scroll down and select Open Folder to use Windows Explorer to view the contents of the media player s hard drive ...

Page 21: ...d 6 You can then move copy or delete files using Windows Explorer N No ot te e In the example shown below the drive in the media player is identified as drive F The drive letter may be different depend ing upon the configuration of the computer being used ...

Page 22: ... step 2 to connect the media player to your computer F FO OR R S SY YS ST TE EM MS S W WI IT TH H W WI IN ND DO OW WS S 9 98 8S SE E After connecting the media player to a Windows 98SE operating system com puter the Windows system will detect the media player and ask to install driv er Place the supplied driver CD in the CD ROM drive and refer to the Utility CD section to complete the driver insta...

Page 23: ...gment the hard disk to improve hard disk access speed and for longer battery life S Sa af fe el ly y D Di is sc co on nn ne ec ct t f fr ro om m C Co om mp pu ut te er r After managing files or updating firmware please follow the steps below to safe ly disconnect the media player from the computer 1 When the media player is connected to the computer the icon will be shown on computer system tray l...

Page 24: ... can not be shut down by one short press press and hold the power switch in the up position for 5 sec onds this forces power off V VO OL LU UM ME E A AD DJ JU US ST TM ME EN NT T M MU US SI IC C The volume while playing a MP3 can be adjusted from the unit or by using the remote control V VO OL LU UM ME E C CO ON NT TR RO OL L U UN NI IT T To adjust the volume from the unit while playing a MP3 file...

Page 25: ... RO OL L R RE EM MO OT TE E C CO ON NT TR RO OL L 1 To change the volume level push the VOL VOL buttons on the remote The volume status icon at the top of the LCD screen changes while adjust ing volume There are 16 steps of volume level adjustment 2 To mute the volume press MUTE button The Volume status icon displays as follows N NO OT TE E The remote control does not function if the unit is docke...

Page 26: ...e shown on the list that are playable N NO OT TE E To view videos the DMP040 must be connected to an external display Figure 1 Figure 2 Play Video on media player 1 Connect the media player to the computer refer to Connect and Disconnect from PC 2 Upload the files from the computer to the media player 3 If the uploaded video file is not supported by the media player use the bundled video converter...

Page 27: ...tton to display the contents of the folder select a file to play from the list by using the same technique with the Navigation button Select a file and press the Navigation button to the right to preview a file If there are a large number of files you can push and hold the down or up Navigation button to quickly scroll to the next or previous page 7 Press in on the Navigation button to play pause ...

Page 28: ... To adjust brightness volume of the video playback press the R button The brightness volume adjustment screen will appear Push the Navigation but ton left or right to adjust There are 16 levels of adjustment set to the desired level A brightness volume status bar will display as shown below it will disappear in a few seconds if no button is pressed Press the Navigation button down to access the vo...

Page 29: ...Music in the music folder Photos in the Photo folder etc Play a DivX Video The media player is certified by DivX s Portable Profile logo program to guaran tee playback of DivX v3 11 v4 x and v5 x file formats with up to D1 704x576 resolution for Portable and Handheld devices You can transfer DivX format videos to the media player and play them later on 1 Connect the media player to your computer m...

Page 30: ...ledge Select Audio Track and Subtitle Track of DivX File DivX video may support multiple language audio and subtitle tracks You can select different languages for audio and subtitles to meet your needs during video playback 1 If the video has embedded multiple language audio tracks the Please select Audio Track message will display on the LCD when you press the Navigation button in to play the Div...

Page 31: ...e language during DivX video playback When a video is playing press the Navigation button in to pause the play back Push the Navigation button up to select an audio track and press the Navigation button in to play that audio track Push the Navigation button down to choose a language subtitle and press the Navigation button in to play with that selected language subtitle M MU US SI IC C The media p...

Page 32: ...On Music selection press the Navigation button in to display the Music folders as shown in Figure 4 5 Push the Navigation button up or down to select a category and press the Navigation button in to select a file from list If there is a large number of files push and hold down or up with the Navigation button to quickly scroll to the next or previous page Select a file and press the Navigation but...

Page 33: ...p or down to select the file push the Navigation but ton left to display the below left hand figure Push Navigation key left right to select Yes and press Navigation key down to confirm to delete These selection icons are displayed as shown below Random Push Navigation button right or left On Off Repeat Push Navigation button right or left Single All Off EQ Push right or left Normal Jazz Rock Clas...

Page 34: ...p or down to select Photo as shown on the above left hand figure When Photo is selected press the Navigation button in to enter the Photo menu as shown in the above right hand figure 4 Push the Navigation button up or down to select a category and press the Navigation button in to enter Push the Navigation button up or down to select a file from list Press the Navigation button in to view the file...

Page 35: ...ed picture from the file list and press the Navigation button left and then to the right refer to the left hand figure below Select wallpaper right icon and press the Navigation button in Select Yes and press the Navigation button in to set that photo as Wallpaper refer to the right hand figure below 9 While viewing one photo in full screen not in slide show mode push the Navigation button left to...

Page 36: ...not needed you can delete it from file list Push Navigation button up or down to select the file push Navigation button left to see below left figure select the trash can icon and push the Navigation button in Push Navigation button left right to select Yes and press Navigation key in to confirm to delete This sequence is displayed below V VO OI IC CE E R RE EC CO OR RD DI IN NG G The media player...

Page 37: ...3 and so forth for each recording N NO OT TE E The maximum length of Voice Recording depends on hard disk free space Voice Recording can not exceed 24hrs or 2GB Play a Recorded Voice File 1 To play a recorded voice file use the navigation button to go to Music mode Recorded folder 2 Find recorded file name on the file list of Music mode 3 Select a file and press the Navigation button in to play or...

Page 38: ... DVD player with the supplied AV cable Match video line in component cable to AV signal connectors on the same row by color or text N NO OT TE E To avoid battery discharge and subsequent loss of recording it is suggested that the AC adapter be used to power the media player N NO OT TE E Before recording from TV Video it is recommended that the highest resolution and Best AV quality in be selected ...

Page 39: ...n the recorded file exceeds 2GB capacity or 3 hours the recording will be saved and then will continue to record the signal to another file unless you press the Exit button on the remote or the R or E button on the unit 6 Press the REC z button on the remote control or the R button on the unit to start recording the Record LED will be illuminated and the message below will display 7 To stop record...

Page 40: ...eleted and press the Navigation to the left select the delete icon press the Navigation button in select yes and press the Navigation button in S SD D M MM MC C A AN ND D M MS S C CA AR RD DS S The media player comes with SD MMC and MS card slots You can insert a Secure Digital Card MultiMedia Card or Memory Stick into its slot to increase the capa bility and functionality of your media player NOT...

Page 41: ...removed before the file is stopped or if a file is selected that is corrupted the DMP may lock up To reset the unit push the power switch on the unit up and hold for 5 seconds If this fails to restore operation use the Reset button located on the back of the unit see Getting Started for use of the Reset button S SI IG GN NA AL L O OU UT TP PU UT T You can view the media player signal output on a l...

Page 42: ...d Info tabs 1 Select Setting menu by pushing the Navigation button up or down as shown above on the left Press the Navigation button in the screen will display as shown above on the right 2 Push the Navigation button right or left to select Display Photo Record System or Info tab with the various setting options for each tab N NO OT TE E Exit the Setting Menu by pressing the EXIT button on the rem...

Page 43: ...r Setting menu the Display tab is the default tab see figure above 2 Push the Navigation button down to select Brightness TV Standard or Display Refer to the table below for the settings available Setting Item Method and Purpose Options Brightness Push Navigation button to right or left to adjust display brightness Adjust brightness to meet the desired level TV Standard Push Navigation button to r...

Page 44: ...ush the Navigation button right or left to go to Photo as shown above 2 Push the Navigation button up or down to select among Slide Music Slide Repeat and Slide Interval Refer to the table below for the settings available Setting Item Adjustment and Purpose Options Slide Music Push Navigation button right or left to enable or disable the background music On Off Slide Repeat Push Navigation button ...

Page 45: ... size will be larger when higher resolution and or qual ity are selected Picture and sound quality will be optimum in the Best setting Quality will be less in any other setting The media player can record video at up to 30 fps Select the settings for your preferences Setting Item Method and Purpose Options Resolution Push Navigation button right or left to adjust record resolution Standard Fine Be...

Page 46: ...change system settings 1 In Setting Menu push the Navigation button right or left to System tab The display will be as shown above 2 Push the Navigation button up or down to select Display Off Power Off Language Date Format Date Setting Time Setting Time Format Alarm Alarm Time and Load Defaults Refer to the table below for the settings available ...

Page 47: ...display yy mm dd mm dd yy dd mm yy Date Setting Push Navigation right or left to select year month day Push Navigation up or down to change property Set today s date Time Setting Push Navigation right or left to select hour minute sec Push Navigation up or down to change setting Set time Time Format Push Navigation right or left to select time format on display 12hrs 24 hrs Alarm Push Navigation r...

Page 48: ...ill appear as shown above 2 Push the Navigation button up or down to change the selection Refer to the table below for the information settings available Setting Item Method and Purpose Options HDD Free Space Shows available Hard Disk Drive free storage space NA Version Displays software version NA DivX R VOD Push Navigation key to the right to read DivX information and the registration code NA Up...

Page 49: ...About 19 84 oz or 1 24 lb 562 5 g Operating Temperature 41 F to 95 F 5 C to 35 C Storage Temperature 4 F to 176 F 20 C to 80 C Operating Humidity 50 to 60 Audio Spec Earphone Output 30mW rms 15mW channel Frequency 20 to 20KHz SNR 85dB Supports OS Windows 98SE Windows ME Windows 2000 Windows XP Home Pro Windows 98SE system requires driver installation USB Meets USB 2 0 specification LCD Display 7 1...

Page 50: ...he screens N NO OT TE E To prevent battery discharging while upgrading we recom mend that the AC Adapter be used 1 Connect the media player to your computer with the USB cable 2 Power on the media player to initialize it on your computer 3 Download a media player upgrade file from website www directedmobileme dia com and save it into the media player root directory Double click to run the upgrade ...

Page 51: ... completes the system will restart automatically U Up pg gr ra ad de e F Fi ir rm mw wa ar re e The media player firmware can be upgraded You need a computer and the sup plied USB cable for the following procedures N NO OT TE E The DMP040 must have an external video display connected to view the screens N NO OT TE E To prevent battery discharging while upgrading we recom mend that the AC Adapter b...

Page 52: ...select No to cancel upgrade 10 When firmware upgrade completes system will restart D Do oc ck ka ab bl le e M Me ed di ia a P Pl la ay ye er r I In ns st ta al ll la at ti io on n 1 Be sure the media player is off ensure power to the OHD console is off and that the ignition key is off 2 Align the notches in the side of the media player with the tabs in the sides of the monitor POD mounting area an...

Page 53: ...the unit when the media player is docked The remote control used with the overhead console now controls the media player The cross reference table below lists the remote control functions that operate the media player when docked NOTE The control buttons on the DMP740 function when the unit is docked Electrical Connector Lock Unlock Button Insert Player and then slide down until unit locks ...

Page 54: ...head Remote Media Player Remote Comments Title Icon z Rec Record or R button on unit S S Up Setup Setting Menu displays Mute Mute W WW Left Enter X Play Pause X XX Right T T Down X X Play Pause Exit E button on unit TV AV LCD TV Menu PCB Menu M button on unit ...

Page 55: ...l l 1 While holding and supporting the player 2 Move and hold the lock unlock button to the right 3 Slide the player away from the screen and carefully remove N NO OT TE E Install the rubber protective cover over the electrical connector at the bot tom of the media player after removing the unit from the monitor POD mounting area d ...

Page 56: ...5 56 6 2005 Directed Electronics all rights reserved ...

Page 57: ... 2005 Directed Electronics all rights reserved 5 57 7 d ...

Page 58: ...with the finest vehicle security car stereo products rear seat entertainment and accessories available The recipient of more than 20 patents in the field of advanced electronic technology Directed is ISO 9001 registered Quality Directed Electronics products are sold and serviced throughout North America and around the world Call 8 80 00 0 2 27 74 4 0 02 20 00 0 for more information about our produ...

Reviews: