Magnavox MBP110V/F7 Owner'S Manual Download Page 2

2

EN

INTRODUCTION

Safety Instructions

FCC WARNING

This equipment may generate or use radio frequency energy. Changes or modifications to this equipment may
cause harmful interference unless the modifications are expressly approved in the manual. The user could lose the
authority to operate this equipment if an unauthorized change or modification is made.

RADIO-TV INTERFERENCE

This equipment has been tested and found to comply with the limits for a Class B digital device, pursuant to Part
15 of the FCC Rules. These limits are designed to provide reasonable protection against harmful interference in a
residential installation. This equipment generates, uses, and can radiate radio frequency energy and, if not installed
and used in accordance with the instructions, may cause harmful interference to radio communications. However,
there is no guarantee that interference will not occur in a particular installation. If this equipment does cause harmful
interference to radio or television reception, which can be determined by turning the equipment off and on, the user
is encouraged to try to correct the interference by one or more of the following measures:

1)

Reorient or relocate the receiving antenna.

2)

Increase the separation between the equipment and receiver.

3)

Connect the equipment into an outlet on a circuit different from that to which the receiver is connected.

4)

Consult the dealer or an experienced radio/TV technician for help.

This Class B digital apparatus complies with Canadian ICES-003.

Disconnect the mains plug to shut off when find trouble or not in use. The mains plug shall remain readily operable.

The model and serial numbers of this unit may be found on the cabinet.
You should record and retain those numbers for future reference.

Serial No.:

Model No.:

WARNING:

TO REDUCE THE RISK OF FIRE OR ELECTRIC SHOCK, DO NOT EXPOSE THIS
APPARATUS TO RAIN OR MOISTURE.
APPARATUS SHALL NOT BE EXPOSED TO DRIPPING OR SPLASHING AND NO OBJECTS
FILLED WITH LIQUIDS, SUCH AS VASES, SHALL BE PLACED ON THE APPARATUS.

CAUTION:

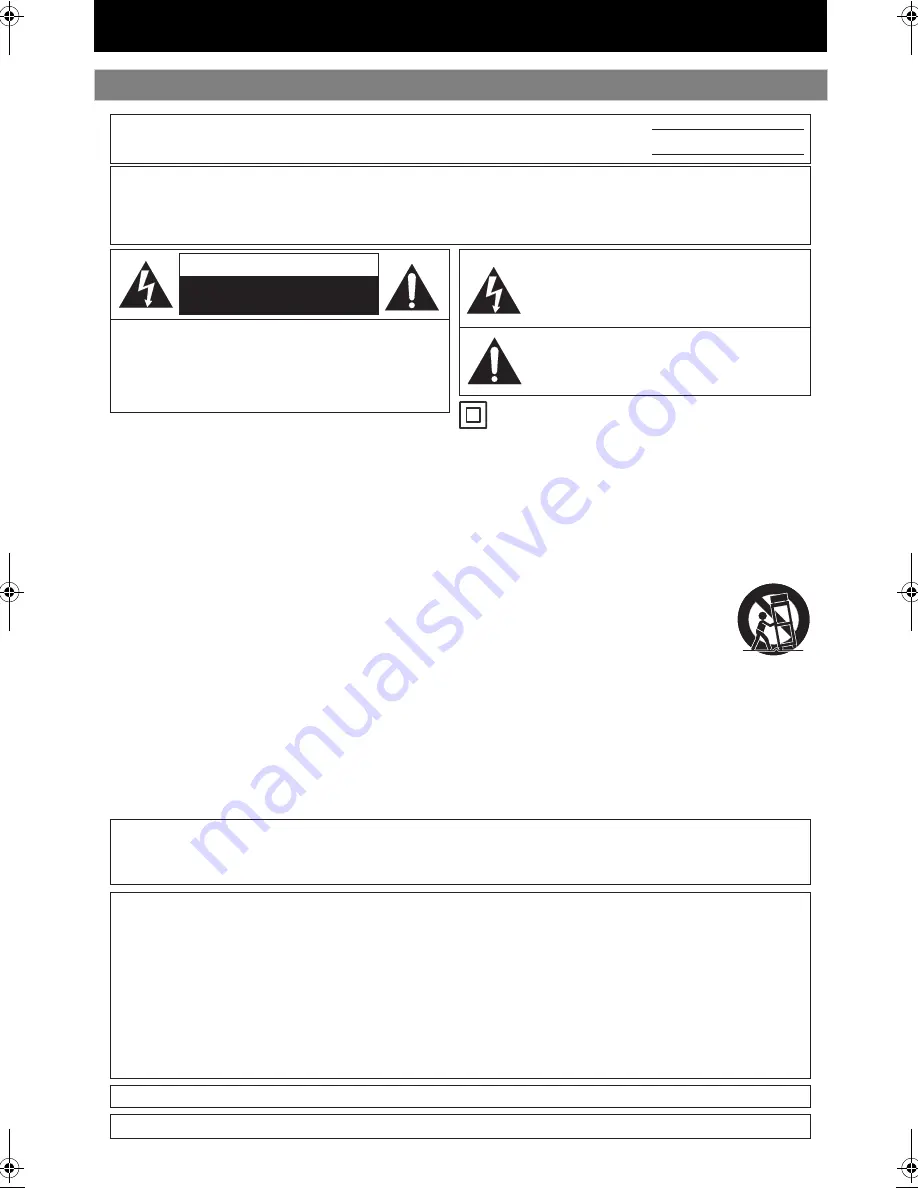
TO REDUCE THE RISK OF ELECTRIC SHOCK, DO NOT
REMOVE COVER (OR BACK). NO USER SERVICEABLE
PARTS INSIDE. REFER SERVICING TO QUALIFIED
SERVICE PERSONNEL.

CAUTION

RISK OF ELECTRIC SHOCK

DO NOT OPEN

The exclamation point within an equilateral triangle is

The symbol for CLASS II (Double Insulation)

intended to alert the user to the presence of important
operating and maintenance (servicing) instructions in
the literature accompanying the appliance.

The lightning flash with arrowhead symbol, within an
equilateral triangle, is intended to alert the user to the
presence of uninsulated“dangerous voltage”within the
product’s enclosure that may be of sufficient magnitude
to constitute a risk of electric shock to persons.

The important note is located on the rear or bottom
of the cabinet.

IMPORTANT SAFETY INSTRUCTIONS

1.

Read these instructions.

2.

Keep these instructions.

3.

Heed all warnings.

4.

Follow all instructions.

5.

Do not use this apparatus near water.

6.

Clean only with dry cloth.

7.

Do not block any ventilation openings. Install in
accordance with the manufacturer’s instructions. 

8.

Do not install near any heat sources such as radiators, 
heat registers, stoves, or other apparatus (including
amplifiers) that produce heat. 

9.

Do not defeat the safety purpose of the polarized or
grounding-type plug. A polarized plug has two blades
with one wider than the other. A grounding type plug
has two blades and a third grounding prong. The wide
blade or the third prong are provided for your safety. If
the provided plug does not fit into your outlet, consult
an electrician for replacement of the obsolete outlet.

10.

Protect the power cord from being walked on
or pinched particularly at plugs, convenience
receptacles, and the point where they exit from the
apparatus.

11.

Only use attachments/accessories specified by the
manufacturer.

12.

Use only with the cart, stand, tripod,
bracket, or table specified by the
manufacturer, or sold with the apparatus.
When a cart is used, use caution when
moving the cart/apparatus combination to
avoid injury from tip-over.

13.

Unplug this apparatus during lightning storms or
when unused for long periods of time. 

14.

Refer all servicing to qualified service personnel. 
Servicing is required when the apparatus has been
damaged in any way, such as power-supply cord or
plug is damaged, liquid has been spilled or objects
have fallen into the apparatus, the apparatus has
been exposed to rain or moisture, does not operate
normally, or has been dropped.

E8M00UD_EN.book  Page 2  Thursday, July 15, 2010  10:01 AM

Summary of Contents for MBP110V/F7

Page 1: ...Manual Guide d utilisation Manual del Usuario MBP110V F7 BD DVD CD Player with Video Cassette Player 2010 Funai Electric Co Ltd INTRODUCTION CONNECTIONS PLAYBACK FUNCTION SETUP VCP FUNCTIONS OTHERS E...

Page 2: ...TO QUALIFIED SERVICE PERSONNEL CAUTION RISK OF ELECTRIC SHOCK DO NOT OPEN The exclamation point within an equilateral triangle is The symbol for CLASS II Double Insulation intended to alert the user...

Page 3: ...cycling regulations Batteries should never be thrown away or incinerated but disposed of in accordance with your local regulations concerning chemical wastes Notice for Progressive Scan Output Consume...

Page 4: ...everse 23 Slow Forward Playback 23 Step by Step Playback 23 Repeat Playback 23 Program Playback 24 Random Playback 25 Rapid Playback 25 Adjusting the Picture 26 Virtual Surround 26 PIP BONUSVIEW Setti...

Page 5: ...itted disseminated transcribed downloaded or stored in any storage medium in any form or for any purpose without the express prior written consent of Funai Furthermore any unauthorized commercial dist...

Page 6: ...playback of AVCHD format files new format for high definition video camcorders recorded on disc SD card Your high definition personal archive is playable in HD quality Connect this unit to your HDTV w...

Page 7: ...C Press to start or resume playback 11 C STOP button DISC Press to stop playback 12 TRACKING buttons TAPE Press to adjust the tracking manually 13 Infrared sensor window Receive signals from your remo...

Page 8: ...Number buttons DISC Press to enter the title chapter track or file number Press to enter values in the input field 4 SEARCH button Press to display the search menu 5 RED GREEN BLUE YELLOW button DISC...

Page 9: ...ay the audio menu TAPE mode During the playing of a Hi Fi video tape press to change the audio out setting to Hi Fi or mono 25 REPEAT button DISC mode Press to toggle between various repeat modes TAPE...

Page 10: ...the Batteries in the Remote Control 1 Open the cover 2 Insert batteries Make sure to match and on the batteries to the marks indicated in the battery compartment 3 Close the cover Caution Incorrect us...

Page 11: ...ble Your TV No analog audio connection required Go To High Definition TV Next Page No supplied cables are used in this connection Please purchase the necessary cables at your local store Use an HDMI c...

Page 12: ...atible HDCP TV the image will not be viewed properly A HDMI IN HDMI cable Your TV Picture is not displayed on the TV screen The indicators blink under the following conditions When the connected devic...

Page 13: ...OUT Analog audio input jacks RCA audio cable stereo system this unit digital audio coaxial input jack digital audio RCA cable DIGITAL AUDIO OUT COAXIAL Disc only AV receiver amplifier To set up Digita...

Page 14: ...r TV 1 After you have made all the necessary connections press STANDBY ON Q to turn on the unit 2 Turn on your TV 3 Press the button on the TV s remote control that accesses the external input channel...

Page 15: ...D RW R SD Memory Card including SDHC miniSD Card microSD Card Readable cards Playable files data SD Memory Card 8 MB 2 GB AVCHD JPEG picture in picture commentary subtitles or other extras for BD ROM...

Page 16: ...mation remaining time A Title information elapsed time A Title information remaining time A Audio format information A off off Track information elapsed time A Track information remaining time A Disc...

Page 17: ...title number Total number of titles Elapsed time or remaining time of the current title Current track file number Total number of track file Elapsed time or remaining time of the current track except...

Page 18: ...oad the disc SDMemoryCard 2 Use K L to select SD Card then press OK Media filter screen will appear When the SD Memory Card contains only one type of file skip to step 4 3 Select the type of the file...

Page 19: ...ng the Media Mode 1 In stop mode press SETUP 2 Use K L to select then press OK 3 Use K L to select Media Select 4 Press OK to change the selected media It switches alternately between SD Card and Disc...

Page 20: ...Resume playback may not be available for the BD that supports Java applications BD Java In the Disc mode the resume information will be cleared when C stop is pressed while in the Resume On Stop mode...

Page 21: ...files Using the Title Disc Pop up Menu Note Contents of menus and corresponding menu operations may vary among discs Refer to the manual accompanying the disc for details Title menu is also available...

Page 22: ...4 2 Use K L 0 1 to select a desired file to be played back then press B play or OK An image will be played back from the selected file and then go to the next file 3 Press C stop to stop playback To r...

Page 23: ...dom playback Slow Forward Playback Note Slow motion speed changes in 3 different levels Only slow forward is available Set Still Mode setting to Field in Video menu if pictures in the slow forward pla...

Page 24: ...the previous page in the programmed list Press YELLOW to go to the next page in the programmed list 0 26 24 CD_DA 0 36 1 14 0 45 0 50 0 53 0 20 0 54 8 9 10 11 12 13 14 1 14 0 50 1 14 0 50 0 53 0 54 0...

Page 25: ...tatus Note During the random playback press C stop once to set the resume point and then press B play to resume random playback from where C stop was pressed audio CD or from beginning of the file whe...

Page 26: ...dary video will be displayed and the secondary audio will be output Use 0 1 to switch between current setting and Off 3 Press RETURN or MODE to remove the PIP information Adjusting the Picture On Make...

Page 27: ...ch During playback of a title enter the chapter number you want to search using the Number buttons Playback of the chapter will start in a few seconds Track File Search Enter the track file number you...

Page 28: ...press OK 3 Use K L to select your desired audio stream channel For Secondary use 0 1 to switch between current audio setting and Off 4 Press AUDIO to exit Switching Subtitles Primary Subtitle Sets th...

Page 29: ...right and left channels are active stereo L ch Only left channel is active R ch Only right channel is active Note The secondary audio will not be output when the secondary video is not displayed or w...

Page 30: ...s Description Custom Language Audio Original Chinese Japanese Korean Danish Finnish Norwegian Icelandic Hungarian Romanian Turkish Greek Irish Portuguese Polish Czech Slovak Bulgarian Other Sets the a...

Page 31: ...coarse due to the limited amount of data Select Field when the pictures are still unstable even if Auto is selected Frame Displays relatively motionless pictures in higher resolution Frame improves th...

Page 32: ...hange the setting Center Small Subwoofer On Surround Large Surround Back Small Default Channel Level Test Tone Off Outputs the test tone from each speaker Use 0 1 to switch options then press OK to co...

Page 33: ...lby TrueHD audio is played back Off Parental Refer to page 37 for more information Password input field BD Rating Level All Sets the rating level for the disc playback Age Setting DVD Rating Level All...

Page 34: ...cable 480p signal will be output Video and audio signals may be distorted temporarily when switching to from the HDMI output mode You cannot change the video resolution during playback of BD AVCHD To...

Page 35: ...l to an AV amplifier Audio Mute HDMI audio will be mute and Dolby Digital DTS bitstream or LPCM will be output from DIGITAL AUDIO OUT COAXIAL jack depending on Digital Out setting Refer to Digital Out...

Page 36: ...tput When BD Audio Mode is set to HD Audio Output When BD Audio Mode is set to Mix Audio Output BD video Dolby Digital Dolby Digital Dolby Digital 2ch Downmix LPCM 2ch Downmix LPCM Dolby Digital Plus...

Page 37: ...ect Current Version then press OK 6 Press OK or RETURN to exit 1 Prepare a software update disc Access www magnavox com and download the latest version software to a blank disc by following the direct...

Page 38: ...he default The setting for Parental and Media Select will not be reset Format SD Card Available only when an SD card is inserted Initializes the SD card Erase Saved BD ROM Data Player Clears the data...

Page 39: ...ke to skip to 4 Press B to skip forward Press s to skip backward The playback will start automatically from the selected index mark point Selecting the Menu Language for VCP Playback Note Tracking wil...

Page 40: ...se repeatedly during slow motion playback to select the desired speed Automatic rewind When a cassette tape is played back or fast forwarded to its end the cassette tape will rewind to the beginning s...

Page 41: ...mpatible with this unit No sound or distorted sound Adjust the volume Check if speakers are connected correctly Check the HDMI connections Check the settings in Audio menu Picture freezes momentarily...

Page 42: ...e sound is OK Head cleaning may be necessary Refer to Auto head cleaning on page 46 Playback picture cannot be viewed while the menu screen is displayed No or poor playback picture Fine tune your TV o...

Page 43: ...ext generation optical discs Blu ray Disc supports 7 1 multi channel surround sound output DTS Digital Theater System DTS is a multi channel surround sound system By connecting to a DTS decoder you ca...

Page 44: ...Lettish 5868 Lingala 5860 Lithuanian 5866 Language Code Macedonian 5957 Malagasy 5953 Malay 5965 Malayalam 5958 Maltese 5966 Maori 5955 Marathi 5964 Moldavian 5961 Mongolian 5960 Nauru 6047 Nepali 60...

Page 45: ...04 F 40 C Operating humidity Less than 80 no condensation Terminals Rear Video output RCA jack x 1 1 Vp p 75 HDMI output HDMI jack x 1 Digital Video 480p 720p 1080i 1080p 1080p24 Digital Audio Audio o...

Page 46: ...t fingerprints and dust do not adhere to the surfaces of the discs Always store the disc in its protective case when it is not used Note that discs with special shapes heart shaped discs octagonal dis...

Page 47: ...47 EN EN MEMO INTRODUCTION CONNECTIONS PLAYBACK FUNCTION SETUP VCP FUNCTIONS OTHERS...

Page 48: ...PARTS DEMO OR FLOOR MODELS FUNAI CORP AND ITS REPRESENTATIVES OR AGENTS SHALL IN NO EVENT BE LIABLE FOR ANY GENERAL INDIRECT OR CONSEQUENTIAL DAMAGES ARISING OUT OF OR OCCASIONED BY THE USE OF OR THE...

Reviews: