18
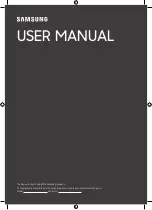
PICTURE MENU CONTROLS
1
-
Press
MENU
button on the remote control to
display the onscreen menu.
2
Press
CURSOR
<
or
>
to until the
Picture
menu feature is highlighted.
3
Press
CURSOR >
or
or
or
<
to adjust
Brightness Control
Brightness Control
- until the darkest parts of the
picture are as bright as you want.
Color Control
-
Color Control
Color Control
to add or remove color.
Picture Control
- until the lightest parts of the
picture show good detail.
Sharpness Control
Sharpness Control
-
Sharpness Control
Sharpness Control
to improve sharpness in the
picture.
Tint Control
- adjust natural skin tones in the
picture quality.
Note : Tint is not available in Digital Mode
Color Temp Control
Color Temp Control
- to select Normal, Cool,
or Warm picture preferences. For Normal, whites
will mainain their whiteness;
Cool will make the whites bluish; and Warm will
make the whites reddish.
DNR
- When set to On Dynamic Noise Reduction
helps to eliminate "noise" from the picture.
Co Control
-
Co Control
Co Control
when set to
On
, the
Co control helps to “sharpen” the
picture quality. The black portions of the picture
become richer in darkness and the whites become
brighter.
DNR
>
>
< >
MENU
MENU
Digital and Analog Mode
T
o adjust your TV picture controls, select a channel and use the Picture Menu Controls listed below. Your selection is
T
T
stored as
T
T
Personal
.
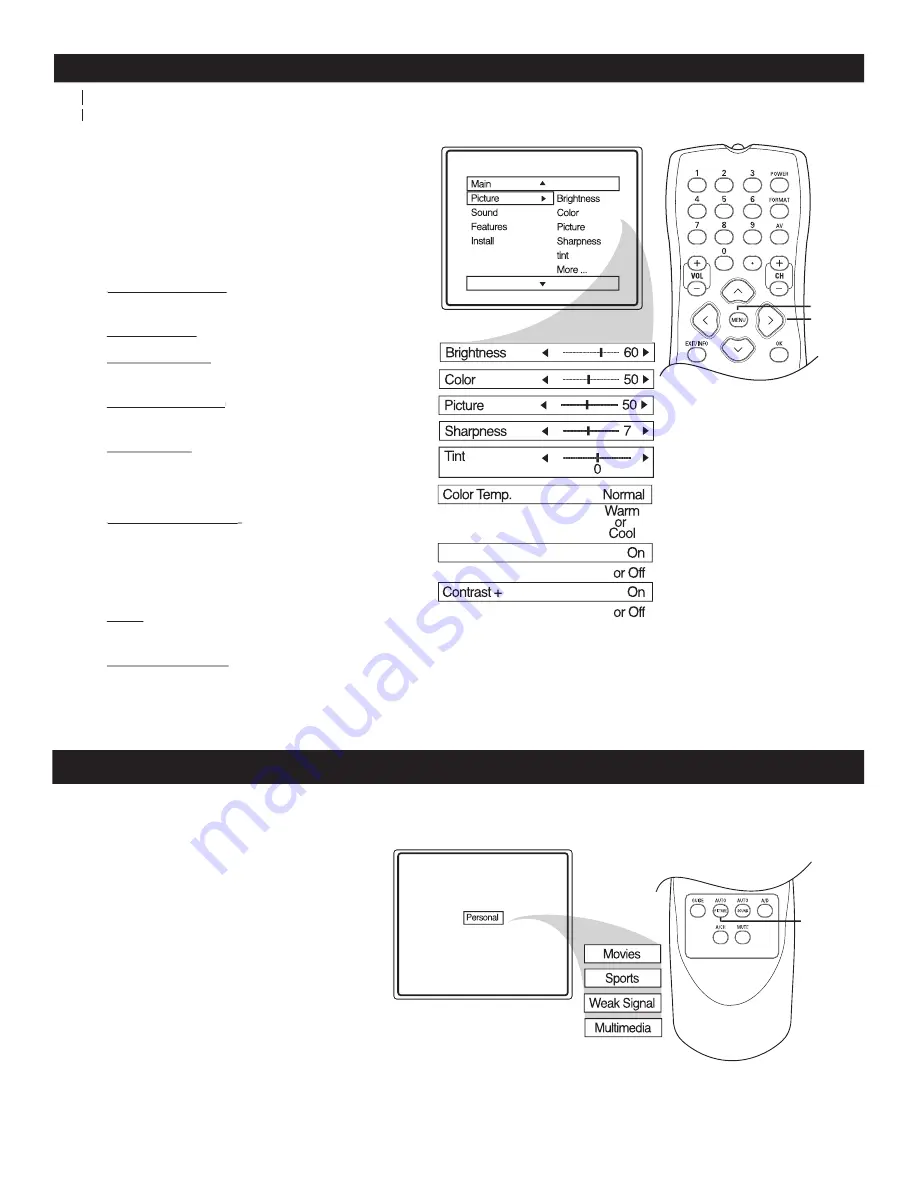
AUTO PICTURE
1
Press
AUTO PICTURE
button on the
remote control. The current Auto Picture
setting will display on the screen.
2
Press
AUTO PICTURE
repeatedly to
select either
Personal, Movies, Sports,
Weak Signal
or
Multimedia
picture
settings.
NOTE:
The way you choose to set the Picture Menu
Controls will become your Personal setting.
W
hether you’re watching a movie or a sporting event, your TV has automatic video control settings to enhance
your current program source or content.
AUTO
PICTURE