background image

12

(F) Information display.  Displays speed, time of day, elevation, compass direction.  While routing it also can also 

display distance to destination, estimated time of arrival (ETA), and time remaining.  Tap on the information 
field to change.

(G) Access the list of nearest Highway Exit POIs (available only when driving on a highway/freeway/interstate). Tap 

to display options to start a new trip or, when routing, to make modifications to an existing trip.

(H) Voice Command button

(I) Zoom in and zoom out controls to change the map scale.

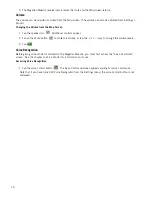
Accessing the Map Screen

1. On the Main Menu screen, tap 

View Map

.

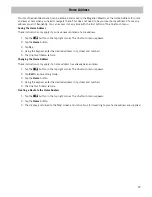
Setting the Map Modes (2D or 3D)

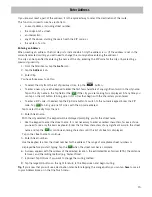
The map is normally displayed in 3D mode (perspective view) but you can set the map to 2D mode (top down 
view) if so desired. Choose the mode that suits you best.

1. From the 

Map

 screen, tap anywhere on the map. Additional controls appear.

2. Tap 2D 

 to switch the map to 2D mode from 3D mode, or tap 3D 

 to switch the map to 3D mode 

from 2D mode.

    Tap 

.

Setting Zoom Levels

Select the zoom level that best suits your needs.  Note that zoom levels are limited in 3D mode.  As you zoom out 
in 3D, the display will switch to 2D at higher zoom levels.

1. Tap the '+' or '-' zoom level buttons at the bottom of the display to set the desired zoom level. 

Panning on the Map

1. While viewing the Map screen, slide your finger or a stylus across the map.

2. The map screen changes to Pan mode.

3. When finished, tap 

 and the map returns to your current position.

Routing to a Panned Position

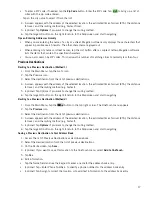
1. Pan the map until the location you wish to route to is displayed.

2. Tap on the map at the point you go to.  A red push pin will be displayed along with information about the 

point chosen at the top of the screen.

3. Tap the 

 button in the top left corner.

4. If an active route already exists, first you need to define what to do with this new route point: 

Replace Destination

: the next destination is cleared and replaced with the one selected from the Pan 

screen.

Go There Now

: the selected location is inserted in the route as an intermediate destination before the next 

destination. 

Add To Trip

: the selected destination is added to the end of the current trip.

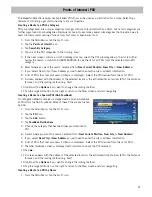
5. Tap the large GO 

 button on the right to return to the 

Map

 screen and begin navigating.


Note: 

if the panned position does not match an existing street address (i.e. the destination is not along a road or 

street that is stored in the map database), the guidance will stop on the road that is closest to your destination. A 
dashed line to your final destination will then be displayed on the map.

Summary of Contents for Maestro 4700 - Automotive GPS Receiver

Page 1: ...960 Overland Court San Dimas CA 91773 Magellan MaestroTM 4700 GPS Receiver User Manual...

Page 2: ...the Magellan Maestro receiver in your vehicle whether using the windshield mount or other mounts that it does not obstruct the driver s view of the road interfere with the operation of the vehicle s s...

Page 3: ...ure limits set forth for an uncontrolled environment End users must follow the specific operating instructions for satisfying RF exposure compliance This transmitter must not be co located or operatin...

Page 4: ...der license by MiTAC International Corporation All rights reserved NAVTEQ is a tradmark of NAVTEQ Inc AAA and the AAA logo are trademarks of the American Automobile Association AAA 2009 all rights res...

Page 5: ...l 6 Volume 6 Brightness 7 Main Menu 7 Keypad 8 Notes on Entering Data 9 Smart City Search 9 QuickSpell 10 Map Screen 11 Current Location Screen 13 Accessing the Current Location Screen 13 Saving Your...

Page 6: ...eating a Route to a Highway Exit POI 22 Home Address 23 Saving the Home Address 23 Changing the Home Address 23 Creating a Route to the Home Address 23 Traveling on a Route 24 Map Screen 24 Maneuver L...

Page 7: ...ing Brightness 34 Setting the Time Format 34 Selecting the Time Zone daylight savings on off 34 Selecting Units of Measure 35 Map Options 35 Night Mode 35 Setting Auto Night Map Display 35 Setting Hea...

Page 8: ...oute 38 Enabling Voice Recognition 38 GPS Options 38 Setting the GPS Position 38 Viewing the GPS Status 38 Backing Up and Restoring Data 39 Viewing Product Information 39 Traffic 40 Coverage 40 Glossa...

Page 9: ...omize your Magellan Maestro receiver to meet your needs using the Settings menu With the optional Traffic Link accessory the Magellan Maestro receiver can receive traffic information so as to avoid de...

Page 10: ...aestro A Power Switch B Micro SD card slot A micro SD card is optional and is used for backing up and restoring data C USB connector Power input from vehicle power adapter cable or AC power adapter 5...

Page 11: ...ers Using the Adhesive Disk If you plan on using the adhesive disk you will first need to attach it to the dashboard and allow it to cure for 24 hours before continuing Find a smooth flat surface and...

Page 12: ...DC power cable and the optional Traffic Link cable are connected in the same manner If you have the standard 12VDC power cable and have purchased the optional Traffic Link cable replace the standard c...

Page 13: ...r is not left in plain view while unattended for reasons of theft Please note that the Magellan Maestro receiver is a receiver only and does not transmit GPS location signals Neither the receiver nor...

Page 14: ...ever the Magellan Maestro is connected to external power Please note that this battery can only be serviced by authorized Magellan repair facilities Viewing the Battery Level Indicator 1 While viewing...

Page 15: ...reen there is a Dim on Battery Power option When Dim on Battery Power is checked the Magellan Maestro receiver will reduce the brightness when operating exclusively on battery power and you have not u...

Page 16: ...isplays the Settings menu This menu can be used to access functions used to customize the Magellan Maestro receiver to your personal needs OneTouch Menu Displays the OneTouch menu with easy access boo...

Page 17: ...ttempts to predict the city you are looking for This prediction is based upon two major factors your position and cities you ve gone to before In this example I am in Los Angeles and enter PA The rece...

Page 18: ...uickSpell In the example to the right CE has been entered for a street name in Chicago IL The Magellan Maestro receiver has predicted that the street name may be Cedar Ave Also it has greyed out any l...

Page 19: ...information field to change D Zoom Out In E Access Main Menu F Access to volume controls G Access OneTouch Menu OneTouch Menu gives you instant access to your saved search criteria and favorite destin...

Page 20: ...or zoom level buttons at the bottom of the display to set the desired zoom level Panning on the Map 1 While viewing the Map screen slide your finger or a stylus across the map 2 The map screen change...

Page 21: ...the address book entry optional Tap Assign to correct the location or to add text information to the address book entry 6 When the details for this address are acceptable tap Note entering a Name is c...

Page 22: ...ute button to mute the volume or tap the or icons to change the volume levels 3 Tap Voice Recognition Before giving voice control commands to the Magellan Maestro you must first access the Say a Comma...

Page 23: ...with the characters you entered To enter a ZIP code if needed tap the Zip Code button to switch to the numeric keypad Enter the ZIP code Tap to bring up a list of cities with the zip code entered Tap...

Page 24: ...se the keypad to enter the street name It is not necessary to enter accented characters for ease of use you need to use only the basic keyboard Enter the first few characters of any significant word i...

Page 25: ...dress of the selected location the estimated time of arrival ETA the distance to travel and the routing method e g Fastest 5 optional Tap Options if you want to change the routing method 6 Tap the lar...

Page 26: ...right to return to the Map screen and start navigating Creating a New Entry in Your Address Book by Entering an Address 1 From the Main Menu tap the Go To icon 2 Tap the Address icon and enter an addr...

Page 27: ...een optional Tap Enter Phone Number to specify a phone number for the address book entry optional Tap Assign to correct the location or to add text information to the address book entry 7 When the det...

Page 28: ...eTouch button 1 Tap the button in the top right corner The OneTouch menu appears 2 Tap the Edit button 3 Tap on the OneTouch button you want to edit 4 Tap on the Re assign button 5 Tap Yes to confirm...

Page 29: ...ppears with the address of the selected location the estimated time of arrival ETA the distance to travel and the routing method e g Fast 10 optional Tap Options if you want to change the routing meth...

Page 30: ...t POI The Highway Exit POIs function provides a way of accessing commonly used POIs that are near an exit you are approaching while travelling on a highway Highway Exit POIs include restaurants gas st...

Page 31: ...appears 2 Tap the Home button 3 Tap Yes 4 Using the keypad enter the desired address city street and number 5 The OneTouch Menu returns Changing the Home Address These instructions only apply if a hom...

Page 32: ...created the Magellan Maestro needs to know how the route is to be calculated Routes can be calculated by the following methods Fastest Time Fast the fastest possible route provided the vehicle is able...

Page 33: ...can check the Maneuver List of an alternate route if you tap the button on the right 6 Tap the desired alternate route SmartDetour on Freeways When you slow down under 20 of the speed limit on a freew...

Page 34: ...List is displayed 6 Tap on one of the addresses to move it up or down in the list 7 Tap Optimize to optimize the route 8 Tap Add to put another destination in the route 9 When done tap 10 A screen ap...

Page 35: ...the address book 1 From the Map screen tap Menu 2 Tap Trip Options 3 Tap Edit Trip 4 The Multiple Destination List is displayed 5 Make changes as needed 6 Tap 7 Tap Save 8 Tap Yes to save the route t...

Page 36: ...access some functions with voice commands Unchecking Enable Voice Recognition turns off the voice recognition function and removed the Voice Recognition button from the Map screen Accessing Voice Reco...

Page 37: ...a close restaurant Find closest restaurant Show closest restaurant Nearest Restaurant by type Nearest restaurant type i e Nearest American Find the nearest restaurant type Show the nearest restaurant...

Page 38: ...Number number number Select number Item number number The first second third fourth fifth Scrolling the list Next More Go to next page Previous Page up Cancel Back returns to the Say a Command screen...

Page 39: ...Magellan Maestro will ask if you want to accept the connection Tap Yes 9 Phone connected successfully screen appears if the connection is successful Tap OK 10 You may now import contacts from your pho...

Page 40: ...there is a phone number that can be redialed it will appear in the second button marked Redial 3 Tap the Redial button 4 The Magellan Maestro will begin calling the number Manual Dialing 1 Access the...

Page 41: ...enter numbers for automated answer services mute the call and adjust the volume and microphone gain Hanging Up To hang up and disconnect the call tap the red phone button on the Connected screen Enter...

Page 42: ...duration of time that the Magellan Maestro receiver remains idle before turning off automatically 1 Access the System Settings menu above 2 Tap Auto Power 3 Tap on the desired duration 4 Tap the back...

Page 43: ...ode 1 From the Main Menu screen tap the Settings icon 2 Tap Map Options 3 Tap 2D Heading Up or 2D North Up to toggle between settings Assigning Visible POIs To avoid cluttering of the map the POI icon...

Page 44: ...on 2 Tap Sound 3 Checking Mute will mute all sounds Turning off Button Sounds 1 From the Main Menu screen tap the Settings icon 2 Tap Sound 3 Unchecking Button Sounds will turn off the audible indicat...

Page 45: ...receiver to avoid toll roads whenever possible Viewing Current Location 1 From the Main Menu screen tap the Settings icon 2 Tap Current Location 3 Tap Save to save the current location to your addres...

Page 46: ...button in the middle of the Traffic Options screen Enabling Voice Recognition 1 From the Main Menu screen tap the Settings icon 2 Tap Voice Recognition 3 Checking Enable Voice Recognition turns on the...

Page 47: ...sting data 1 Insert a micro SD card in your Magellan Maestro receiver 2 From the Main Menu screen tap the Settings icon 3 Tap Backup and Restore Tap Backup My Data to save your user data and settings...

Page 48: ...be able to get traffic information in major US cities indicated on this map as well as in Toronto Canada Additional cities may be added at any time Glossary RDS Radio Data System Infrastructure that b...

Page 49: ...Tapping on the maneuver icon to the right of each line will display the Maneuver List for each route Tapping on the Map icon at the bottom of the display shows a graphical representation of the curre...

Reviews: