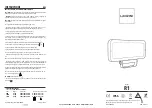
REFILLING OPERATION
1. Use only Butane fuel when refilling torch.
2. Ensure that the torch is extinguished before refilling.
3. Allow sufficient time for torch to cool to room temperature before refilling the torch with fuel.
4. Refill torch in a well ventilated area free of fire or other sources of ignition and away from people.
5. Never smoke while refilling the torch.
6. Hold the torch with the FILL VALVE (1) up.
7. Invert fuel canister and insert the fuel canister tip into the FILL VALVE (1).
8. Push the fuel canister and torch together to allow fuel to flow into the torch fuel tank. Torch should be filled in about 10 seconds.
9. Stop refilling once the fuel begins to overflow.
10. Wait 3 minutes to allow fuel gas to stabilize before igniting the torch.
LIGHTING AND OPERATION
Exercise caution when using this device not to breathe vapors. Depending on the task being conducted with device (wood burning, melting plastic, etc.) toxic or
nauseating vapors may exist.
INTERMITTENT USE MODE
1. Turn FLAME ADJUSTMENT KNOB (5) approximately halfway between – and + position.
2. Slide the SAFETY LOCK (2) down until it clicks and locks in the ignition position.
3. Press and hold down the IGNITION BUTTON (3).
4. Repeat step 2 and step 3 if torch does not ignite.
5. Release IGNITION BUTTON (3) to extinguish torch.
CONTINUOUS USE MODE
1. Turn FLAME ADJUSTMENT KNOB (5) approximately halfway between – and + position.
2. Slide the SAFETY LOCK (2) down until it clicks and locks in the ignition position.
3. Press and hold down the IGNITION BUTTON (3).
4. Repeat step 2 and step 3 if torch does not ignite.
5. Press the CONTINUOUS FLAME LOCK (4) in to lock the IGNITION BUTTON (3) in the on position.
6. Release IGNITION BUTTON (3).
7. To extinguish flame, press the IGNITION BUTTON (3) until the CONTINUOUS FLAME LOCK (4) resets and releases.
ADJUST FLAME
1. Slide FLAME ADJUSTMENT KNOB (5) to – for small flame.
2. Slide FLAME ADJUSTMENT KNOB (5) to + for large flame.
USE AS A GAS TORCH
(This is an open flame. Do not use with combustibles in the area. Read warning sections of instruction)
1. Torch is factory set for use as a gas torch and can be used immediately; after refilling.
2. Ignite torch as shown above.
USE AS SOLDERING IRON
NOTE:
A small amount of smoke and/or odor may be noticeable during the initial use of the soldering tip, this is normal.
1. Ensure that the GAS TORCH TIP (6) is cool before installing the SOLDERING TIP ASSEMBLY (7)
2. Loosen soldering tip locking screw by turning it counterclockwise.
3. Install SOLDERING TIP ASSEMBLY (7) onto the GAS TORCH TIP (6).
4. Lightly tighten the soldering tip locking screw by turning it clockwise.
5. Ignite torch as shown above.
6. Allow torch to burn for about 10 seconds until the heating element begins to glow red.
7. Slide the AIR ADJUSTMENT BUTTON (8) forward. This should extinguish the flame and leave only the heating element glowing red.
8. Torch is now ready for use as a soldering iron.
NOTE:
For best performance, make sure that the tip is tightly installed onto the SOLDERING TIP ASSEMBLY (7). Do not use tools to tighten tip.
USE AS A HOT AIR BLOWER
1. Assemble for use as soldering iron (see above).
2. Remove the tip from the SOLDERING TIP ASSEMBLY (7) by rotating it counterclockwise.
NOTE:
Tip may be difficult to remove if the solder tip has never been used. Allow torch to heat up in the soldering iron configuration (see above) for 3 minutes,
then allow the tip to cool.
3. Torch is now ready for hot air blower operation.
4. Ignite torch as shown above.
DO NOT DISCARD THESE WARNINGS AND INSTRUCTIONS | NE PAS JETER CES AVERTISSEMENTS ET CES INSTRUCTIONS
NO DESECHE ESTAS ADVERTENCIAS E INSTRUCCIONES | NÃO DESCARTE ESTES AVISOS DE ATENÇÃO E INSTRUÇÕES
ST2200
ST200
ST500 - 1000
1
2
ST2200
ST200
ST500 - 1000
1
2


