background image


TABLE OF CONTENTS 

F o r e w o r d … … … … … … … … … … … … … … … … … … … … … … … … … … … …

. . . 2 

Ta b l e   o f   C o n t e n t s … … … … … … … … … … … … … … … … … … … … … . … … …

. . . 3 

1.


S a f e

t y   I n s t r u c t i o n s … … … … … … … … … … … … … … … … … … … … … . … …

2.


I ntroducti on  to  Parts  and  Com ponent s………………………….………

.6 

3.


P r e -

o p e r a t i o n   C h e c k / I n s p e c t i o n … … … … … … … … … … … … … … … … …

4.


S t a r t i n g   t h e   E n g i n e … … … … … … … … … … … … … … … … … … … … …

1 1 

5.


Use  of  the  Generator  Set……...……………………………………………

...13 

6.


S t o p p i n g   t h e   E n g i n

e … … … … … … … … … … … … … … … … … … … … … …

1 7 

7.


M a i n t e n a n c e … … … … … … … … … … … … … … … … … … … … … … … … …

1 8 

8.


E l e c t r i c a l   S t a r t … … … … … … … … … … … … … … … … … … … … … … … …

. . 2 1 

9.


S t o ra g e   a n d   Tra n s p o r t a t i o n . … … … … … … … … … … … … … . … … … … …

2 2 

10.


T r o u b l e s h o o t i n g … … … … … … … … … … … … … … … … … … … . … … … …

. . 2 4 

11.


S p e c i f i c a t i o n s … … … … … … … … … … … … … … … … … … … … … … … … …

2 6 


Summary of Contents for KZ10000E

Page 1: ...Reference Purchase Date Comprador Comprador Name Morada Direcci n Address Localidade Ciudad City Revendedor Carimbo Revendedor Estampilla Seller Stamp GARANTIA GARANT A WARRANTY O consumidor goza dos...

Page 2: ...1 Estimado Cliente Desde j agradecemos ter escolhido um dos nossos produtos GERADOR A GASOLINA KZ9500E KZ10000E PICTURE LEIA COM ATEN O AS INSTRU ES ANTES DE UTILIZAR A M QUINA...

Page 3: ...este produto e especifica es a qualquer momento sem aviso pr vio Mensagem Importante Este manual cont m mensagens especiais para chamar a aten o para poss veis problemas de seguran a danos ao gerador...

Page 4: ...o s partes e componentes 7 3 Verifica o Pr Funcionamento 7 4 I n i c i a r o m o t o r 1 2 5 U t i l i z a r o G e ra d o r 1 4 6 P a r a r o m o t o r 1 8 7 M a n u t e n o 1 9 8 I n c i o E l t r i...

Page 5: ...mente fechados como salas caves garagens cavernas t neis etc Figura 1 AVISO PERIGO Mon xido de Carbono Usar um gerador dentro de casa ou lugares fechados ou parcialmente fechados sem boa ventila o POD...

Page 6: ...astecimento de combust vel Figura 5 AVISO PERIGO Fogo e ou explos o A gasolina e seus vapores s o altamente inflam veis e explosivos sob certas condi es A gasolina e seu vapor podem ser facilmente inf...

Page 7: ...s quentes como o silenciador resultar em queimaduras graves 1 9 Mantenha as crian as e outras pessoas afastadas da unidade durante o funcionamento 2 Introdu o s Partes e Componentes Nota Imagens e des...

Page 8: ...A capacidade de leo da m quina 1 1L para 7500 SAE10W 30 o leo do motor recomendado para uso a todas as temperaturas Outras viscosidades de leo como mostrado no gr fico pode ser usado quando a m dia te...

Page 9: ...Remova a tampa do tanque de combust vel Figura 13 Fig 14 3 2 3 Verifique o n vel de combust vel e adicione combust vel se necess rio Certifique se de n o adicionar demasiado Capacidade de combust vel...

Page 10: ...dor se a unidade n o for usada por muito tempo pois a degenera o do combust vel devido ao armazenamento prolongado pode dificultar o acionamento do motor 3 3 Filtro de Ar 3 3 1 Remova a cobertura do f...

Page 11: ...Bateria Apenas para modelos de in cio el trico 3 4 1 Verifique a bateria e as portas de conex o 3 4 2 Verifique cada c lula da bateria para ver se o n vel de eletr lito da bateria est entre o n vel s...

Page 12: ...se de que toda a verifica o de pr funcionamento foi feita 4 1 Desconecte todas as tomadas AC para desconectar cargas 4 2 Verifique se a unidade foi devidamente aterrada 4 3 Verifique o n vel de leo e...

Page 13: ...talhes consulte o Cap tulo 8 Figura 25 4 7 Se o motor n o ligar por favor ligue a alavanca do estrangulador e repita o que fez na Se o 4 6 AVISO Ap s o arranque do motor solte o man pulo de arranque s...

Page 14: ...os Dados de refer ncia da pot ncia nominal e a maneira de calcular a pot ncia de partida dos aparelhos el tricos conectados ao gerador Descri o Pot ncia Esp cies Exemplos In cio Class Apar El tricos I...

Page 15: ...e liga o Se houver duas ou mais cargas que precisam de fonte de alimenta o do gerador certifique se de conect las uma a uma com a de maior corrente de partida primeiro seguida pela segunda maior at a...

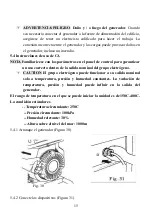
Page 16: ...da nominal do grupo gerador CUIDADO O gerador pode trabalhar na sua sa da nominal somente sob temperatura press o e humidade constantes A varia o de temperatura press o e humidade pode influenciar a s...

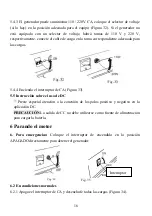
Page 17: ...4 4 Ligue o disjuntor AC Figura 33 5 5 Instru es sobre o uso do DC Preste aten o especial conex o de polos positivos e negativos em aplica es DC CUIDADO A sa da DC n o deve ser usada como fonte de ali...

Page 18: ...ento de combust vel na unidade que n o vai ser usada por muito tempo dificultar o in cio do motor Drene o combust vel para armazenamento prolongado da unidade 7 Manuten o 7 1 Agenda da Manuten o A uni...

Page 19: ...fluidez adequada do leo 7 2 1 Desparafuse e retire a vareta Figura 37 7 2 2 Desaperte o buj o de drenagem e drene o leo de motor do c rter 7 2 3 Coloque o buj o de drenagem de volta Figura 38 7 2 4 En...

Page 20: ...imine o carv o em volta da vela com uma escova de metal Figura 41 Fig 41 7 3 4 Verifique a folga da vela de igni o para ver se est entre 0 7 0 8 mm ajuste a se necess rio Figura 42 7 3 5 Volte a monta...

Page 21: ...lf rico l quido venenoso dentro da bateria O gerador a bateria desequilibrado poder derramar cido sulf rico Mantenha as crian as afastadas da unidade Evite que o cido l quido toque na pele ou olhos CU...

Page 22: ...trico substitua a bateria da seguinte forma 8 4 1 Desconecte os polos positivo e negativo da bateria com fios 8 4 2 Remova a placa de fixa o da bateria 8 4 3 Instale uma nova bateria e a placa de fix...

Page 23: ...itua o leo do motor Estabilizador de gasolina garante mais tempo de armazenamento de gasolina 9 2 Prepara o antes de Armazenar Execute os seguintes procedimentos para armazenamento de longa dura o 9 2...

Page 24: ...lvulas de entrada e sa da do motor est o fechadas para evitar ferrugem no c rter 10 Solu o de Problemas 10 1 Falha ao iniciar o motor gerador n o pode ser iniciado Figura 49 Fig 49 Fig 50 10 1 1 Verif...

Page 25: ...erifique se h fa scas Figura 53 Fig 53 10 1 5 Se o gerador ainda n o puder ser iniciado ap s as etapas acima consulte seu revendedor para obter ajuda Figura 54 Fig 54 10 2 Falha em gerar energia a uni...

Page 26: ...25 Fig 55 Fig 56 10 2 2 Verifique se o disjuntor AC est na posi o ON Figura 56 10 2 3 Se o problema persistir ap s as etapas acima consulte seu revendedor para obter ajuda Figura 57 Fig 57...

Page 27: ...cidade 3000 3600 Ajuste de Volt AVR Digital Regula o Autom tica de Voltagem Igni o CDI Tipo de In cio In cio de Arranque In cio El trico Volume Tanque 25L Consumo M nimo de Combust vel 295g Kwh Capaci...

Page 28: ...1 Estimado Cliente Gracias por elegir nuestros productos GENERADOR DE GASOLINA KZ9500E KZ10000E PICTURE POR FAVOR LEER ATENTAMENTE EL MANUAL DE INSTRUCCIONES ANTES DE USAR ESTE EQUIPO...

Page 29: ...reservamos el derecho de cambiar este producto y las especificaciones en cualquier momento sin previo aviso Mensaje importante Este manual contiene mensajes especiales para llamar la atenci n sobre p...

Page 30: ...as piezas y componentes 5 3 Verificaci n previa a la operaci n inspecci n 6 4 Arrancando el motor 10 5 Uso del grupo electr geno 12 6 Detener el motor 16 7 Mantenimiento 17 8 Arranque el ctrico 20 9 A...

Page 31: ...habitaciones s tanos garajes cuevas t neles etc Figura 1 ADVERTENCIA PELIGRO mon xido de carbono El uso de un generador en interiores o en lugares cerrados o parcialmente cerrados sin una buena ventil...

Page 32: ...ado de combustible Figura 5 ADVERTENCIA PELIGRO Incendio y o Explosi n La gasolina y sus vapores son altamente inflamables y explosivos bajo ciertas condiciones La gasolina y su vapor pueden encenders...

Page 33: ...s ADVERTENCIA PELIGRO Quemaduras El escape est muy caliente durante y o inmediatamente despu s de operar el motor El contacto accidental con superficies calientes con el escape provocar quemaduras gra...

Page 34: ...aceite de motor SAE10W 30 se recomienda para uso general a cualquier temperatura Puede usar otras viscosidades de aceite como se muestra en la tabla cuando la temperatura media en su rea se encuentre...

Page 35: ...3 2 2 Retire la tapa de combustible Figura 13 Fig 14 3 2 3 Verifique el nivel de combustible y agregue combustible si es necesario Aseg rese de no agregar demasiado Capacidad de combustible de la m q...

Page 36: ...ble en el tanque y el carburador si no va a usar la unidad por mucho tiempo ya que la degeneraci n del combustible debido al almacenamiento prolongado puede dificultar el arranque del motor 3 3 Filtro...

Page 37: ...y suj tela firmemente Figura 19 Fig 19 3 4 Bater a solo para modelos con arranque el ctrico 3 4 1 Compruebe la bater a y los puertos de conexi n 3 4 2 Verifique cada celda de la bater a para ver si e...

Page 38: ...rese de que se haya realizado toda la comprobaci n previa al funcionamiento 4 1 Desenchufe todas las cargas que est n en la toma el ctrica 4 2 Compruebe si la unidad se ha puesto a tierra correctamen...

Page 39: ...RT para los modelos el ctricos Para obtener m s informaci n consulte el Cap tulo 8 Figura 25 4 7 Si el motor no arranca abra la palanca del aire y repita lo que hace en la Secci n 4 6 ADVERTENCIA Desp...

Page 40: ...atos de referencia del vataje de clasificaci n y la forma de calcular el vataje inicial Fig 27 de los aparatos el ctricos que se conectan al generador Descripci n Vataje Especies Ejemplos arran que Cl...

Page 41: ...ctar cargas a este 5 3 Secuencia de conexi n Si hay dos o m s cargas que necesitan suministro de energ a del generador aseg rese de conectarlas una a una con la de la corriente de arranque m s alta pr...

Page 42: ...de control para garantizar un uso correcto dentro de la salida nominal del grupo electr geno CAUTION El grupo electr geno puede funcionar a su salida nominal solo a temperatura presi n y humedad cons...

Page 43: ...4 4 Encienda el interruptor de CA Figura 33 5 5 Instrucci n sobre el uso de DC Preste especial atenci n a la conexi n de los polos positivo y negativo en la aplicaci n DC PRECAUCI N La salida de CC no...

Page 44: ...enamiento del combustible que no se va a utilizar durante un per odo prolongado dificultar el arranque del motor Drene el combustible para un almacenamiento prolongado de la unidad 7 Mantenimiento 7 1...

Page 45: ...idad est funcionando 7 2 Reemplazo de aceite del motor Drene completamente el aceite del motor antes de que se enfr e completamente para garantizar la fluidez adecuada del aceite 7 2 1 Destornille y s...

Page 46: ...e la suciedad alrededor de la buj a Figura 39 7 3 2 Retire la buj a con una herramienta especial Figura 40 7 3 3 Verifique la buj a si el aislador est roto haga cambiar la buj a Elimine las incrustaci...

Page 47: ...ico liquido venenoso dentro de bater a La inclinaci n del grupo electr geno con la bater a puede provocar fugas de cido sulf rico Mantenga a los ni os alejados de la unidad Evite que el cido l quido t...

Page 48: ...la siguiente manera 8 4 1 Desconecta los polos positivo y negativo de la bater a 8 4 2 Retire la placa de sujeci n de la bater a 8 4 3 Instale una bater a nueva y la placa de sujeci n 8 4 4 Conecte l...

Page 49: ...Reemplace el aceite del motor El estabilizador de gasolina puede garantizar un mayor tiempo de almacenamiento de la gasolina 9 2 Preparaci n antes del almacenamiento Lleve a cabo los siguientes proce...

Page 50: ...n las v lvulas de entrada y salida del motor est n cerradas para evitar el c rter oxidado 10 Soluci n de problemas 10 1 No arrancar el motor El generador no se puede iniciar Figura 49 Fig 49 Fig 50 1...

Page 51: ...chispas saltando Figura 53 Fig 53 10 1 5 Si a n no se puede iniciar el grupo electr geno despu s de los pasos anteriores consulte a su distribuidor para obtener ayuda Figura 54 Fig 54 10 2 Fallo en ge...

Page 52: ...56 10 2 2 Compruebe si el interruptor de CA est en la posici n de ENCENDIDO Figura 56 10 2 3 Si el problema persiste despu s de los pasos anteriores consulte a su distribuidor para obtener ayuda Figu...

Page 53: ...3000 3600 Ajuste de Volt AVR Digital Regulaci n autom tica de voltaje Encendido CDI Tipo de Inicio Inicio del Arranque Inicio El ctrico Volumen del tanque 25L Consumo m nimo de combustible 295g Kwh Ca...

Page 54: ...1 Dear Costumer Thanks for choosing one of our products GASOLINE GENERATOR KZ9500E KZ10000E PICTURE PLEASE READ CAREFULLY THESE INSTRUCTIONS BEFORE USING THE PRODUCT...

Page 55: ...is manual We reserve the right to change this product and specifications at any time without prior notice Important Message This manual contains special messages to bring attention to potential safety...

Page 56: ...and Components 6 3 Pre operation Check Inspection 7 4 S t a r t i n g t h e E n g i n e 1 1 5 Use of the Generator Set 13 6 S t o p p i n g t h e E n g i n e 1 7 7 M a i n t e n a n c e 1 8 8 E l e c...

Page 57: ...partially enclosed places such as rooms basements garages caves tunnels etc Figure 1 WARNING DANGER Carbon Monoxide Using a generator indoors or enclosed or partially enclosed places without good ven...

Page 58: ...l filling Figure 5 WARNING DANGER Fire and or Explosion Gasoline and its vapours are highly flammable and explosive under certain conditions Gasoline and its vapor can easily be ignited by cigarette e...

Page 59: ...urfaces WARNING Danger Burns The muffler is very hot during and or immediate after engine operation Accidental contact with hot surfaces such as the muffler will result in serious burns 1 9 Keep child...

Page 60: ...machine is 1 1L for 7500 E SAE10W 30 engine oil is recommended for general all temperature usage Other viscosities oil as shown in the chart may be used when the average temperature in your area is wi...

Page 61: ...unit on a level surface 3 2 2 Remove the fuel filler cover Figure 13 Fig 14 3 2 3 Check the fuel level and add fuel if necessary Be sure not to add too full Fuel capacity for the machine 25L to 7500 E...

Page 62: ...tank and carburettor if the unit is not to be used for long time as fuel degeneration owing to long time storage may cause it difficult to start the engine 3 3 Air Cleaner 3 3 1 Remove the air cleane...

Page 63: ...it securely Figure 19 Fig 19 3 4 Battery For Electrical Start Models only 3 4 1 Check the battery and connecting ports 3 4 2 Check each cell of the battery to see if the electrolyte level of the batte...

Page 64: ...ting the Engine NOTE Before starting the engine be sure that all the pre operation check has been done 4 1 Unplug all AC sockets to disconnect loads 4 2 Check if the unit has been properly grounded 4...

Page 65: ...tion for E start Models for details please consult Chapter 8 Figure 25 4 7 If the engine fails to start please turn on the choke lever and repeat what you do in Section 4 6 WARNING After the engine st...

Page 66: ...l Devices Reference data of the rating wattage and the way to calculate the starting wattage of the electric appliances connecting to the generator Description Wattage Species Examples Start Rating El...

Page 67: ...en connecting loads to it 5 3 Connecting Sequence If there are two or more loads needing power supply from the generator be sure to connect them one by one with the one of highest start current first...

Page 68: ...ed output of the generator set CAUTION The generator set can work at its rated output only under constant temperature pressure and humidity The variation of temperature pressure and humidity may influ...

Page 69: ...ds 5 4 4 Turn on the AC breaker Figure 33 5 5 Instruction on DC Usage Pay special attention to the connection of positive and negative poles in DC application CAUTION The DC output should not be used...

Page 70: ...ich is not to be used for long time will cause it difficult to start the engine Drain the fuel for long time storage of the unit 7 Maintenance 7 1 Maintenance Schedule The Unit should be serviced acco...

Page 71: ...quate oil fluidity 7 2 1 Unscrew and take out the dipstick Figure 37 7 2 2 Unscrew the drain plug and drain engine oil from the crankcase 7 2 3 Put the drain plug back Figure 38 7 2 4 Fill engine oil...

Page 72: ...rbon fouling around the spark plug with a metal brush Figure 41 7 3 4 Check the spark plug clearance to see if it is between 0 7 0 8mm adjust it if necessary Figure 42 7 3 5 Re mount the spark plug an...

Page 73: ...Tilting generator set with battery may result in sulfuric acid leakage Keep children away from the unit Avoid liquid acid from touching your skin or eyes CAUTION If the unit is not to be used for long...

Page 74: ...ttery replaced as follows 8 4 1 Disconnect the positive and negative poles of the battery with wires 8 4 2 Remove the battery hold down plate 8 4 3 Install a new battery and the hold down plate 8 4 4...

Page 75: ...k plug Replace engine oil Gasoline stabilizer can ensure a longer storing time of gasoline 9 2 Preparation before Storage Carry out the following procedures for long time storage 9 2 1 Loosen the drai...

Page 76: ...At this position the inlet and outlet valves of the engine are closed so as to prevent the rusty crankcase 10 Troubleshooting 10 1 Failure to Start the Engine the generator cannot be started Figure49...

Page 77: ...k if there is spark jumping out Figure 53 Fig 53 10 1 5 If the generator set still cannot be started after the above steps consult your dealer for help Figure 54 Fig 54 10 2 Failure to Generate Power...

Page 78: ...25 Fig 55 Fig 56 10 2 2 Check if the AC breaker is at ON position Figure 56 10 2 3 If the problem still exists after the above steps consult your dealer for help Figure 57 Fig 57...

Page 79: ...d Speed 3000 3600 Volt Adjustment Digital AVR Automatic Voltage Regulation Ignition CDI Start Type Recoil start electric start Tank Volume 25L Minimum Fuel Consumption 295g Kwh Engine Oil Capacity 1 1...

Page 80: ...directives Machinery Directive 2006 42 EC Low Voltage Directive 2014 35 EU Electromagnetic Compatibility Directive 2014 30 EU RoHS Directive 2011 65 EU amended by 2015 863 EU EURO V Directive 2016 162...

Page 81: ...directives Machinery Directive 2006 42 EC Low Voltage Directive 2014 35 EU Electromagnetic Compatibility Directive 2014 30 EU RoHS Directive 2011 65 EU amended by 2015 863 EU EURO V Directive 2016 162...

Page 82: ...OMAGN TICA 2014 30 UE LA DISPOSICI N RoHS 2011 65 UE modificado por 2015 863 UE LA DISPOSICI N EURO V 2016 1628 EU EST DE ACUERDO CON LAS NORMAS EN ISO 8528 13 2016 EN 60204 1 2006 A1 2010 EN 55012 20...

Page 83: ...OMAGN TICA 2014 30 UE LA DISPOSICI N RoHS 2011 65 UE modificado por 2015 863 UE LA DISPOSICI N EURO V 2016 1628 EU EST DE ACUERDO CON LAS NORMAS EN ISO 8528 13 2016 EN 60204 1 2006 A1 2010 EN 55012 20...

Reviews: