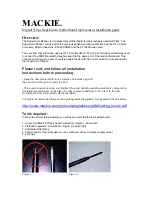
Parts Supplied:
1. P4spa+ Supermicro motherboard.
2. Midi/footswitch
conversion
cable.
Before You Start
You’ll need to do the following things before starting to open up your Digital X Bus:
• Make sure the console is completely shut off and unplugged from any AC power source. Before
you begin to remove the Iwill motherboard make sure the motherboard power LED is not lit this
guaranty that there is no AC power present.
• Unplug all audio and sync cables from the rear panel.
• Unplug any USB peripherals, mouse, keyboard, or anything other cables attached to the rear
panel.
• Place the Digital X Bus on a surface larger than the console, away from any carpeting or static-
prone area(s). This surface will need to extend beyond the rear side of the Digital X Bus by at
least three feet (or one meter) of distance, because the rear panel will eventually slide out (like a
drawer) and you will need to make sure it is supported and doesn’t fall out of the mixer.
!
Note
: We recommend
using an anti-static strap that fits on your wrist, and has
a cord that clips to the metal chassis of the Digital X bus. This will discharge any static
electricity
from you onto the chassis, and prevent zapping the sensitive electronic parts.
WARNING
: The wrist-strap and cord are electrically conductive and present
a potentially LETHAL safety hazard. Once you are wearing it, keep the cord
away from all live electrical circuits, outlets, sockets, contacts, electric heaters, or
toasters for example.
• Damage caused to the Digital X bus due to improper installation or handling of
these components will not be covered under warranty.
Summary of Contents for DIGITAL XBUS - SOFTWARE
Page 25: ......


