


13
CHAPTER6
POWER OUTAGES
If want to cut off the printer power, please press the power button again. You could do it at anytime, it will not damage the printer.
And there is no need to operate any other steps. If you do it when printer is making parts, it will not finish the current printing task.
Note:
After turning off the power switch, the system cooling fan and indicator light will continue to work for a few seconds.
CHAPTER7
GENERAL MAINTENANCE
7.1
Daily Preventive Maintenance
1.
After the completion of each production, cleaning the printing plate and all of accumulated materials with lead screw. If not, can
cause the printing platform is not in a horizontal position, or stuck at the printing platform in its upper limit.
2.
Check the printing nozzle. After the completion of each production, you should examine the nozzle to ensure without accumulated
materials. if there is, please clean the nozzle parts. Because it will cause parts quality problems.
3.
Use a vacuum cleaner to clean the print production Chamber in order to absorb all residual material and extrusion materials.
4.
Clean the door, do not use ammonia-based glass cleaner on the door, otherwise it will damage the window. Use only ethanol
cleaner
5.
Periodically lubricate the axes X,Y and Z
7.2
Maintenance
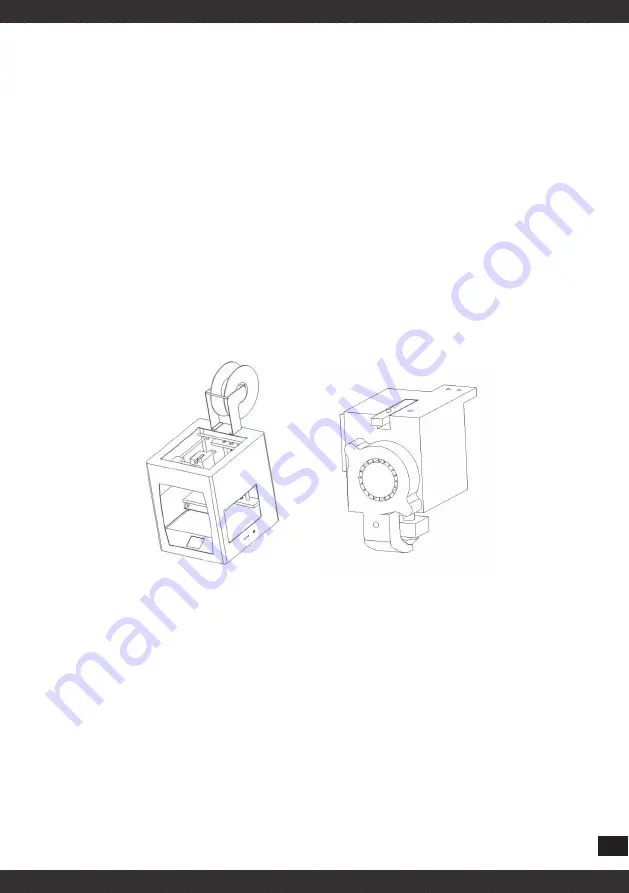
7.2.1
About every 500 hours should clean up the nozzle parts
1.
Cut off the printer power completely.
2.
Loosen the screw on the heating blocks
3.
Use sleeve to twist down the nozzle, take out feeding tube.
4.
Take out the new feeding tube from kit, cut 52 mm then install in original
7.2.2
2000 Hours Maintenance
After running more than 2000 hours, printing nozzle would impair. May be there are have a negative impact with the surface flatness
and details of the model. The steps of maintenance as same as the “ 500 hours maintenance” to change new feeding tube, and replace
with a new printing nozzle in the kit.


