13
Configuring a Fixed IP Address to the NAS in Mac
If DHCP server is not available in your network, G-S350UN uses its default IP address 192.168.1.202.
If this default IP does not fit into your LAN environment, then you have to configure G-S350UN with
an IP address suitable to your LAN. If you don’t have a PC computer in your LAN network to use
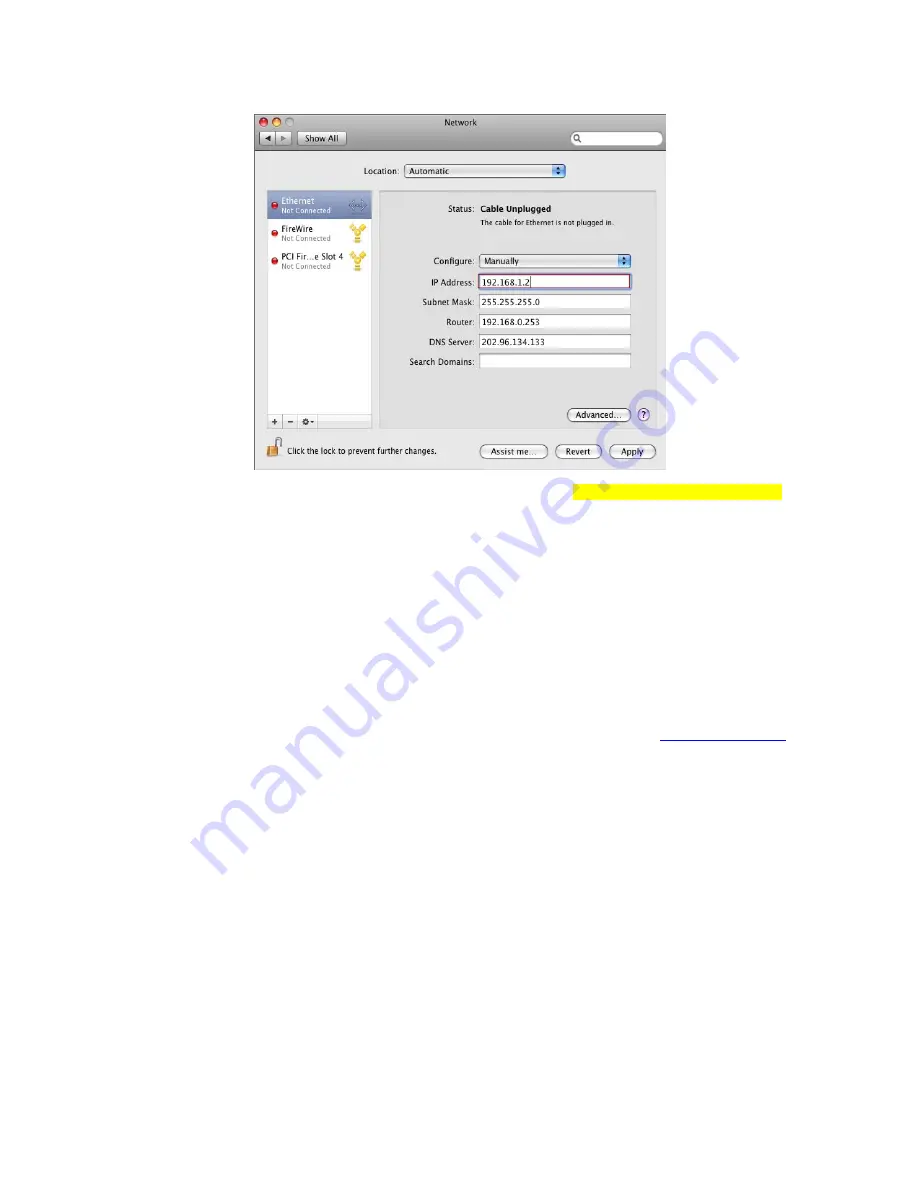
SetupUtil.exe to configure G-S350UN as described in previous section, you can change your Mac
computer’s IP address temporarily to 192.168.1.2 and subnet 255.255.255.0 in order to connect to
the NAS to configure it.
First connect G-S350UN into your Mac’s Ethernet port directly using the Ethernet cable included in G-
S350UN package. Turn on both G-S350UN and your Mac. Open System Preferences in your MacOS
X and then click the “Network” icon. From the screen similar to above, WRITE DOWN YOUR
CURRENT CONFIGURE SETTING(EITHER “USING DHCP” OR “MANUALLY”), IP ADDRESS,
SUBNET MASK, ROUTER AND DNS INFO FIRST, YOU WOULD NEED THEM TO RESTORE BACK
TO THE CURRENT SETTINGS LATER ON. Then select “Manually” in Configure field and change the
current Mac computer’s IP address into IP address 192.168.1.2, and enter 255.255.255.0 in Subnet
Mask. Click “Apply” to complete.
Then launch the web browser Safari or Internet Explorer from MacOS X, type in
http://192.168.1.202
in address field and press Enter key, NETWORK STORAGE ADMINISTRATOR Login screen will
appear as shown below.
Summary of Contents for G-S350UN
Page 14: ...14 Please enter admin as Username and Password...
Page 37: ...37 FTP Log DHCP Server Log System Log Administration Log...
Page 48: ...48 Step1 click on Set Up Printers button Step 2 click on Add button...
Page 51: ...51 Step2 Select IP Printer then click on More Printers button Step 3 Select Windows Printing...
Page 54: ...54 Step 8 Example printing choose lp as printer Step 9 Print job is executed For MacOS 10 5...
Page 55: ...55 Step 1 Click on button Step2 Select Windows then click on workgroup...


