background image

6DV-B / 6DVI-B

5-2-55, Minamitsumori, Nishinari-ku, Osaka 557-0063 JAPAN
Phone: +81(6)6659-8201  Fax: +81(6)6659-8510  E-mail: [email protected]

EM-4220-A  Rev.9  P. 5 / 8

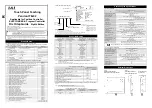
CONNECTION DIAGRAM

For use in potentially explosive atmosphere or in hazardous (classified) locations, please follow instructions in ‘SAFE IN-
STALLATION MANUAL’ provided separately for each type of certification.

ENTR / ESC

BACK / DOWN

NEXT / UP

LED Display

Internal

Bridge

Power Source

1

2

4

3

+

ENTR / ESC

BACK / DOWN

NEXT / UP

LED Display

Internal

Bridge

Power Source

1

2

4

3

+

• WITHOUT TERMINAL BLOCK (Euro terminal block at the rear of indicator module)

ENTR / ESC

BACK / DOWN

NEXT / UP

LED Display

Internal

Bridge

1

2

4

3

+

ENTR / ESC

BACK / DOWN

NEXT / UP

LED Display

Internal

Bridge

1

2

4

3

9

10

12

11

9

10

12

11

+

• WITH TERMINAL BLOCK

Two-wire

Transmitter

+

Two-wire

Transmitter

+

*

1

Non-Hazardous
Location

Hazardous Location

Safety Barrier

Power Source

Power Source

Two-wire

Transmitter

+

Two-wire

Transmitter

+

*

1

Non-Hazardous
Location

Hazardous Location

Safety Barrier

*

1

Non-Hazardous
Location

Hazardous Location

Safety Barrier

*

1

*

3

*

2

Non-Hazardous
Location

Hazardous Location

Safety Barrier

A safety barrier must be installed for the intrinsic safety.
The safety barrier must meet the Ex-data of this unit and must be approved for the hazardous location.
In order to use a two-wire transmitter in the TIIS intrinsically safe circuit, the combination of the 6DV-B 
with the transmitter must be re-evaluated and approved by the TIIS.
This connection digram is not applicable for the TIIS intrinsic safety.

*

1.

*

2.

*

3.

■ 

2-WIRE CONNECTION EXAMPLE

Summary of Contents for 6DV-B

Page 1: ...igurations connected devices connected wires may af fect the protection level of this unit when it is integrated in a panel system The user may have to review the CE requirements in regard to the whol...

Page 2: ...op Wiring Conduit Case Internal Earthing Screw Internal Earthing Screw External Earthing Screw Terminal Block Screw Cover Indicator Specifications top Wiring Conduit Case External Earthing Screw Screw...

Page 3: ...or to increase parameter values How to Reset All Parameters to the Factory Setting Turn off the power supply to the module In pressing all the three control buttons at once turn it on When a message a...

Page 4: ...Safe Installation Manual WITHOUT TERMINAL BLOCK 1 Loosen the screws on top of the indicator and separate the indicator module from the case 2 Fasten wires to terminals at the rear side of the indicato...

Page 5: ...EXT UP LED Display Internal Bridge 1 2 4 3 9 10 12 11 9 10 12 11 WITH TERMINAL BLOCK Two wire Transmitter Two wire Transmitter 1 Non Hazardous Location Hazardous Location Safety Barrier Power Source P...

Page 6: ...nstalled for the intrinsic safety The safety barrier must meet the Ex data of this unit and must be approved for the hazardous location In order to use a two wire transmitter etc in the TIIS intrinsic...

Page 7: ...et a four digit number to protect the user s configurations MENU MODE is available only when the code is entered The lockout is canceled when is set ENTR ESC The scaled value for the nth input is set...

Page 8: ...of effective digits in this case is reduced by 1 digit compared from the 3 decimal places Select appropriately for the application Refer to Program ming Procedure for how to choose decimal point posi...

Reviews: