10.
Save button (save the pre-setting spot)
11.
Data port (connect the conference main unit)
12.
RS232 port (connect the computer)
13. High speed dome control port, RS485/RS232 (connect to the high speed dome data control
line)
14. High speed dome video input port (connect the high speed dome video signal)
15. Video port (connect the monitor)
16. Power supply (AC220V)
High speed dome characteristics:
18 times auto-focus len, focusing distance: 4.1~73.8 mm.
The horizontal direction can be 360 degrees unrestricted rotation, running speed can be up to
254 degrees / sec, vertical direction speed can be moved 95 degrees, running speed can be up
to 80 degrees / sec.
64 preset spots, can be set with programs and save, and call the preset spot freely for
Checking
63 high speed domes can be connected
Full-features automatic or manual control. aperture white balance, gain compensation with
reversible light and automatic gained. Both automatic and manual control is work.
Camera components: 1/4 Inch interline transfer CCD
Action pixels: 380,000 768(H)X 494 (V)
Resolution: 480 TVL
Please refer details operation in the camera using manual
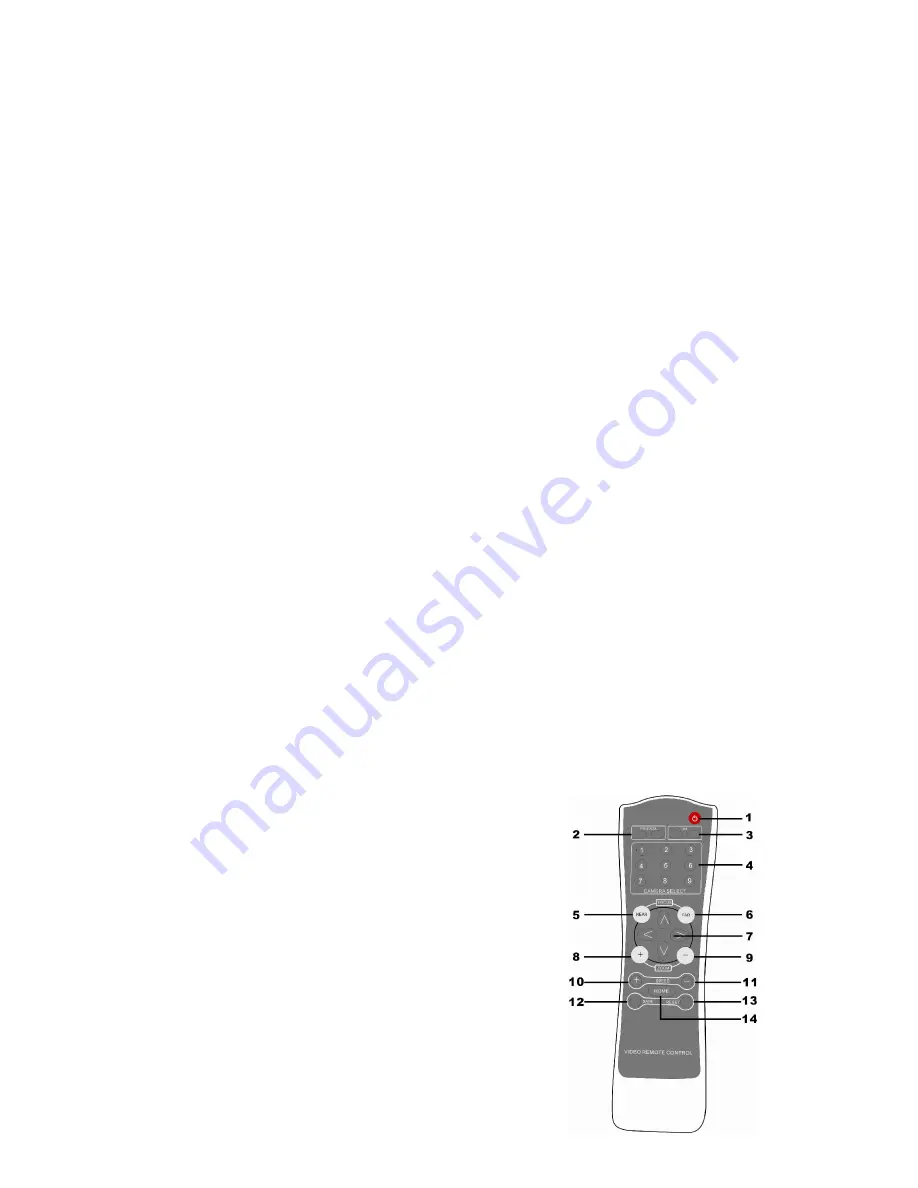
Remote control using instruction:
The remote control used in setting automatic location for following camera preset spot, open
and install AAA battery when using, and take it out if don’t used for long time. Make sure the
central processor in the working state when setting, it is better to point the remote control to
the IR Lens in the central processor; Remote control transmitting distance is about 15M. Turn
on the related microphone in manual operation when setting (in FIFO mode), after debug the
required image by saving button and then to the next point of a preset settings
1.
Remote control on/off button
2.
Protocol setting ( original Pelco-D)
3.
Baud rate setting (original 9600)
4.
High speed dome choosing button(1-8)
5.
Focus near
6.
Focus far
7.
Camera dome direction adjustment button: up, down,
left, right
8.
Zoom +
9.
Zoom –
10.
Camera speed s
11.
Camera speed setting –
12.
Save, press this button for one second after set the
preset, then it will save the data
Summary of Contents for H-8000
Page 1: ...CONFERENCE VIDEO PROCESSOR H 8008 INSTRUCTION MANUAL ...
Page 5: ......
Page 6: ...System connection ...


