background image

Adjusting the light

Dimming

Rotate the power and dimming 
wheels until the desired effect 
is achieved. Turning up the left 
wheel will result in a cooler light, 
while turning up the right wheel 
will result in a warmer light. By 
adjusting the two dials, you can 
achieve any color temperature 
between 3200 and 5400 K.

Mounting the filters

To install the diffusion or color 
filters, slide the filter into the 
insertion slot on the top of the 
light unit.

Summary of Contents for CNS-40B

Page 1: ......

Page 2: ...ng for any situation Providing powerful and portable illumination the Large Daylight Block features a 160 bulb bicolor LED panel flicker free dimmability and compatibility with multiple battery types...

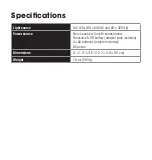
Page 3: ...160 LEDs 80 5400 K and 80 3200 K Power source Sony L series or Sony M series battery Panasonic D 28 battery adapter plate included 6 AA batteries adapter included DC power Dimensions 5 1 5 3 5 12 7 3...

Page 4: ...device contains small parts which may pose a choking hazard Keep out of reach of children Do not operate this device in the presence of flammable gas or vapor Do not use this product if it emits smoke...

Page 5: ...cover the ventilation grille found at the rear of device when in operation and ensure the light is cool before storing Do not use or leave this device in conditions of extreme heat severe cold or high...

Page 6: ...Overview Front 1 Filter insertion slot 2 Quick mount wing clips Back 3 Power and dimming wheels 4 Battery meter 5 DC power input 6 Battery mounting area 7 Threading mount 1 2 4 5 6 7 3...

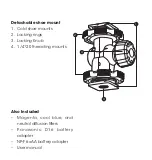
Page 7: ...unt 1 Cold shoe mounts 2 Locking rings 3 Locking Knob 4 1 4 20 threading mounts Also Included Magenta cool blue and neutral diffusion filters Panasonic D16 battery adapter NP F 6 AA battery adapter Us...

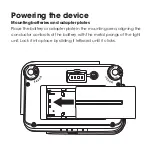
Page 8: ...batteries and adapter plates Place the battery or adapter plate in the mounting area aligning the conductor contacts of the battery with the metal prongs of the light unit Lock it into place by slidin...

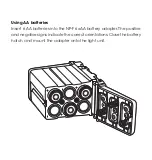
Page 9: ...g AA batteries Insert 6 AA batteries into the NP F 6 AA battery adapter The positive and negative signs indicate the correct orientations Close the battery hatch and mount the adapter onto the light u...

Page 10: ...ount without the 1 4 20 threading mount and slide it into the slot at the bottom of the light unit Tighten the locking ring firmly to secure the shoe in place 2 Use the cold shoe mount with the 1 4 20...

Page 11: ...wheel will result in a cooler light while turning up the right wheel will result in a warmer light By adjusting the two dials you can achieve any color temperature between 3200 and 5400 K Mounting the...

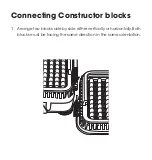
Page 12: ...Connecting Constructor blocks 1 Arrange two blocks side by side either vertically or horizontally Both blocks must be facing the same direction in the same orientation...

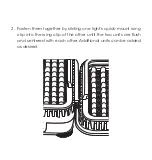
Page 13: ...2 Fasten them together by sliding one light s quick mount wing clip into the wing clip of the other until the two units are flush and centered with each other Additional units can be added as desired...

Page 14: ...its intended environment Inoperability of the product or part s shall be determined by the warranty provider If the product has been discontinued the warranty provider reserves the right to replace i...

Page 15: ...the RMA number and proof of purchase Shipment of the defective product is at the purchaser s own risk and expense For more information or to arrange service visit www luxlilight com or call Customer S...

Page 16: ...LUXLI is a registered trademark of the Gradus Group 2016 Gradus Group LLC All Rights Reserved www luxlilight com GG2...

Reviews: