


2.
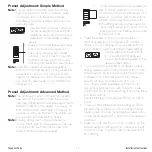
Select wallstation function (optional).
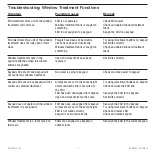
The info screen on the GRAFIK Eye
®
QS control unit
will display a prompt to change your wallstation’s
function (type).
Press the OK button on the QS control unit to
display the current wallstation function/type. To
change, use the master buttons to scroll through the
available choices until the function you want displays
on the info screen.
The keypad menu will display only functions that are
available for the wallstation model that is “talking” to it.
The example shown here is for a
5-button wallstation with raise/lower buttons.
Press the OK button to accept and save your
highlighted choice.
6
Installation Instructions
Occupant Copy
System Communications
In order for wallstations to communicate with a
control unit, each wallstation must be individually
configured to “talk” to a “listening” control unit.
In order for shade wallstations to control exclusively
a given group of window treatments (as opposed
to all window treatments in the system), each
shade wallstation must be individually configured to
“talk” to its respective window treatments.
(Only one wallstation can be in setup mode at a time.)
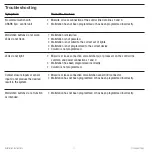
1.
Enter Setup Mode.
Press and hold simultaneously
for 3 seconds the top and bottom buttons (not
including raise/lower buttons) on the wallstation.
Note:
For wallstations
with two columns
of buttons, you will
program each set as
if each were its own
wallstation.
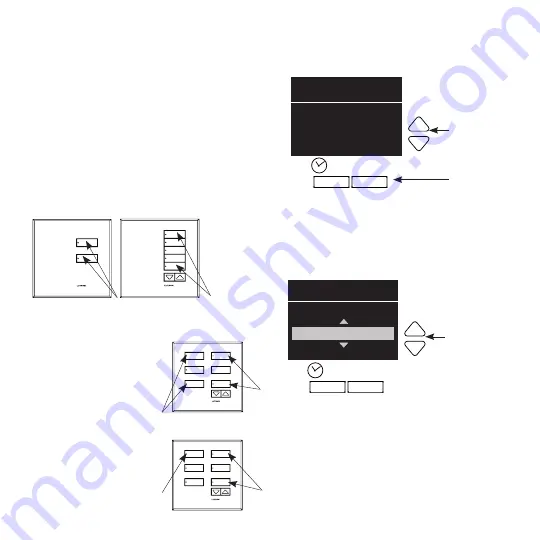
Note:
For multigroup
shade wallstations,
first select the group,
then program the
wallstation for that
group.
Press and hold the top and bottom buttons on your
wallstation for 3 seconds to enter setup mode.
OK
1
2
3
4
5
6
Keypad
Change type?
Press OK
Master
buttons
OK
button
OK
1
2
3
4
5
6
Change type?
01-04, off
Master
buttons
OK
button
1
Open
2
Preset
Off
Close
Group 1
Open
Group 2
Preset
Group 3
Close
Program
second
column
Program first
column
2. Enter
setup mode
1. Select
group


