background image

3.6 Monitoring

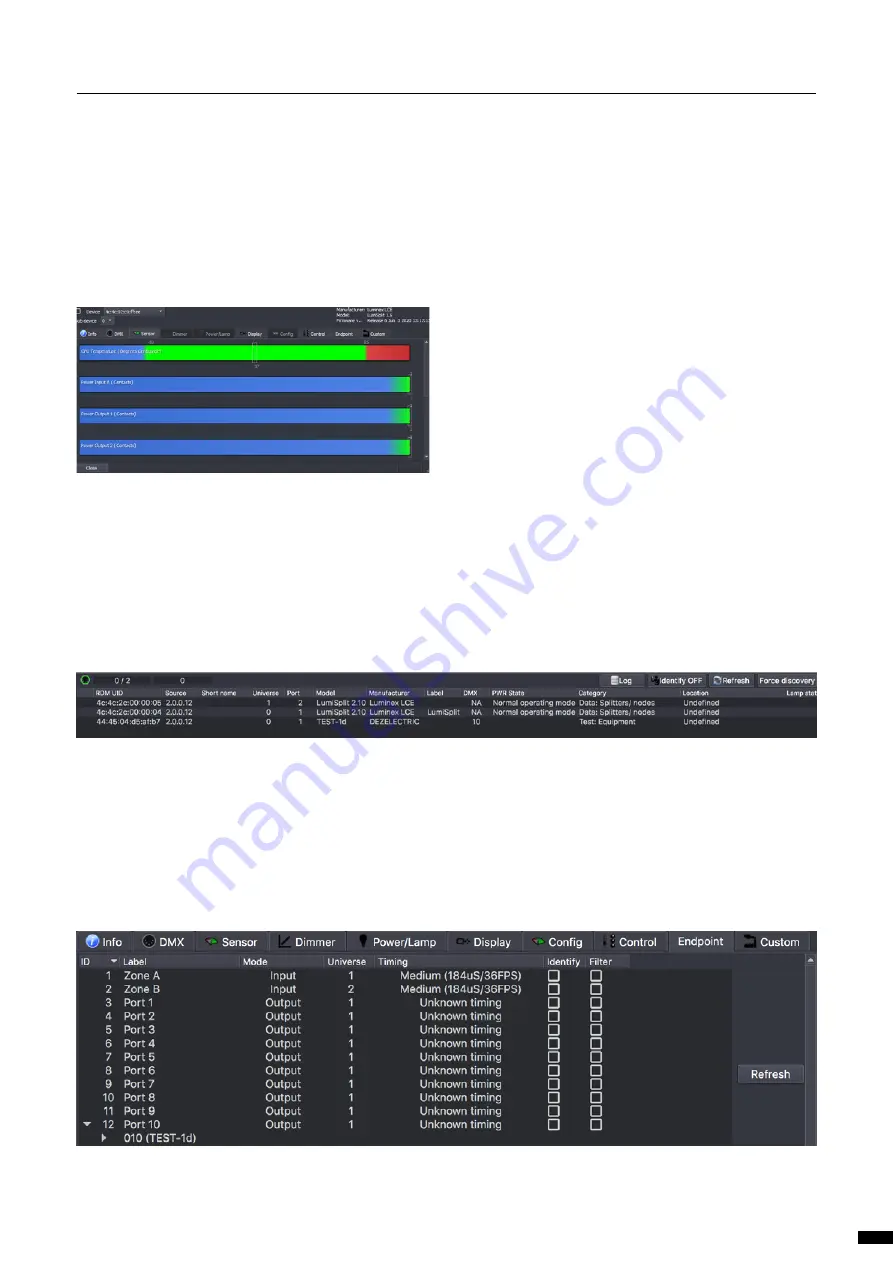
The RDM control panel enables you to monitor the status of all sensors 
embedded in the LumiSplit. The splitter comes with one temperature 
sensor, and one sensor per DC/DC converter (input and output).

3.7 Endpoint View

The LumiSplit 2.10 is the world’s first splitter to offer the endpoint view. 
Endpoints are any RDM compliant devices such as lighting fixtures, 
smoke machines, lasers, or any remotely managed devices.
If RDM devices are connected to the ports of the LumiSplit, you’ll be 
able to know which port they are connected to.
By default, any RDM device will be listed in the RDM panel as follows:

In this example, the RDM test device is connected to port 1 of the 
converter using 2.0.0.12 as an IP address.
To see which port of the LumiSplit the device is connected to, 
right click on one of the responders of the LumiSplit 2.10 and se-
lect Control.

In the control panel, click on the endpoint tab:

If RDM devices are connected to the splitter, they will appear on 
each port marked with a white triangle on the left-hand side. Ex-
pand these lists, and discover the devices connected to the select-
ed port. This feature makes your life easier when troubleshooting 
an installation, to follow the complete signal path. Hover your 
mouse over the discovered RDM device to get some more info 
about it.

The temperature sensor will indicate the actual inner temperature of 
the LumiSplit. The contact sensors will display the status of all DC/DC 
converters. A DC/DC converter’s sensor with a value of 1 means the 
DC/DC converter is working correctly.

To monitor the status of these sensors, right click on one of the re-
sponders, select Control, and then, click on the Sensor tab.

11

3 | THE NEW RDM EXPERIENCE / 

3.6 MONITORING / 3.7 ENDPOINT VIEW  

Summary of Contents for LumiSplit 2.10

Page 1: ...USER MANUAL LUMISPLIT PRODUCT FAMILY LumiSplit 2 10 THANKS FOR CHOOSING LUMINEX Description User Manual LumiSplit 2 10 REVISION 20200820 REV 6 0 0...

Page 2: ...2...

Page 3: ...e Selection 7 2 4 Modes in detail 8 2 5 Front Panel Lock 8 2 6 Factory Reset 8 3 THE NEW RDM EXPERIENCE 9 3 1 Discovery 9 3 2 Identify a LumiSplit 9 3 3 Lock Unlock the Front Panel 10 3 4 Dark Mode 10...

Page 4: ...local dealer if you don t have a suitable power cable on hand The device will automatically switch on To shut it down after use just un plug the power cable again After connecting the power cable corr...

Page 5: ...he selected mode D OUTPUT BUTTON Output selector enable disable RDM filtering per output E OUTPUT LED Indicates the output status and the selected mode 1 3 2 Rear Panel F POWER 1x Neutrik powerCONTRUE...

Page 6: ...ed blink Factory Reset Blue DMX fail mode or Startup mode configured PORT LED STATUS DESCRIPTION Input A front panel Blue DMX RDM Cyan DMX Only White blink RDM activity Input B front panel Red DMX RDM...

Page 7: ...enable or disable RDM filtering per zone A B The input LED indicator colour will change together with all associated output LED indicators RDM FILTERING PER OUTPUT Press the input button together with...

Page 8: ...ication with connected endpoints is no longer active 2 4 7 Regeneration Zone A B 7 A B This mode allows you to quickly select regeneration mode for both inputs The timing for each input will be set as...

Page 9: ...LumiNet Monitor 2 1 6 or higher and LumiSplit firmware v5 or higher are necessary to take full benefit of all the features listed below 3 1 Discovery Wrong text Should be The LumiSplit 2 10 comes wit...

Page 10: ...ers and select display level Here you can set the brightness either to low or full There is no intermediate value available for the brightness of the LEDs 3 5 Mode Selection Youcanremotelyselectoneoft...

Page 11: ...nnected to right click on one of the responders of the LumiSplit 2 10 and se lect Control In the control panel click on the endpoint tab If RDM devices are connected to the splitter they will appear o...

Page 12: ...ify a port If needed you can identify a port To do so tick the corresponding Identify check box and the LED of the selected port will blink white This can come in handy when you need to indicate the p...

Page 13: ...go to the Backup Recover main option and click on the Set button All output LEDs will turn blue again 3 8 2 Backup Auto Recovery The LumiSplit firmware version 6 onwards offers the option to automati...

Page 14: ...esending the last frame is the same as set for the regeneration mode default 36 FPS with a break time of 184 s Send snapshot makes it possible to send out the captured snap shot as lighting state with...

Page 15: ...ill follow the incoming DMX again LEVEL The level is a value that acts as a master level on the cap tured preset LumiSplit only supports 255 full as level 3 12 Messages The LumiSplit can send messages...

Page 16: ...is a knowledge base available online that gets updated on a regular basis at https support luminex be If you need to ask our team for more help or you need to return a de vice to Luminex for diagnosti...

Page 17: ...EFFECTIVE RELIABLE ACCESSIBLE YOUR NETWORK SOLUTION FOR AUDIO VIDEO AND LIGHTING 17...

Page 18: ...Slamstraat 13 3600 Genk Belgium T 32 11 812 189 info luminex be www luminex world...

Reviews: