


17
Operating the ZDClink Controller
Note
Always address one luminaire at a time. Attempting to
address more than one luminaire at a time can result
in assignment failures.
Assigning Luminaires into Groups
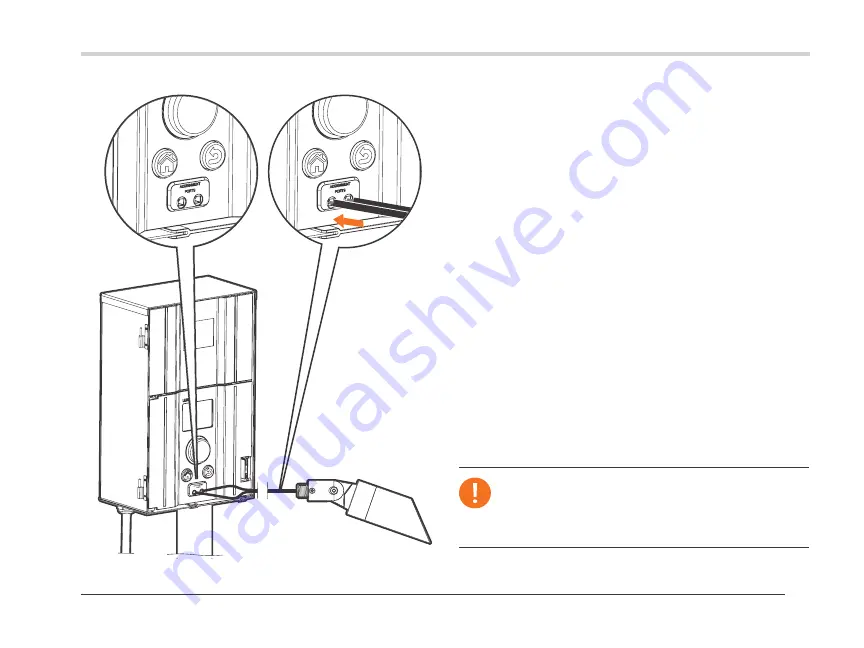
Figure 14: Luminaire assignment wire diagram
The lighting assignment screen is automatically displayed when
an Lumascape low-voltage LED luminaire or device containing
ZD Technology or ZDC Technology is connected into the
assignment ports of the controller facepack. This mode can also
be forced by navigating to
Setup
and selecting
Assign
.
1. Enter this mode by placing two separate wires from a single
Lumascape low-voltage LED luminaire or device containing
ZD Technology or ZDC Technology into each of the
assignment ports on the front of the facepack. The wires
must maintain contact inside the assignment ports during
the entire process.
2. Navigate to
Program
and press the scroll wheel to
initiate assignment. When complete, the screen will
show “Assignment Successful” or “Assignment Failed.”
If failed, reposition wires and try again. If the problem
persists, the board or device may either be defective or not
programmable.
3. The assigned group number is stored in the device (e.g., LED
board, lamp, CUBE) and not in the facepack. Thus, power loss
or other errors within the ZDClink Controller will not affect
the luminaire assignment. If a device is replaced, the new
device must be programmed to the desired group number.
Summary of Contents for ZDClink
Page 38: ...38 Notes ...
Page 39: ...39 Notes ...


