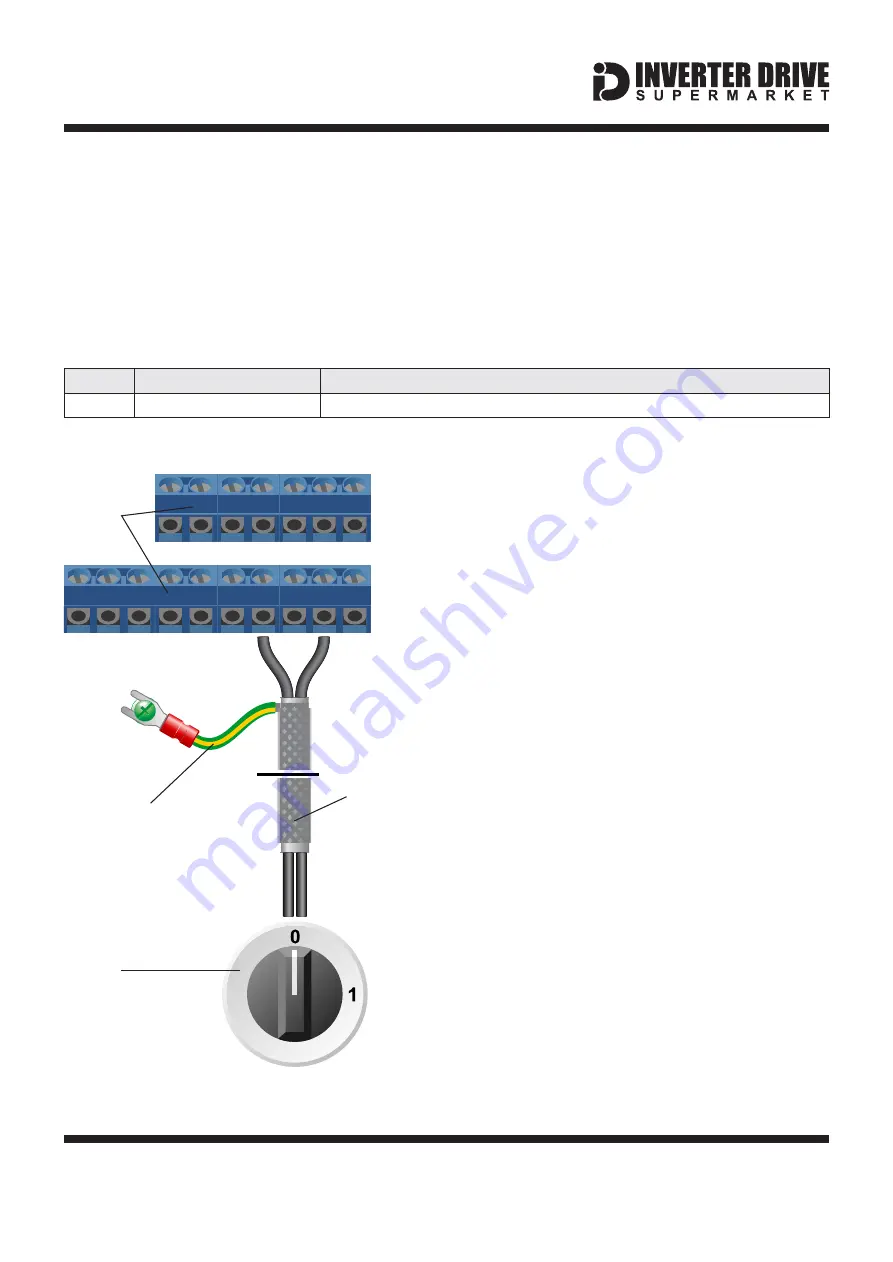
CM
Screen to
Earth Terminal
iC5 I/O
Terminal
Blocks
Switch
SY Cable
Easy Start Guide
10. How to connect and configure a Run/Stop switch
LS Industrial Systems SV-iC5
Page 11
This guide has been produced by The Inverter Drive Supermarket Ltd.
All content, including but not limited to graphics, text and procedures copyright
The Inverter
Drive Supermarket and must not be reproduced or altered without prior written permission.
©
2
P1
Parameter
Description
How to set
drv
Run/Stop Command Source
Set to
for Programmable Input 1 “P1".
1
10.1 Parameters to change in the Drive Group
Press left/right to find 0.0 then up/down to find parameter number
The parameters described in Section 4 enable
Run/Stop operation via the red and green
buttons on the Inverter.
If this is unsuitable for the application, a remote
Run/Stop switch can be used instead.
Note that once this procedure is complete, the
Run/Stop buttons on the Inverter can no longer
be used.
Important: P1 refers to the P1 I/O terminal
and NOT the P1 power terminal.
1
2
1
10.2 Connecting the Switch
Digital Input
A wiring diagram is shown in the illustration
opposite.
The CM terminal output is 24V DC when the
Inverter is connected to a power supply. This is
provided as a 24V output only and has no other
function.
When the P1 terminal receives 24V (ie. when
the circuit with CM is complete), Run is
enabled and motor will turn. Conversely, when
it receives 0V (ie. when the circuit with CM is
broken), Run is disabled and the motor will
stop.
This behaviour is known as a
.
Any 24V DC signal connected to P1 will cause
the Inverter to run. This can be useful if an
external source such as a PLC is controlling
the Inverter. If the 24V DC signal is external, a
connection to CM is not required.
Use shielded SY cable between the switch and
Inverter and ensure that the cable screen is
earthed at the green earth terminal on the
Inverter.
Note that although 2 core SY cable is shown in
the illustration opposite, multi-core SY cable
can be used if several digital inputs are to be
used.


