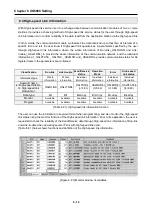


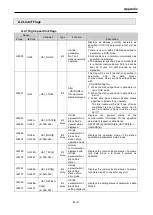


Chapter 7 Program Example
7 - 9
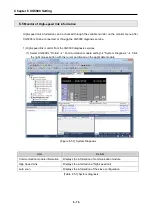
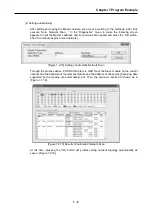
(2) Setting automatically
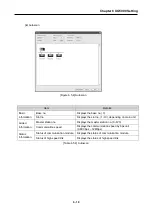
After setting and saving the Master module, set access according to the methods. After that,
execute “Auto. Network Scan…” in the “Diagnostics” menu to make the following screen
appeared. Input the Master’s address and its communication speed and press the ‘OK’ button.
Then, the module begins to scan networks.
[Figure 7.2.14] Setting of Automatic Network Scan
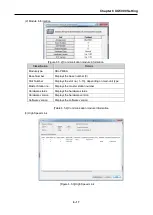
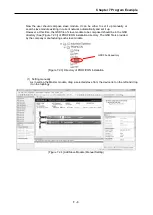
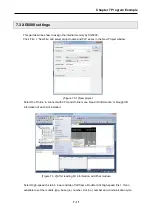
Through the process above, PROFICON refers to GSD file of the Slave module on the current
network and the data size of the relevant module and the address of the sending/receiving data
supported by the module are automatically set. Then, the scanned results are shown as in
[Figure 7.1.16].
[Figure 7.2.15] Results of Automatic Network Scan
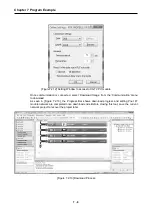
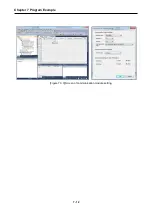
At this time, pressing the “OK’ button will prompt setting network topology automatically as
seen in [Figure 7.2.16].
Summary of Contents for XBL-PMEC
Page 50: ...Chapter 5 PROFICON Setting 5 18 Figure 5 4 8 Network topology collected and composed...
Page 84: ...Chapter 7 Program Example 7 12 Figure 7 3 3 Screen of communication module setting...
Page 91: ...Chapter 8 Troubleshooting 8 3 8 5 Troubleshooting 8 5 1 Connection error on PROFICON XG5000...
Page 99: ...Appendix A 7 A 4 External Dimensions Unit mm XBL PMEC XBL PMEC...