background image

7

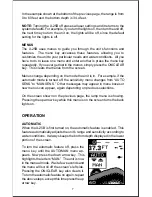
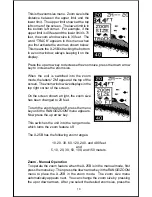
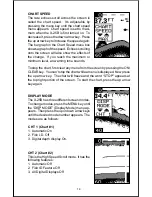
In the example shown at the bottom of the previous page, the range is from
0 to 60 feet and the bottom depth is 34.4 feet.

NOTE: Turning the X-25B off erases all user settings and it returns to the
system defaults. For example, if you turn the lights on, then turn the unit off,
the next time you turn the unit on, the lights will be off, since the default
setting for the lights is off.

MENUS
The X-25B uses menus to guide you through the unit’s functions and
features.  The menu key accesses these features, allowing you to
customize the unit to your particular needs and water conditions.  All you
have to do to leave one menu and enter another is press the menu key
repeatedly.  If you ever get lost in the menus, simply press the ON/CLEAR
key.  This clears the menus from the screen.

Menus change depending on the mode the unit is in.  For example, if the
automatic mode is turned off, the sensitivity menu changes from “AUTO
SENS” to “MAN SENS.”  Other messages may appear in menu boxes or
new menus can appear, again depending on previous selections.

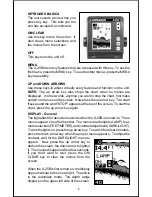
On the screen shown on the previous page, the lamp menu is showing.
Pressing the up arrow key while this menu is on the screen turns the back
lights on.

OPERATION

AUTOMATIC
When the X-25B is first turned on, the automatic feature is enabled.  This
feature automatically adjusts the unit’s range and sensitivity according to
water conditions.  It always keeps the bottom depth displayed in the lower
portion of the screen.

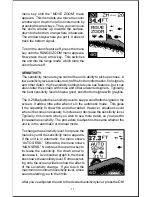
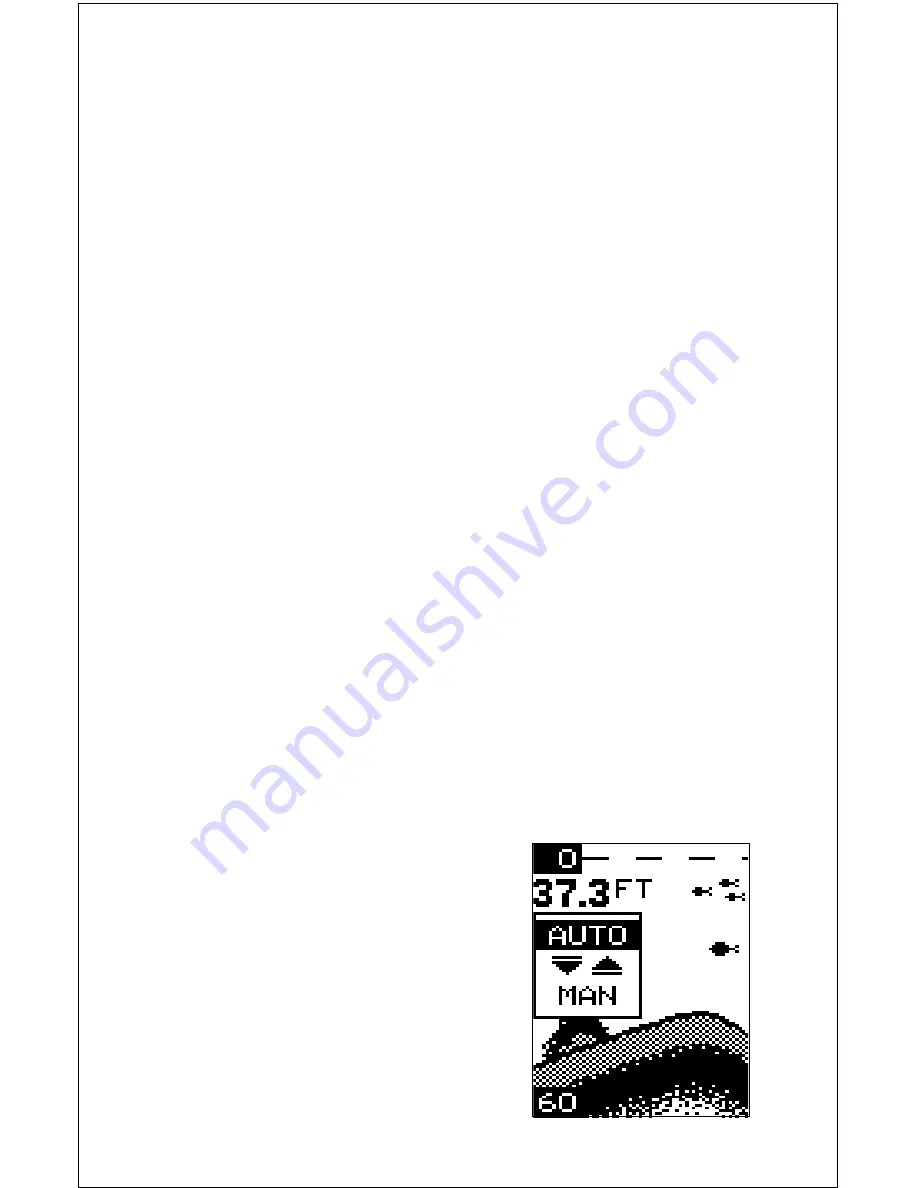
To turn the automatic feature off, press the
menu key until the AUTO/MAN menu ap-
pears.  Now press the down arrow key.  This
highlights the letters “MAN.”  The unit is now
in the manual mode.  Wait a few seconds and
the menu will scroll off the screen’s left side.
Pressing the ON/CLEAR key also clears it.
To turn the automatic feature on again, repeat
the above steps, except this time press the up
arrow key.

Summary of Contents for X-25B

Page 1: ...1 X 25B X 25B X 25B X 25B X 25B INSTALLATION AND OPERATION INSTRUCTIONS ...

Page 2: ...14 DISPLAY MODE 14 ALARMS 15 LIGHT 16 FEET METERS 16 DISPLAY CONTRAST 17 ASP Advanced Signal Processing 17 SIMULATOR 18 FISH ARCHES 19 WATER TEMPERATURE AND THERMOCLINES 20 TROUBLESHOOTING 21 WARRANTY 25 UPS RETURN SERVICE USA ONLY 26 MISSING PARTS 28 HOW TO OBTAIN SERVICE INTERNATIONAL ONLY 29 Copyright 1995 Lowrance Electronics Inc All rights reserved All features and specifications in this manu...

Page 3: ...en read the rest of the manual The more you know about your unit the better it will perform for you Take this manual for reference when you head for the water NOTICE The storage temperature for your unit is from 4 degrees to 167 degrees Fahrenheit 20 degrees to 75 degrees Celcius Extended storage in tempera tures higher or lower than specified will damage the liquid crystal display in your unit Th...

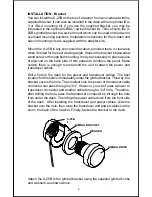
Page 4: ...panels to reinforce the panel Make certain there is enough room behind the unit to attach the power and transducer cables Attach the X 25B to the gimbal bracket using the supplied gimbal knobs and washers as shown above Drill a hole in the dash for the power and transducer cables The best locationforthisholeisimmediatelyunderthegimbalbracket Thisway the bracket covers the hole The smallest hole th...

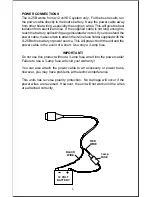
Page 5: ...holdersuppliedwiththe X 25B to the battery or power source This will protect both the unit and the power cable in the event of a short Use only a 3 amp fuse IMPORTANT Do not use this product without a 3 amp fuse wired into the power cable Failure to use a 3 amp fuse will void your warranty You can also attach the power cable to an accessory or power buss however you may have problems with electric...

Page 6: ...ey The chart freezes and the word STOP appears at the top of the screen To start the chart press the up arrow key again DISPLAY General The lights flash for about ten seconds when the X 25B is turned on Three menusappear oneaftertheother Themenusarethelights LAMP feet meterselection FEET METER andcontrastadjustment DARK LIGHT To turnthelightson press the up arrow key To switch fromfeetto meters pr...

Page 7: ... in For example if the automatic mode is turned off the sensitivity menu changes from AUTO SENS to MAN SENS Other messages may appear in menu boxes or new menus can appear again depending on previous selections On the screen shown on the previous page the lamp menu is showing Pressing the up arrow key while this menu is on the screen turns the back lights on OPERATION AUTOMATIC When the X 25B is f...

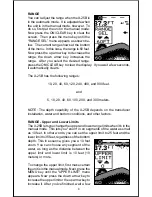
Page 8: ...eet and 5 10 20 40 60 100 200 and 300 meters NOTE The depth capability of the X 25B depends on the transducer installation water and bottom conditions and other factors RANGE Upper and Lower Limits TheX 25Bletsyouchangetheupperandlowerrangelimitswhenit sinthe manual mode This lets you zoom in on segments of the water as small as 10 feet In other words you can set the upper limit to 25 feet and the...

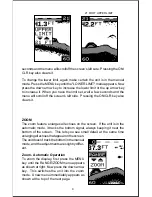
Page 9: ...g the ON CLR key also clears it ZOOM The zoom feature enlarges all echoes on the screen If the unit is in the automatic mode it tracks the bottom signal always keeping it near the bottom of the screen This lets you see small detail at the same time enlargingallechoesthatappearonthescreen Theunitdoesn ttrackthebottominthemanual mode and the adjustments are slightly differ ent Zoom Automatic Operati...

Page 10: ...e the letters ZM appear at the top of the screen Thezoomwindowsizedisplaysinthe top right corner of the screen On the screen shown at right the zoom size has been changed to 20 feet To turn the zoom feature off press the menu key until the RANGE ZOOM menu appears Now press the up arrow key This switches the unit into the range mode which turns the zoom feature off The X 25B has the following zoom ...

Page 11: ...h grayline The X 25B adjusts the sensitivity level to keep a solid bottom signal on the screen It adds a little extra when it s in the automatic mode This gives it the capability to show fish and other detail However situations occur where it becomes necessary to increase or decrease the sensitivity level Typically this occurs when you wish to see more detail so you need to increase the sensitivit...

Page 12: ...ifferent sensitivity setting To change the Grayline level first press the MENU key until the Grayline menu appears Now press the up arrow key to increase the level the down arrow to decrease it The bar graph in the Grayline menu box shows the levelofGraylinenowinuse Echoesscrolling onto the screen will also show the effects of the Grayline change If you reach the maxi mum or minimum level a tone s...

Page 13: ...ure on press the menu key until the Fish ID feature s menu appears as shown at right Now press the up arrow key This turns the feature on To turn it off repeat the above steps but press the down arrow key instead The Fish ID feature can t be used when the X 25B is in the manual mode If you turn the automatic feature off the Fish ID feature will automatically be turned off also FISHTRACK The X 25B ...

Page 14: ... chart first clear any menu from the screen by pressing the ON CLEARkey Youcan tstopthechartwhileamenuisdisplayed Nowpress the up arrow key The chart will freeze and the word STOP appears at the top right portion of the screen To start the chart press the up arrow key again DISPLAY MODE The X 25B has three different screen modes To change modes press the MENU key until the DISP MODE Display Mode m...

Page 15: ...pth alarms are triggered only by the bottom signal No other echoes will activate these alarms The depth alarms consist of a shallow and deep alarm The shallow alarm sounds an alarm tone when the bottom goes shallower than the alarm s setting The deep alarm sounds a tone when the bottom goes deeper than it s setting Both alarms adjust the same although through different menus Shallow Alarm To set t...

Page 16: ... the setting an alarm tone sounds LIGHTS The X 25B s display is backlighted for night use Toturnthebacklightsonoroff pressthe menu key repeatedly until the LAMP menu appears Now press the up arrow to turn the lights on or the down arrow to turn them off The menu will clear automatically after a few seconds FEET METER The X 25B can show the depth in feet or meters When the unit is in the metric mod...

Page 17: ...um or minimum level a tone sounds alerting you to the limits The menu willclearautomaticallyafterafew secondsor presstheON CLEARkeytoclearthescreen ASP Advanced Signal Processing ASP is a program embedded in the X 25B s computer that is specifically designed to eliminate noise It continually monitors the signals from the receiver determineswhichechoesarenoiseandrejectsthem Thisallows true target e...

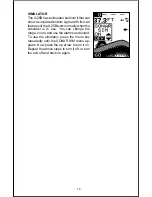
Page 18: ...oftheX 25Bworknormallywhenthe simulator is in use You can change the range zoom and use the alarms as desired To use the simulator press the menu key repeatedly until the SONAR SIM menu ap pears Now press the up arrow to turn it on Repeat the above steps to turn it off or turn the unit off and back on again ...

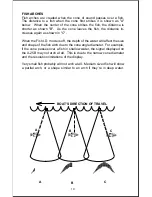
Page 19: ...ance in creases again as shown in C When the Fish I D mode is off the depth of the water will affect the size and shape of the fish arch due to the cone angle diameter For example if the cone passes over a fish in shallow water the signal displayed on the X 25B may not arch at all This is due to the narrow cone diameter and the resolution limitations of the display Very small fish probably will no...

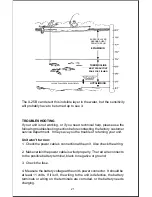
Page 20: ... During the winter colder water slows down their metabolism At this time they need about a fourth as much food as they consume in the summer Most fish don t spawn unless the water temperature is within rather narrow limits The surface temperature meter built into the X 25B helps identify the desired surface water spawning temperatures for various species Trout can t survive in streams that get too...

Page 21: ...attery voltage at the unit s power connector It should be at least 11 volts If it isn t the wiring to the unit is defective the battery terminals or wiring on the terminals are corroded or the battery needs charging TROUBLESHOOTING If your unit is not working or if you need technical help please use the following troubleshooting section before contacting the factory customer service department It ...

Page 22: ...tomatically increase its Discrimination or noise rejection feature This can cause the unit to eliminate weaker signals such as fish or even structure from the display 3 The water may be deeper than the sonar s ability to find the bottom If the sonar can t find the bottom signal while it s in the automatic mode the digital will flash continuously It may change the range to limits far greater than t...

Page 23: ...etargets allowingthedisplaytoshow much more detail 4 The boat must be moving at a slow trolling speed to see fish arches If the boat is motionless fish stay in the cone showing on the display as straight horizontal lines ELECTRICAL NOISE A major cause of sonar problems is electrical noise This usually appears onthesonar sdisplayasrandompatternsofdotsorlines Inseverecases it can completely cover th...

Page 24: ...gs alternator or tachometer wiring Try using resistor spark plugs alternator filters or routing the sonar unit s power cable away from engine wiring Again routing the power cable directly to the battery helps eliminate noise problems Make certain to use the in line fuse supplied with the unit when wiring the power cable to the battery When no noise appears on the sonar unit after all of the above ...

Page 25: ...ENT OR REFUND AS JUST DESCRIBED IS THE EXCLUSIVE REMEDY AVAILABLE TO YOU AGAINST US FOR ANY DEFECT MALFUNCTION OR NON CONFORMITY CONCERNING THE PRODUCT OR FOR ANY LOSS OR DAMAGE RESULTING FROM ANY OTHER CAUSE WHATSOEVER WE WILL NOT UNDER ANY CIRCUMSTANCES BE LIABLE TO ANYONE FOR ANY SPECIAL CONSEQUEN TIAL INCIDENTAL OR OTHER INDIRECT DAMAGE OF ANY KIND Some states do not allow the exclusion or lim...

Page 26: ... Authorization RA Number 2 Pack your unit and any accessories in the original shipping container if possible Be sure to include proof of purchase for warranty verifica tion 3 Write a brief note detailing the problem you re having with the unit Please include your name address and daytime telephone number 4 Please include payment for non warranty repairs Check money order Visa or MasterCard may be ...

Page 27: ...r transducers please contact 1 Your local marine dealer Most quality dealers that handle marine electronic equipment should be able to assist you with these items Consult your local telephone directory for listings 2 LEI Extras Inc P O Box 129 Catoosa OK 74015 0129 or call 800 324 0045 USA orders only Lowrance Electronics may find it necessary to change or end our shipping policies regulations and...

Page 28: ...0 324 1353 A RECORDED MESSAGE will request the following information Please have it ready before you call 1 Your name shipping address and telephone number 2 The part that s missing 3 The model serial number and DATE AND PLACE OF PURCHASE OF YOUR UNIT 4 The best time of day to call you if we have questions Provided that all of the requested information is recorded and approved by our Customer Serv...

Page 29: ...w to Obtain Service International Customers Only If you need service or repairs contact the dealer in the country you purchased your unit To order accessories such as power cables or transducers please contact 1 Your local marine dealer Most quality dealers that handle marine electronic equipment should be able to assist you with these items Consult your local telephone directory for listings 2 Ca...

Page 30: ...ur unit and accessories packed with the unit at the factory There is a 180 day warranty on all non warranty repairs from the factory which is similartotheoriginalwarranty butisfor180daysratherthanoneyear For further details please call us at the above number On factory repairs we guarantee your unit will be repaired in three working days from the time it is received This does not include shipping ...

Reviews: