


3.
The waypoint details are displayed. The cursor is at the first character of the name.
4.
Edit the temporary waypoint name
or
to edit only the latitude or longitude, press ENT
repeatedly until the cursor moves to the required line.
5.
When you are finished, press ENT (repeatedly if necessary) until a new LCD appears.
6.
Press ENT to store the changes. The waypoint list is displayed again. If more changes are
required, repeat steps 2 through 6. Otherwise, press EXIT.
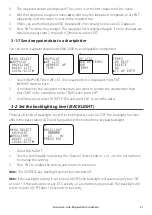
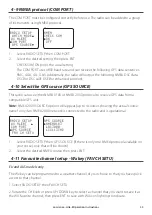
3-1-7 Send waypoint data to a chartplotter
You can send waypoint data over NMEA 2000 to a compatible chartplotter.
MENU SELECT
►
WAYPOINT
BACKLIGHT
BUDDY LIST
LOCAL/DIST
▼
WAYPOINT
►
WP LIST
NEAREST WP
TEMP
TEMP2
WP EDIT
DELETE
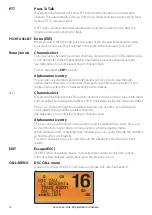
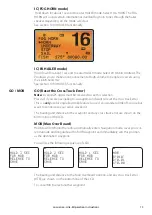
GO
►
TX WP DATA
WP LIST
NEW WP TEMP2
MOB
TEMP1
1.
Select WAYPOINT then WP LIST. Your waypoint list is displayed. Press ENT.
NEW WP starts to flash.
2.
Scroll down to the waypoint whose data you want to send to the chartplotter then
press ENT. In the example scroll to TEMP2 then press ENT.
3.
Scroll down and select TX WPT DATA and press ENT to send the data.
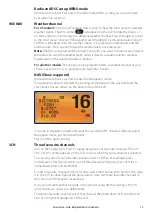
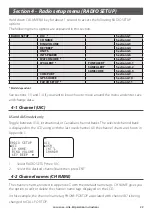
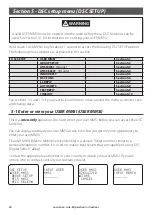
3-2 Set the backlighting level (BACKLIGHT)
There are 8 levels of backlight. Level 8 is the brightest, Level 0 is OFF. The backlight function
affects the base station (LCD and Keypad) and the microphone keypad backlight.
MENU SELECT
WAYPOINT
►
BACKLIGHT
BUDDY LIST
LOCAL/DIST
▼
BACKLIGHT
LO HI
PRESS ENT
1.
Select BACKLIGHT.
2.
Select a comfortable level using the Channel Select knob or + or – on the microphone
to change the setting.
3.
Press ENT to enable the setting and return to the menu.
Note:
The DISTRESS key backlight cannot be switched off.
Note:
If the backlight setting is set to level 0 (OFF), the backlight will automatically turn ON
at level 1 if the radio detects any DSC activity, or any buttons are pressed. The backlight will
return to level 0 (OFF) after 10 seconds of inactivity.
Lowrance - Link-8 Operation Instructions
21
Summary of Contents for Link-8 VHF
Page 1: ...lowrance com ENGLISH Link 8VHF User Guide ...
Page 87: ......
Page 88: ...1177 988 10254 001 ...


