background image

17

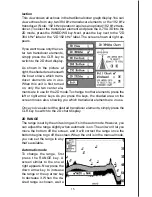
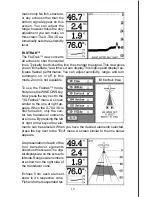
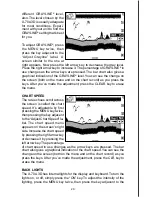
and your new upper limit will
be at the top of the screen.

To change the lower limit, use
the same steps as above, but
press the key next to the "Set
Lower Limit" menu.

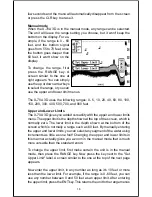
Press the CLR key to erase
these menus or wait a few sec-
onds and they will automati-
cally disappear.

2D ZOOM - Automatic mode
The zoom feature enlarges all echoes on the screen, making them easier
to see. This feature works in automatic or the manual mode. The X-70A
3D can show a full 2D zoom screen or a split-screen with the right side
normal and the left side enlarged.

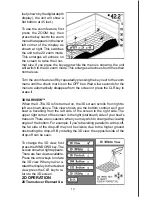
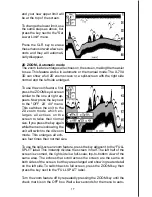
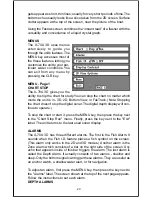
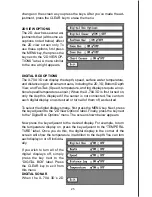
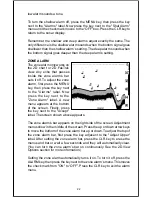
To use the zoom feature, first
press the ZOOM key. A screen
similar to the one at right ap-
pears. Now press the key next
to the "OFF  2X  4X" menu.
This switches the unit to the
2X zoom mode which en-
larges all echoes on the
screen to twice their normal
size. If you press the key again
while the menu is showing, the
unit will switch to the 4X zoom
mode. This enlarges all ech-
oes four times their normal size.

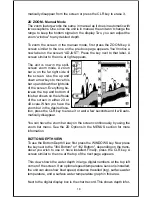
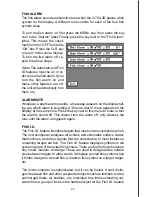
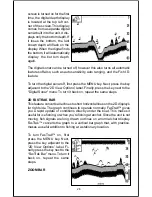
To use the split-screen zoom feature, press the key adjacent to the “FULL
SPLIT” label. This instantly divides the screen in half. The left half of the
screen is zoomed, the right side is a full-scale, top-to-bottom view of the
same area. The echoes that scroll across the screen are the same on
both sides of the screen, but they are enlarged and show in greater detail
on the left side. To switch back to full screen, press the ZOOM key, then
press the key next to the “FULL SPLIT” label.

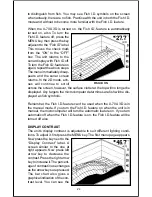
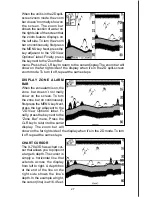
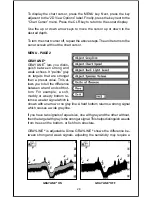
Turn the zoom feature off by repeatedly pressing the ZOOM key until the
check mark is on the OFF box. Wait a few seconds for the menu to auto-

Summary of Contents for ION AND OPERATION INSTRUCTIONS

Page 1: ...3D INST INST INST INST INSTALLA ALLA ALLA ALLA ALLATION AND OPERA TION AND OPERA TION AND OPERA TION AND OPERA TION AND OPERATION TION TION TION TION INSTR INSTR INSTR INSTR INSTRUCTIONS UCTIONS UCTIONS UCTIONS UCTIONS LOWRANCE ELECTRONICS INC ...

Page 2: ...LARM 23 MUTE ALARM 23 FISH I D 23 DISPLAY CONTRAST 24 2D VIEW OPTIONS 25 DIGITAL BOX OPTIONS 25 DIGITAL SONAR 26 2D FASTRAK BAR 26 ZOOM BAR 27 ZONE ALARM BAR 27 CHART CURSOR 27 MENU PAGE 2 28 GRAYLINE 28 CHART SPEED 29 ADJUST BACK LIGHT LEVEL 29 SPEAKER VOLUME 30 UNITS OF MEASURE 30 MENU PAGE 3 31 SURFACE CLARITY CONTROL 31 ASP Advanced Signal Processing 31 FISHTRACK 32 ADJUST TEMPERATURE GRAPH 32...

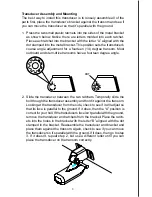
Page 3: ...amage the liquid crystal display This type of damage is not covered by the warranty INSTALLATION TOOLS AND HARDWAREYOU WILL NEED Screwdriver Four 10 screws with flat washers or up to 1 4 screws to attach gimbal bracket to dash Hand held drill with a 5 32 drill bit Marine grade caulking compound TRANSDUCER INSTALLATION The HS 3D4 supplied with your X 70A 3D is a 384 kHz 4 element high speed transom...

Page 4: ... the chance that it will remain in the water at high speed or sharp turns and reduces the possibility of air bubble interference cavitation 4 Don t mount the transducer directly behind strakes or ribs on the bot tom of the hull Typically a good location on aluminum boats is be tween the ribs closest to the engine The port left side of the transom is preferred for mounting the transducer however if...

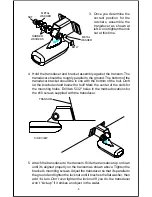
Page 5: ... degree angle 2 Slide the transducer between the two ratchets Temporally slide the bolt though the transducer assembly and hold it against the transom Looking at the transducer from the side check to see if it will adjust so that its face is parallel to the ground If it does then the A position is correct for your hull If the transducer s face isn t parallel with the ground remove the transducer a...

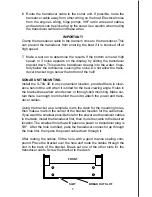
Page 6: ... the bracket extend below the hull Mark the center of the slots for the mounting holes Drill two 5 32 holes in the marked locations for the 10 screws supplied with the transducer 5 Attach the transducer to the transom Slide the transducer up or down until it s aligned properly on the transom as shown above Tighten the bracket s mounting screws Adjust the transducer so that it s parallel to the gro...

Page 7: ...nvenient location provided there is clear ance behind the unit when it is tilted for the best viewing angle Holes in the bracket base allow wood screw or through bolt mounting Make cer tain there is enough room behind the unit to attach the power and trans ducer cables Using the bracket as a template mark the dash for the mounting holes then make a mark in the center of the bracket location for th...

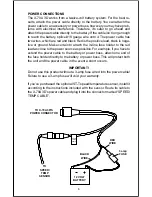
Page 8: ...e holder to the red lead as close to the power source as possible For example if you have to extend the power cable to the battery or power buss attach one end of the fuse holder directly to the battery or power buss This will protect both the unit and the power cable in the event a short occurs IMPORTANT Do not use this product without a 3 amp fuse wired into the power cable Failure to use a 3 am...

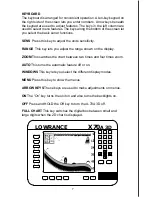
Page 9: ...ge shown on the display ZOOM This switches the chart between two times and four times zoom AUTO This turns the automatic feature off or on WINDOWS This key lets you select the different display modes MENU Press this key to show the menus ARROW KEYS These keys are used to make adjustments on menus ON The On key turns the unit on and also turns the backlights on OFF Press and HOLD the Off key to tur...

Page 10: ...is turned on Menus appear at the same time To leave the lights on press the ON key This key controls the back lights If you don t want the lights on wait a few seconds and they will automatically turn themselves off The menus will also disappear after a few seconds or you can press the CLEAR key to erase them The Metric and Display menu labels work the same way Press the key adjacent to the Metric...

Page 11: ...s mode Structure weeds thermoclines etc will not show The X 70A 3D uses a 384 kHz transducer with four elements The digital depth display shows the bottom depth from the middle transducer ele ments If it loses the signal from any element a box with the word LOST appears over the corresponding area on the display This means the unit cannot receive an echo from that element This could be due to a la...

Page 12: ...re fish signals or other echoes show on this display This feature is available using either fre quency transducer 384 Bot tom or 192 Bottom The 3D FasTrak screen con verts echoes from all four transducer elements into short horizontal lines Typically the thicker the bar the stronger the echo This screen is up dated rapidly giving you flasher like performance You can view echoes from any or all ele...

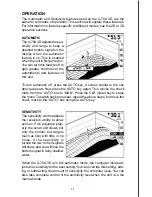
Page 13: ...TO key again This moves the check mark from the AUTO box to MAN Press the CLR clear key to erase the menu To switch back to manual repeat the above steps but move the check mark to the AUTO box using the AUTO key SENSITIVITY The sensitivity control adjusts the receiver s ability to show echoes If it s adjusted prop erly the sonar unit shows not only the bottom but targets such as fish with little ...

Page 14: ... begins to go off the screen When the unit is in the manual mode you can set the range to any that s available To change the range on the X 70A 3D first press the RANGE key A screen similar to the one at right appears Simply press the down arrow key to in crease the range or the up ar row key to decrease it When the desired range is chosen wait a few seconds and the menu will automatically disap p...

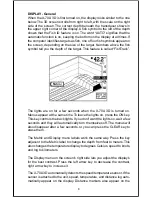
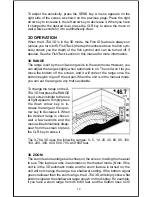
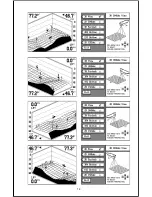
Page 15: ...to erase it 3DVARIVIEW When the X 70A 3D is first turned on the 3D screen scrolls from right to left as shown above This view shows you the bottom contour as if your boat is travelling from the left side of the screen to the right side The upper right corner of the screen is the right starboard side of your boat s transom There are occasions when you may wish to change the viewing angle of the bot...

Page 16: ...14 ...
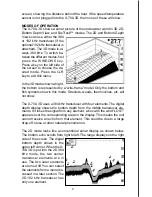
Page 17: ...center ele ments are in use for the 2D mode To change to other elements press the left or right arrow keys As you press the keys the shaded area on the screen moves also showing you which transducer elements are in use Once you ve selected the desired transducer elements simply press the CLR key to switch to the 2D chart display 2D RANGE The range is set by the unit as long as it s in the auto mod...

Page 18: ...th the upper and lower limits menu The upper limit is the depth shown at the top of the screen which is normally zero The lower limit is the depth shown at the bottom of the screen which is normally a range such as 60 feet By manually entering the upper and lower limits you can select any segment of the water using increments as little as one foot Changing the upper and lower limits in this manner...

Page 19: ...This switches the unit to the 2X zoom mode which en larges all echoes on the screen to twice their normal size If you press the key again while the menu is showing the unit will switch to the 4X zoom mode This enlarges all ech oes four times their normal size To use the split screen zoom feature press the key adjacent to the FULL SPLIT label This instantly divides the screen in half The left half ...

Page 20: ...ttom of this bar shows on the left side of the screen in either 2X or 4X scale When you have the zoom bar in the desired loca tion press the CLR key to erase it or wait a few seconds and it will auto matically disappear You can have the zoom bar stay on the screen continuously by using the zoom bar menu See the 2D Options in the MENUS section for more information BOTTOM DEPTH VIEW To use the Botto...

Page 21: ...in this mode Zoom is not available To use the Fastrak mode first press the WINDOWS key Now press the key next to the 3D Fastrak menu A screen similar to the one at right ap pears When the X 70A 3D is first turned on only the cen ter two transducer elements are in use By pressing the left or right arrow keys other ele ments can be selected When you have the desired elements selected press the key n...

Page 22: ...he digital sonar The digital depth display will con tinue to operate To stop the chart or start it press the MENU key then press the key next to the Chart Stop Run menu Finally press the key next to the Exit label The unit returns to the last used sonar display ALARMS The X 70A 3D has three different alarms The first is the Fish Alarm It sounds when the Fish I D feature places a fish symbol on the...

Page 23: ...time To set the depth alarms press the key adjacent to the alarm you wish to set In this example we will set and turn on the shallow alarm When the X 70A 3D is turned on the shallow alarm is set to zero Pressing the key next to the Shal Alarm menu moves the check mark to the SET box This brings up the adjustment menu as shown above Using the numbered keys enter the depth for the shallow alarm In t...

Page 24: ...to the Alarms label Now press the key next to the Zone Alarm label A new menu appears at the bottom of the screen Finally press the key next to the Accept label The screen shown above appears The zone alarm s bar appears on the right side of the screen Adjustment menus show in the middle of the screen Press the up or down arrow keys to move the bottom of the zone alarm bar up or down To adjust the...

Page 25: ...ss the key next to this menu to mute or turn the alarm s sound off This doesn t turn the alarm off only silences the tone until the alarm is triggered again FISH I D The Fish I D feature identifies targets that meet certain conditions as fish The microcomputer analyses all echoes and eliminates surface clutter thermoclines and other signals that are undesirable In most instances remaining targets ...

Page 26: ...ll no longer be displayed Any targets the microcomputer determines are fish will be dis played as fish symbols Remember the Fish I D feature can t be used when the X 70A 3D is in the manual mode If you turn the Fish I D feature on when the unit is in manual the microcomputer will turn the automatic feature on If you turn automatic off when the Fish I D feature is on the Fish I D feature will be tu...

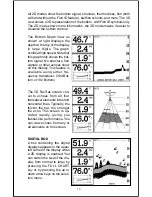
Page 27: ... first turned on only the depth is displayed if the sensor is not connected You can turn each digital display on as desired or turn all of them off as desired To select the digital displays menu first press the MENU key Next press the key adjacent to the 2D View Options label Finally press the key next to the Digital Box Options menu The screen shown below appears Now press the key adjacent to the...

Page 28: ...View Options label Finally press the key next to the Digital Sonar menu To turn it back on repeat the same steps 2D FASTRAK BAR This feature converts all echoes to short horizontal lines on the 2D display s far right side The graph continues to operate normally FasTrak gives you a rapid update of conditions directly under the boat This makes it useful for ice fishing or when you re fishing at anch...

Page 29: ... the same steps DISPLAY ZONE ALARM BAR When the zone alarm is on the zone bar doesn t normally show on the screen To turn the zone bar on continuously first press the MENU key Next press the key adjacent to the 2D View Options label Fi nally press the key next to the Zone Bar menu Press the CLR key to return to the sonar display The zoom bar will show on the far right side of the display when it s...

Page 30: ... echoes It paints gray on targets that are stronger than a preset value This al lows you to tell the difference between a hard and soft bot tom For example a soft muddy or weedy bottom re turns a weaker signal which is shown with a narrow or no gray line A hard bottom returns a strong signal which causes a wide gray line If you have two signals of equal size one with gray and the other without the...

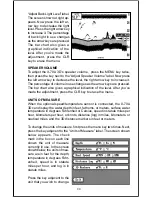
Page 31: ...R key to erase the menu CHART SPEED The rate echoes scroll across the screen is called the chart speed It s adjustable by first pressing the MENU key twice then pressing the key adjacent to the Adjust Chart Speed la bel The chart speed menu appears on the screen s right side Increase the chart speed by pressing the right arrow key or decrease it by pressing the left arrow key The percentage of cha...

Page 32: ...tion of the level After you ve made the adjustment press the CLR key to erase the menu UNITS OF MEASURE When the optional speed temperature sensor is connected the X 70A 3D can display the water depth in feet fathoms or meters surface water temperature in degrees Fahrenheit or Celsius speed in statute miles per hour kilometers per hour or knots distance log in miles kilometers or nautical miles an...

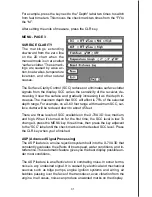
Page 33: ...um SCC sur face clutter will be reduced down to about 45 feet There are three levels of SCC available on the X 70A 3D low medium and high When it s turned on for the first time the SCC level is low To change it press the MENU key three times then press the key adjacent to the SCC label until the check mark is on the desired SCC level Press the CLR key when you re finished ASP Advanced Signal Proce...

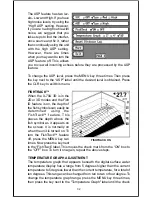
Page 34: ...D feature is on the depth of the fish symbols can easily be determined using the FishTrack feature This places the depth above the fish symbol as it appears on the screen It is normally on when the unit is turned on To turn the FishTrack feature off press the MENU key two times Now press the key next to the FishTrack label This moves the check mark from the ON box to the OFF box To turn it on agai...

Page 35: ... the Reset Distance Log label Press the CLR key to return to the sonar display MENU PAGE 4 3D ENHANCE Although the X 70A 3D has four transducer elements the display shows an enhanced grid that adds points to the grid See the difference be tween the two screens shown below To remove the extra lines and view only the depth grid from the four elements first press the MENU key four times Now press the...

Page 36: ... will be in operation To turn the 3D simulator off press the MENU key four times Now press the key next to the 3D Simulator label to move the check mark from the ON box to the OFF box If you return to the 3D screen the simulator will be off 3D DISTANCE MARKERS The X 70A 3D displays mark ers on the screen showing the approximate distance echoes are behind the boat This re quires an optional speed t...

Page 37: ...om other electrical wiring on the boat may help Route the sonar unit s power cable directly to the battery instead of through a fuse block or ignition switch 2 Inspect the transducer cable for breaks cuts or pinched wires 3 Check both the transducer and power connectors Make certain both are securely plugged in to the unit Weak bottom echo digital readings erratic or no fish signals 1 Make certain...

Page 38: ...er signals such as fish or even structure from the display Try using resistor spark plugs or routing the sonar unit s power and transducer cables away from other electrical wiring on the boat No fish arches when the Fish ID feature is off 1 Make certain transducer is pointing straight down This is the most common problem if a partial arch is displayed 2 The sensitivity may not be high enough In or...

Page 39: ...cer cable away from the wiring that is causing the interference VHF radio antenna cables radiate noise when transmitting so be certain to keep the sonar s wires away from it You may need to route the sonar unit s power cable directly to the battery to isolate it from other wiring on the boat If no noise displays on the sonar unit from electrical equipment then make certain everything except the so...

Page 40: ...NT OR REFUND AS JUST DESCRIBED IS THE EXCLUSIVE REMEDY AVAILABLE TO YOU AGAINST US FOR ANY DEFECT MALFUNCTION OR NON CONFORMITY CONCERN ING THE PRODUCT OR FOR ANY LOSS OR DAMAGE RESULTING FROM ANY OTHER CAUSE WHATSOEVER WE WILL NOT UNDER ANY CIRCUMSTANCES BE LIABLE TO ANYONE FOR ANY SPECIAL CONSEQUENTIAL INCIDENTAL OR OTHER INDI RECT DAMAGE OF ANY KIND Some states do not allow the exclusion or lim...

Page 41: ...verifica tion 3 Write a brief note detailing the problem you re having with the unit Please include your name address and daytime telephone number 4 Please include payment for non warranty repairs Check money order Visa or MasterCard may be used 5 Fill in your name address zip code date and RA number in the blanks provided on the UPS form included with your unit 6 Attach the label to the shipping ...

Page 42: ...r transducers please contact 1 Your local marine dealer Most quality dealers that handle marine electronic equipment should be able to assist you with these items Consult your local telephone directory for listings 2 LEI Extras Inc P O Box 129 Catoosa OK 74015 0129 or call 800 324 0045 USA orders only Lowrance Electronics may find it necessary to change or end our shipping policies regulations and...

Page 43: ...arts If you need service or repairs contact the Lowrance Factory Customer Service Department at the toll free number listed below A technician may be able to solve the problem and save you the inconvenience of returning your unit You will be asked for your unit s serial number 800 347 1014 Canada Only Monday through Friday 8 00 A M 8 00 P M Central Time ...

Page 44: ...it is covered by a full one year warranty See the back of this flyer forcompletewarrantydetails Ifyourunitfailsandthefailureisnotcovered by the original warranty Lowrance has a flat rate repair policy that covers your unit and accessories packed with the unit at the factory There is a 180 day warranty on all non warranty repairs from the factory which is similartotheoriginalwarranty butisfor180day...

Reviews: