Lorex LHWF1006 Series Instruction Manual Download Page 21

Basic Setup

4

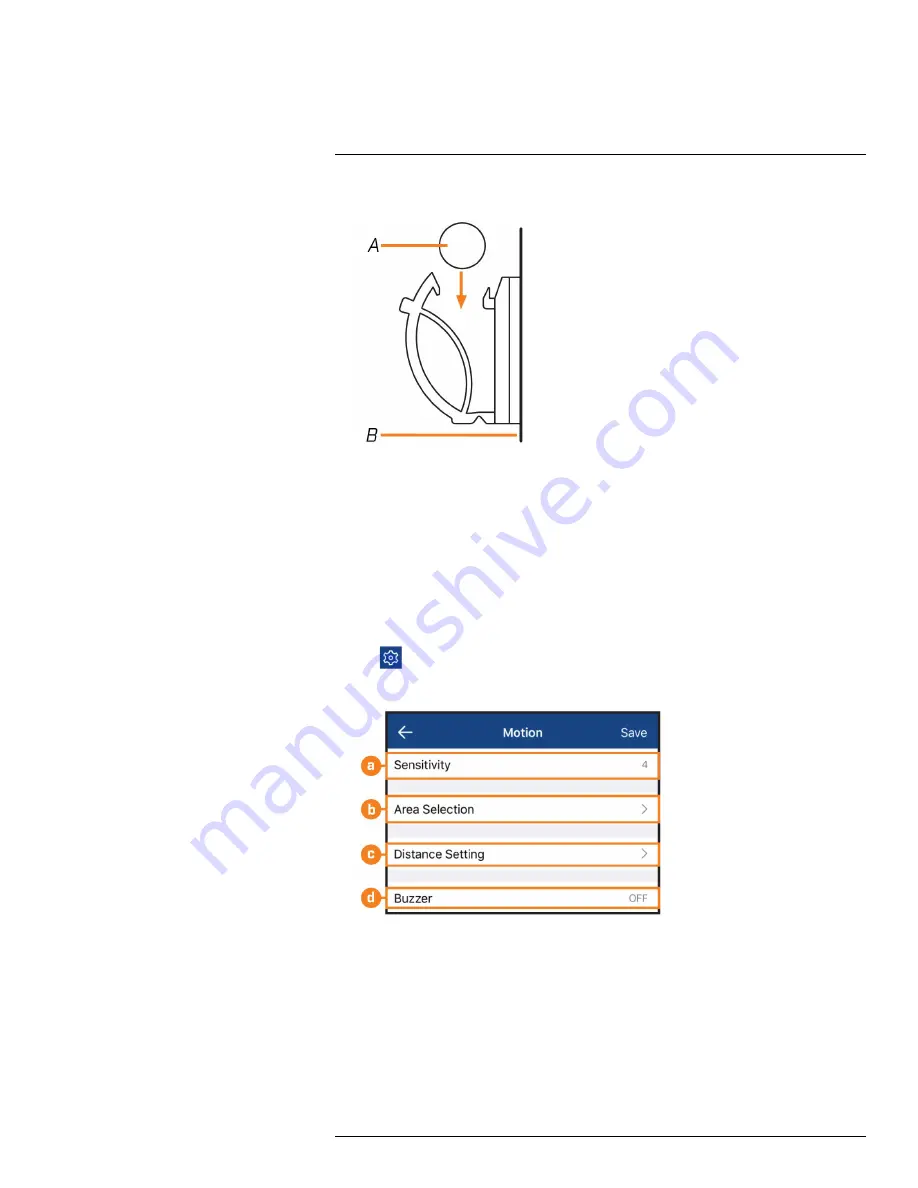
1. Use the included cable clips to complete the installation.

A. Cable
B. Mounting surface

4.4.3

Optimizing Motion Detection

Customize motion detection settings to ensure motion events are being recorded and reduce false
alarms.

To optimize motion detection:

1. Launch the

Lorex Cirrus

app.

2. Tap a channel in Live View to select it.

3. Tap

, then tap

Motion

.

4. Configure the following as needed:

a.

Sensitivity:

The amount of motion needed to trigger recording (e.g., higher sensitivity re-

quires less motion to trigger recording).

b.

Area Selection:

Not supported.

#LX400109; r. 5.0/56381/56402; en-US

13

Summary of Contents for LHWF1006 Series

Page 1: ...Instruction Manual LHWF1006 Series...

Page 2: ......

Page 3: ...Instruction Manual LHWF1006 Series LX400109 r 5 0 56381 56402 en US iii...

Page 4: ...QUALIFIED SERVICE PERSONNEL The lightning flash with arrowhead symbol within an equilateral triangle is intended to alert the user to the presence of uninsulated dangerous voltage within the product...

Page 5: ...Menu 17 6 4 Using the On Screen Keypads 17 7 Recording 20 7 1 Recording Time for Motion Detection 20 7 2 Configuring Manual Recording 21 7 3 Changing Recording Resolution 22 7 4 Setting a Recording S...

Page 6: ...em Information 62 13 3 8 Logs Searching and Backing Up 63 13 4 Advanced Menu 65 13 4 1 Manual Firmware Upgrade 65 13 4 2 Restoring Default Settings 65 13 4 3 Exporting System Settings 66 13 4 4 Import...

Page 7: ...Storage Archive 85 20 1 7 Connectivity 85 20 1 8 General 85 20 1 9 Recording Resolution Pixels Maximum Speed FPS Frames per second 85 21 Notices 86 21 1 FCC IC 86 21 2 CE 86 21 3 Modification 86 21 4...

Page 8: ......

Page 9: ...internal battery that will keep the product running in the event of a power outage CAUTION Maintain electrical safety Power line operated equipment or accessories connected to this product should bea...

Page 10: ...le oper ation of the product and to protect it from overheating These openings must not be blocked or covered The openings should never be blocked by placing the product on a bed sofa rug or other sim...

Page 11: ...sed have the same safety characteristics as the original parts Use of re placements specified by the product manufacturer can prevent fire electric shock or other hazards 4 Safety Check Upon completio...

Page 12: ...e Power Pack Adapter Ethernet Cable USB Mouse Recorder Power Adapter Per camera in multi camera packs NOTE Hard drive size number of channels and camera configuration may vary by model Check your pack...

Page 13: ...cluded Ethernet cable to a router or switch on your network for local and re mote connectivity 3 USB Mouse Backup Connect the included mouse or a USB flash drive not included for the purposes of backi...

Page 14: ...ly charged with no need for initial charging To prepare the cameras 1 Attach an antenna to each camera For LWB4800 LWB4900 Series cameras twist the adjust ment ring counterclockwise to reposition each...

Page 15: ...ks into each camera base Push up until the Power Pack clicks into place LWB4800 LWB4900 Series LWB5800 LWB6800 Series 4 2 STEP 2 Setting Up the Recorder Next you must set up the recorder To set up the...

Page 16: ...few minutes for the system to start 4 3 STEP 3 Connecting with Lorex Cirrus Connect to your system using the free Lorex Cirrus app for smartphones and tablets iOS and Android To connect with Lorex Cir...

Page 17: ...n channels that are in sleep mode NOTE If you do not see video from one or more cameras ensure you have removed the PLEASE REMOVE label from the Power Pack If the issue persists see 19 Troubleshooting...

Page 18: ...ations This camera is weather resistant for outdoor use IP66 rated Installation in a sheltered location is recommended Battery life will vary based on temperature settings and number of events 4 4 2 I...

Page 19: ...the included drywall anchors if you are mounting the camera onto drywall The hole at the top of the mounting bracket will be used in step 5 once the camera is attached to the mounting plate 4 Lower th...

Page 20: ...included screwdriver item A B in toolkit NOTE You will need to loosen the locking screw to remove the Power Pack in the future 7 Adjust the angle of the camera LWB4800 LWB4900 Series LWB5800 LWB6800...

Page 21: ...re being recorded and reduce false alarms To optimize motion detection 1 Launch the Lorex Cirrus app 2 Tap a channel in Live View to select it 3 Tap then tap Motion 4 Configure the following as needed...

Page 22: ...ction is being triggered by unwanted events NOTE Distance will be affected by temperature d Buzzer Set the recorder to sound an alarm when motion is detected 5 Tap Save when finished Repeat for other...

Page 23: ...reen viewing 2 Right Button During live viewing in split screen view click to open the Quick Menu see 6 2 Using the Quick Menu page 16 In menus click to go back close menus 3 Scroll Wheel In menus scr...

Page 24: ...Backup page 28 5 Audio Controls Use the scroll bar to change system volume Click to mute unmute the system 6 System Information Displays system information 7 Auto Upgrade Checks for an available firm...

Page 25: ...ording Click to manually record video from the selected channel Password en try required 3 Pair Click to pair a wire free camera to the selected channel For more information on pair ing see 11 Pairing...

Page 26: ...eypad opens Click to switch between uppercase and lowercase characters NOTE Uppercase entry mode also reveals more special characters on the far right side of the keyboard Click to move the cursor Cli...

Page 27: ...re numeric characters are entered such as the date or time fields The Number Keypad opens Click to move the cursor between letters Click to backspace delete numbers Click to confirm what you have ente...

Page 28: ...recording has been enabled and the system is currently recording video 2 Certain wire free systems have an option for continuous recording In order to take advant age of continuous recording Your rec...

Page 29: ...5 Depending on your system you may have the option to record continuously by setting Camera Record ing Time to Continuous This option is only available on systems that use a hard drive for storage rat...

Page 30: ...ave 5 OPTIONAL Use the Copy function to copy your settings to another or all connected cam eras See 13 1 1 Copying Channel Settings to Another Channel page 45 for details on using the copy function 7...

Page 31: ...80 720 720P 4 Click Save 7 4 Setting a Recording Schedule By default the system is set to record whenever a camera detects motion You have the option to set a recording schedule so that a particular c...

Page 32: ...sections to the recording schedule NOTE If your system and the selected channel support continuous recording you will have the option to choose be tween Motion and Continuous schedules for each day of...

Page 33: ...2 Use the calendar on the left side of the screen to select the date to search for video recordings from 3 Check off the channels you would like to search for recordings from on the left side of the...

Page 34: ...backup see 9 Search Backup page 28 3 Return Return to previous screen to perform a new search 4 Full Screen 5 Rewind 6 Slow Play Click to slow playback by half speed Click repeatedly to play as slow a...

Page 35: ...cording legend shown in the bottom right corner of the display Use the timeframe options in the bottom left corner to view a smaller or larger time period 16 Video Playback Area Double click any chann...

Page 36: ...ble recordings by time period recording type and channel You can then select which files you want to back up to a USB flash drive not included To use back up you must connect a USB flash drive to one...

Page 37: ...p NOTE For details on viewing your backup files on a PC or Mac computer see 16 Viewing Backed Up Video on PC Mac page 72 9 2 Backing Up Videos using Playback Mode You can search for and back up single...

Page 38: ...ld like to search for recordings from on the left side of the screen 4 Click to search for recordings 5 Recordings that fit your search criteria appear Check off any recordings you would like to back...

Page 39: ...wing your backup files on a PC or Mac computer see 16 Viewing Backed Up Video on PC Mac page 72 9 2 2 Video Clip Backup Choose the exact section of video recording you want to back up from Playback mo...

Page 40: ...A red arrow on the timeline indicates your start time 4 Select an ending time for the backup file Let the video play until the desired end time then click OR Click the desired end time on the video t...

Page 41: ...bottom of the window shows you the progress of the backup NOTE For details on viewing your backup files on a PC or Mac computer see 16 Viewing Backed Up Video on PC Mac page 72 9 3 Drive Menu Controls...

Page 42: ...k OK 5 Delete Delete the selected file or folder 6 Up One Level Click to navigate to the containing folder for your current location Clicking in the root folder has no effect 7 Browsing Area Shows fil...

Page 43: ...drive When first connecting a USB flash drive not included to the system it is recommended to format the drive so it is ready for use with the recorder CAUTION Formatting will erase all data saved to...

Page 44: ...nts with varying levels of access to the system 10 1 Changing Passwords To change the password for the administrator or user accounts 1 From the live viewing screen click System Users 2 Click the acco...

Page 45: ...lick the field next to User Name to change the user name for the account 6 Click the field next to Password to enter the desired password 7 Click the field next to Confirm to reenter the password 8 Cl...

Page 46: ...structions on enabling user accounts see 10 2 Adding a New User 3 Click Permission 4 Edit the user permissions to your preference Check the boxes next to any system menus or capabilities you would lik...

Page 47: ...To pair cameras to your system using the Lorex Cirrus see 11 1 Pairing Cameras with Lorex Cirrus page 39 To pair cameras to your system using the recorder interface see 11 2 Pairing Cameras using the...

Page 48: ...iring successful message should appear on screen If you do not see this message repeat the steps above 11 2 Pairing Cameras using the Recorder Interface 1 From the live viewing screen click Settings C...

Page 49: ...r button on the back of the camera for 3 seconds LWB4800 LWB4900 Series LWB5800 LWB6800 Series NOTE A pairing successful message should appear on screen If you do not see this message repeat the steps...

Page 50: ...rted microSD card can be upgraded with a new card up to 128GB Units with a pre installed hard drive are not user upgradable 12 1 Configuring Storage Overwrite By default your storage device is set to...

Page 51: ...up with footage the system will stop recording 4 Click Save 12 2 Formatting Storage Devices Formatting deletes all saved files from the selected storage device It is recommended to format any newly in...

Page 52: ...e live viewing screen 2 Hover over one of the options in the menu to browse options in full view Click to make a se lection If prompted enter the user name default admin and your secure password NOTE...

Page 53: ...anced Menu page 65 for full instructions on using the Ad vanced menu 7 Restart Restarts the recorder You must enter the user name default admin and your secure password before the unit restarts 8 Shut...

Page 54: ...ecordings To change a camera s OSD 1 From the live viewing screen click Settings Camera Setup 2 Select the channel for the camera you want to modify 3 Enter a channel name of your choice e g Back Yard...

Page 55: ...k Settings Camera Setup 2 Select the channel for the camera you want to enable disable 3 Select ON or OFF 4 Click Save 13 2 3 Camera Firmware In order to troubleshoot certain issues technical support...

Page 56: ...ersion number will appear in the text box to the left 13 2 4 Enabling Audio The included cameras support audio recording but must be enabled through the recorder interface This is due to the fact that...

Page 57: ...a you want to enable audio for 3 Select ON from the Audio dropdown 13 2 5 Changing the Display Resolution To optimize display you can change the output resolution of your recorder to match the maximum...

Page 58: ...eriencing cropping of the recorder s display it is recommended that you check the Support Overscan box to optimize your display This is typically only an issue for those using older Cathode Ray Tube C...

Page 59: ...sparency to adjust the transparency of the taskbar and menu screens 3 Click Save 13 2 7 Configuring Basic Network Settings The basic network menu allows you to change port numbers if needed and config...

Page 60: ...ay and DNS to edit as required 5 Click Save 13 2 8 Setting up Email Notifications You can configure the system to send email notifications about important activity from your secur ity system To have t...

Page 61: ...otifications from the system 4 Use the dropdown next to Interval to set the minimum amount of time between email notifi cations This can be used to limit the number of notifications you receive throug...

Page 62: ...t will receive email notifications from the system 10 Use the dropdown next to Interval to set the minimum amount of time between email notifi cations This can be used to limit the number of notificat...

Page 63: ...orange bars 4 Click or click and drag over existing bars to remove sections from the recording schedule For blank areas of the schedule click or click and drag to add sections to the recording schedul...

Page 64: ...k or click and drag to enable disable parts of the image In the example image below on ly motion occurring in the yard will trigger recording but motion in the flower beds will not 5 Set the Sensitivi...

Page 65: ...the Date and Time If you need to change the date and time after completing the setup wizard follow the steps below To change the recorder s date and time 1 From the live viewing screen click System G...

Page 66: ...you exit the main menu 13 3 3 Changing Video Output NTSC and PAL Manually switch between NTSC and PAL video output NOTE The video output is determined intelligently based on the region you set during...

Page 67: ...ither NTSC or PAL 3 Click Save The system will reboot to properly set the new video output mode 13 3 4 Configuring Menu Time out Option By default system menus are set to time out after a set time per...

Page 68: ...0min Menus will disappear after the set time period if there is no activity on the system OFF Menus will never time out due to inactivity 3 Click Save 13 3 5 Configuring Daylight Savings Time DST Cust...

Page 69: ...oose a specific date and time for each DST time change for example on March 13th at 2 00AM 5 Enter the desired Start Time and End Time for Daylight Savings Time System time will move forward an hour a...

Page 70: ...the time zone the selected region is also used by the system to intelligently determine the correct video format NTSC or PAL for that region which may change automatically when changing the region For...

Page 71: ...d Backing Up The system log shows you important system events such as motion alarms and system warnings You can easily create a backup file of the system log for a set time period to a USB flash drive...

Page 72: ...starting time for your search 24 hour format The search will end at this time on the end date 7 Click Search 8 Browse system log events from your search period Video events can be played back instant...

Page 73: ...the drive to one of the USB ports on your recorder To manually upgrade the recorder s firmware 1 From the live viewing screen click Advanced Maintenance 2 Click Firmware Upgrade 3 The drive menu appea...

Page 74: ...deselect all menus 4 Click Save to confirm The recorder will reboot automatically 13 4 3 Exporting System Settings You can export the main menu settings you have configured to a USB flash drive not i...

Page 75: ...tions see 9 3 Drive Menu Controls page 33 See 13 4 4 Importing System Settings page 67 for instructions on importing saved system settings 13 4 4 Importing System Settings Once you have created a syst...

Page 76: ...rs to inform you the system will reboot in order to properly im port your saved settings Click OK to proceed NOTE For more details on using the drive menu including a full overview of buttons and thei...

Page 77: ...occurs NOTE Enabling Send Email requires you to set up email notifications See 13 2 8 Setting up Email Notifications page 52 for full instructions 4 Use the dropdown next to Buzzer to have the record...

Page 78: ...iewing The Lorex Client 13 software allows you to View live video from cameras over the Internet Play back recorded video from the hard drive Manually record video clips or save snapshots to your comp...

Page 79: ...ing fees for live viewing The Lorex Cirrus app allows you to View live video from cameras Play back recorded video from the hard drive Manually record video clips or take a snapshot of live video Set...

Page 80: ...8 10 256MB RAM 16MB video memory Prerequisites Connect the USB flash drive not included used for recorder backup to your computer Ensure at least one backed up video file is on the USB drive Back up v...

Page 81: ...xt File 7 Stop 8 Fast Forward 9 Enable Disable Watermark 10 Take Snapshot 11 Hide Show Playlist 12 Mute Unmute and Volume Bar 13 Add File 14 Remove File 15 Delete File 16 Playlist 17 Advanced Menu 16...

Page 82: ...ac 16 To use the Advanced Menu 1 Click the button 2 Click Select to change the snapshot save folder Then select the folder and click OK 3 Check to enable the watermark 4 Click OK to save changes LX400...

Page 83: ...options that make accessing your system even easier For compatibility information as well as full instructions on setup and use visit lorex com SmartHome To enable Smart Home services on the recorder...

Page 84: ...c page 70 18 1 STEP 1 Port Forwarding You must port forward the HTTP and Client ports default 80 and 9000 on your router to your recorder s IP address before you can remotely connect to your system us...

Page 85: ...tly to 18 3 STEP 3 Add Your Address page 77 3 Enter basic information for account setup 4 Click Create an Account 18 3 STEP 3 Add Your Address Once you have a LOREX account you must add your address t...

Page 86: ...ss 3 Enter your address information 4 Click Submit Once submitted your address information will be summarized under My Saved Addresses 18 4 STEP 4 Activate Your Warranty Activate the manufacturer s wa...

Page 87: ...our Address Enter the rest of your product information attaching bill of sale optional 4 Click Save Warranty Once submitted your warranty information will be summarized under My Warranties 18 5 STEP 5...

Page 88: ...tion will be summarized under My DDNS Devi ces Make a note of your DDNS URL Username and Password as they will be needed to complete DDNS setup 18 6 STEP 6 Enable DDNS on the recorder The primary conn...

Page 89: ...3 Select LOREXDDNS from the dropdown next to Server 4 Click the field next to Domain Name to enter the URL shown under My DDNS Devices in your Lorex account for example www tomsmith lorexddns net 5 C...

Page 90: ...number of events Picture from cameras is dropping Move the camera closer to the recorder Try repositioning the camera recorder or both to improve the reception Picture is or has become choppy Ensure t...

Page 91: ...recorder s on screen display are cut off If you are using an older Cathode Ray Tube CRT monitor you may need to enable overscan See 13 2 5 Changing the Display Resolution page 49 for full instructions...

Page 92: ...device User Authority By user group Time Synchronization Auto time sync by NTP server 20 1 4 Recording Video Compression H 264 Recording Resolution 1080p 720p Recording Frame Rate 1080p 12fps per chan...

Page 93: ...ion over network Ports Programmable by user Network Protocol HTTP IPv4 TCP IP UPNP RTSP UDP SMTP NTP DHCP DNS PPPOE DDNS FTP Network Interface 10 100 Base TX RJ 45 Network Bit Rate Max 32Mbps total 20...

Page 94: ...interference to radio communications 21 2 CE This product and the supplied accessories are marked with CE and comply with the applicable harmonized European standards listed under Low Voltage Directi...

Page 95: ......

Page 96: ...er registered trademarks or trademarks of Lorex Corporation and or its subsidiaries All other trademarks trade names or company names referenced herein are used for identification only and are the pro...

Reviews: