


6
HARDWARE INSTALLATION
Component Placement
The following is recommended when you plan the Logic Net setup:
Place the LS6100 so that you can use the mounting brackets located at the bottom of
the unit.
Place the LS6100 so that the RESET button is accessible.
Place the LS6100 so that the beeps from the speakers can be heard.
Place the LS6100 so that the LED indicator on the front panel can be seen.
Place the LS6100 above grill/counter level, out of the way of possible spills.
Mounting Instructions
Mounting brackets are provided to facilitate mounting the LS6100 to a wall, ceiling or display
monitor mounting arm. The installer should insure that the wall anchors used with the
mounting brackets have the capacity to support 4.3 kg (9.5 lb.). This weight is determined by
adding a safety margin weight to the weight of the unit. Wall anchors with specified weight
capacity are available commercially.
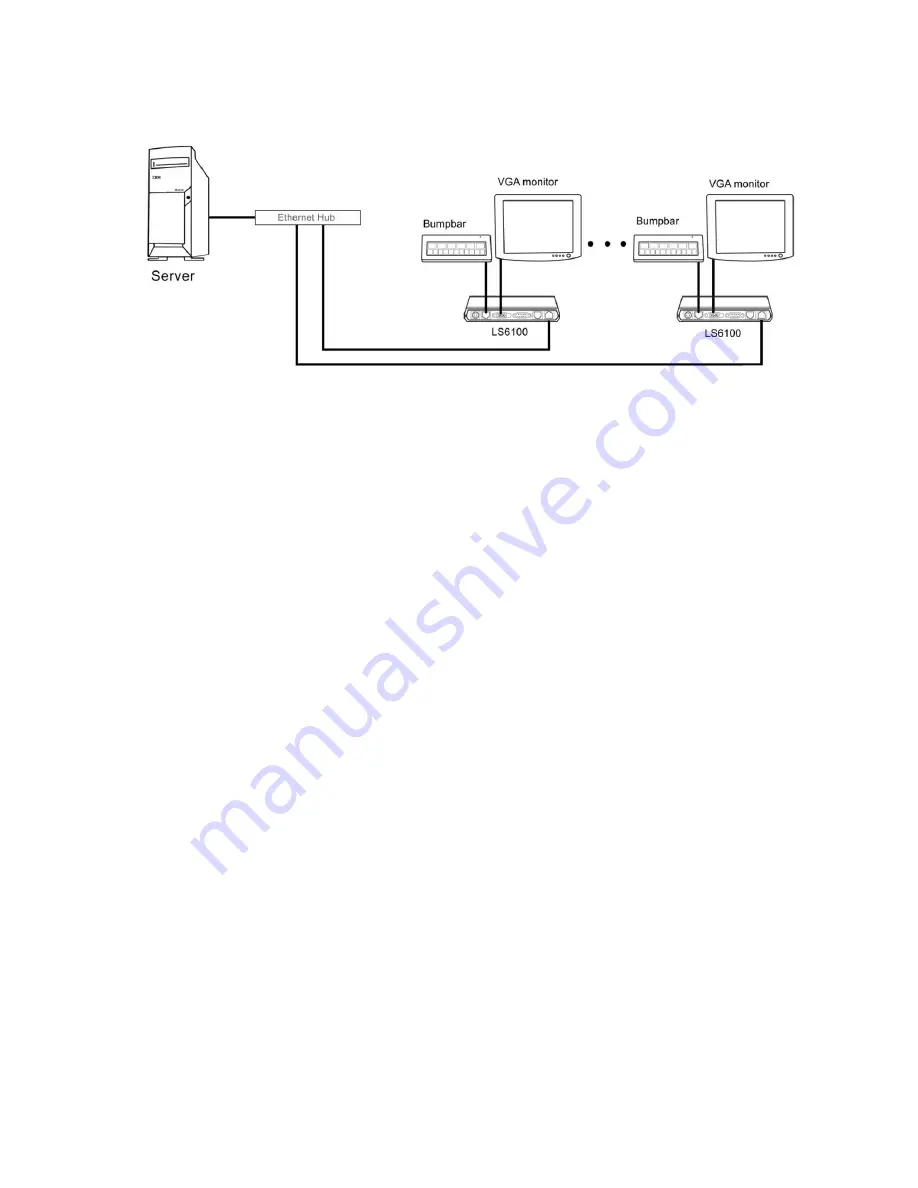
Connections
Make sure that all systems are powered off before making or removing any connections to the
LS6100 unit. Follow the steps below in connecting the devices:
1.
Connect the VGA cable of the display monitor to the LS6100.
2.
Connect the RS232 cable of serial devices to the LS6100.
3.
Connect the keyboard device to the LS6100.
4.
Connect the Ethernet cable from Ethernet hub or switch to the LS6100.
5.
Connect power to all peripheral devices and turn on power.
6.
Connect power adapter to the LS6100 and power cord to the power adapter.
7.
Plug the power cord into AC power outlet.
8.
If necessary, reset the LS6100 by pressing the reset button.


