


3
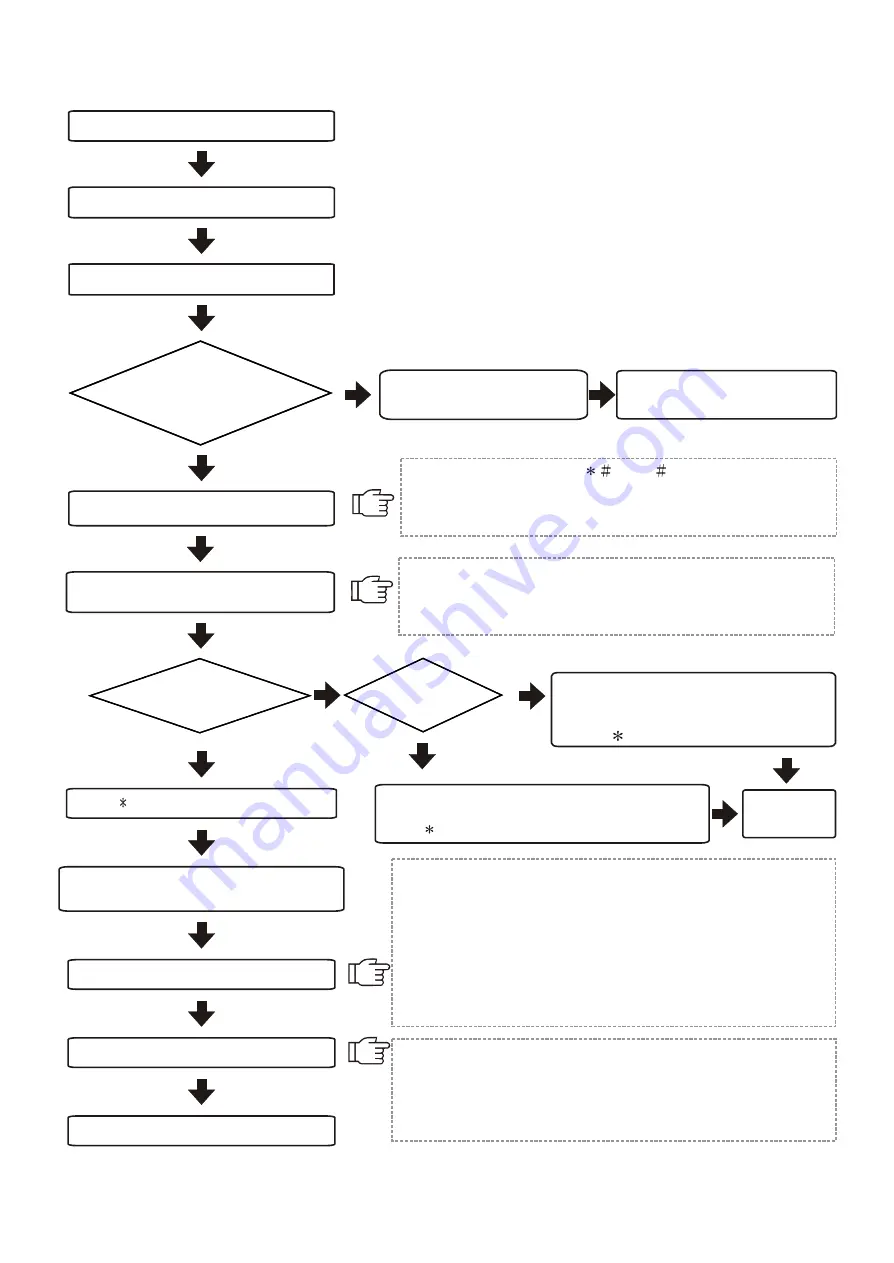
2.Installation Procedures
Mount the unit
(Page 17)
Wiring
(
Page 12~15
)
Power supply to the reader
Enter setting mode
Adding new cards(standalone)(Page 6)
If not, disconnect the
power supply immediately.
Ensure the adapter's voltage
and polarity are correct.
Enter system password (
5678
),then a beep sound
and yellow indicator light flashes to enter into setting mode.
If there isn't any action, this system will automatically escape
from the setting mode.
Default reader number is 001. Enter 10 and then 3-digit
reader number to change reader number(each reader
has its own reader number for software to recognise).
Operation with
computer online
Standalone
mode
Deleting Cards
(standalone)
(Page 6)
Enter 01 and proximity card or enter
card number.One beep sound to
complete registration.
Press
button to escape.
Enter 02 and proximity card or enter card number.
One beep sound to complete deletion.
Press
button to escape.
Completion of setting
NO
NO
YES
YES
Check if power
(RED)indicator is on.
Completion
of setting
Press
button to exit setting mode
Activate the software
(default account:USER,password:0000)
Add new user and reader
Send all settings to the reader
Send all data to the reader when all settings are
completed in order to operate.
Data which need to be sent are:1.Time 2.User's data
3.Time Zone 4.Parameter
Please refer to the software manual for detailed operation.
1.Default reader number is 1 and communication interface is
Com.1 when entering into the software.
2.Reader number 1 will respond when both interface and time
are correct. Please check the wiring and its interface and
reader number when there is no response from the reader.
3.Click Basic Information Setting ->User->Add New User
Information / Data.
4.Click Basic Information Setting ->Reader->Add New Reader.
Reader number or change reader
number(Page 8)
Lock Control -
Kouterbaan 63
- 1840 Malderen - Belgium - Tel. +32 52 57 43 02 - [email protected] - www.lockcontrol.be


