73
14.4.3
PROCEDURE FOR INITIAL LIGHTING
IF THE UNIT IS TO OPERATE ON LPG REFER TO SECTION 15.2 BEFORE PROCEEDING
1.
Ensure that the gas-inlet appliance isolating valve, provided by the installer, is in the “off” position.
2.
Turn on the local electrical isolator, to bring the equipment on.
3.
The boiler will go through a de-aeration sequence of starting and stopping the integral pump three times.
NOTE: If the system pressure is not above 1.0 bar during the deaeration process, the boiler will stop responding
and display the following screen:
System pressure will need to be increased to above 1.0 bar before any further works can be carried out.
4.
Press and hold the service button for three seconds to place the boiler into service mode.
5.
The combustion fan should ramp up to full speed to purge the combustion chamber and then drop back
to half rate in order to light. The spark generator should create a spark, visible through the burner sight
glass. As the gas inlet appliance isolating valve is closed, the controls should go to a flame failure
condition after four ignition attempts.
6.
If the above occurs correctly, open the gas inlet appliance isolating valve, reset the unit by depressing
the button on the control panel and place the boiler back in to service mode.
7.
The combustion fan will repeat the pre-purge procedure and attempt to light. Once a flame is
established, the display will change to indicate that the boiler is in service mode and the firing rate.
8.
Press the [◄] button once to display the flow and return temperatures. If the difference between these
values is below 13°C or above 25°C shut the boiler down and check that there is sufficient water flow
through the boiler.
9.
If sufficient flow exists, press the on/off/reset button for 5 seconds to shut the boiler down. Once this has
been done, check that the main flame has extinguished.
14.4.4
GAS PRESSURE ADJUSTMENT AND COMBUSTION CHECKS
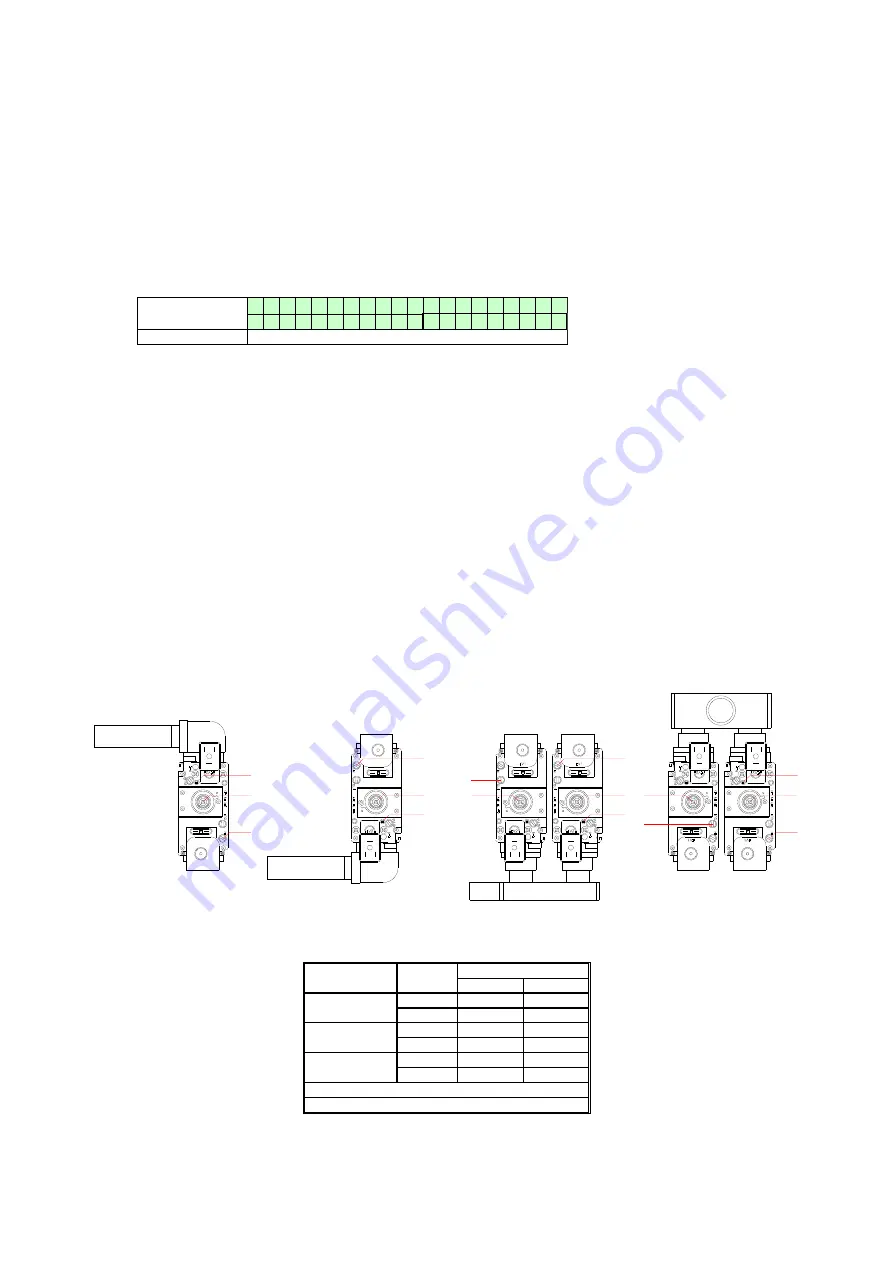
FIGURE 14.1 GAS VALVES
boiler type
load
G20
1
CO
2
(%)
O
2
(%)
CP-M+60-120
2
max. load
9.0 (± 0.3)
4.8 (± 0.5)
min. load
8.7 (± 0.3)
5.3 (± 0.5)
CP-M+ 150
2
max. load
9.0 (± 0.3)
4.8 (± 0.5)
min. load
8.7 (± 0.3)
5.3 (± 0.5)
CP-M+ 180
2
max. load
9.0 (± 0.3)
4.8 (± 0.5)
min. load
8.7 (± 0.3)
5.3 (± 0.5)
1
Cf. EN437
2
All values are measured without boiler door.
TABLE 14.1
COMBUSTION GAS READINGS
Display message
D e a
i
r
a
t
i
o n
9 9 9
,
5
h r
s
Reason
The deaeration process has not completed due to insufficient system pressure.
3
1
2
3
1
2
3
1
2
2
1
3
CP-M+60
CP-M+80 & 100
CP-M+120
CP-M+150 & 180
1
4
1
4
Summary of Contents for CP-M Series
Page 5: ...5 2 0 PRINCIPAL PARTS FIGURE 2 1 REMOVABLE COMPONENTS CP M 60...
Page 6: ...6 FIGURE 2 2 REMOVABLE COMPONENTS CP M 60 CONTINUED...
Page 8: ...8 FIGURE 2 3 REMOVABLE COMPONENTS CP M 80 CP M 100...
Page 9: ...9 FIGURE 2 4 REMOVABLE COMPONENTS CP M 80 CP M 100 CONTINUED...
Page 11: ...11 FIGURE 2 5 REMOVABLE COMPONENTS CP M 120...
Page 12: ...12 FIGURE 2 6 REMOVABLE COMPONENTS CP M 120 CONTINUED...
Page 14: ...14 FIGURE 2 7 REMOVABLE COMPONENTS CP M 150 CP M 180...
Page 15: ...15 FIGURE 2 8 REMOVABLE COMPONENTS CP M 150 CP M 180 CONTINUED...
Page 94: ...94...


