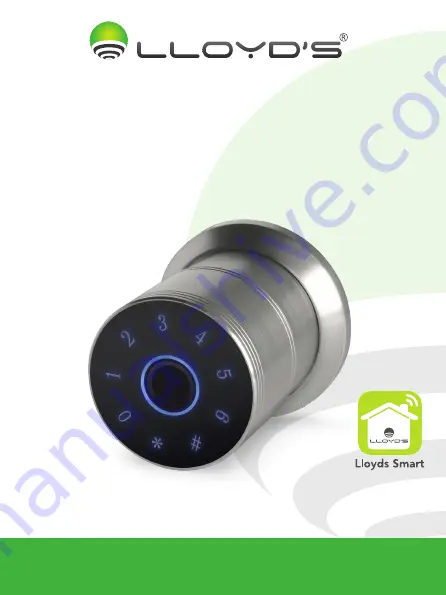
Lloyd's LC-1342 Quick Installation Manual Download Page 22

22

Smart lock

Lloyd’s

®


helps you make your home a smart home

Take control from one single app and transform your spaces into safe,

efficient, comfortable and fun places

QUICK INSTALLATION GUIDE

Brand: Lloyd’s

Model: LC-1342

PLEASE READ THIS INSTALLATION GUIDE BEFORE OPERATING THE PRODUCT

“Operation is subject to two conditions: ( this appliance may not cause harmful interference, and ( this applian-

ce must accept any interference, including interference that may be caused by undesired operation”.

Summary of Contents for LC-1342

Page 1: ...DE INSTALACI N Marca Lloyd s Modelo LC 1342 FAVOR DE LEER LA PRESENTE GU A DE INSTALACI N ANTES DE OPERAR SU PRODUCTO La operaci n de este equipo est sujeta a las siguientes dos condiciones 1 es posib...

Page 2: ...tura huella digital contrase as num ricas con llave f sica y desde la app por solicitud desde la cerradura tecleando 6 Se notificar bater a baja cuando el voltaje sea menor a 4 8 Vcc en ese caso reemp...

Page 3: ...a 5 segundos Desbloqueo r pido 0 3 segundos Permite generar llaves o contrase as num ricas temporales y permanentes numeraci n del 0 al 6 Puede establecer contrase as num ricas de entre 6 a 8 d gitos...

Page 4: ...20 a 93 HR s Teclado t ctil est ndar de 32 bits 6 8 d gitos 20 d gitos 4 8 0 2 Vcc 1 segundo 4 Par metros t cnicos 5 Consideraciones sobre la instalaci n Se recomienda que la instalaci n sea realizad...

Page 5: ...la cerradura 5 Pestillo 6 Cable de conexi n 7 Resorte 8 Manija posterior 16 Panel num rico 17 Sensor de huella digital 18 Puerto para carga de emergencia 19 Entrada para llave f sica 20 Bocina 8 12 1...

Page 6: ...3 4 5 A Ajuste el tama o del cuerpo de la cerradura de acuerdo a la ubicaci n del orificio de la puerta 60 mm o 70 mm B Verifique la direcci n de apertura de la puerta C Elija la posici n del pestillo...

Page 7: ...el cuadrillo de acero y las columnas de conexi n con los orificios del cuerpo de la cerradura C Fije la manija posterior y la frontal con los tornillos recortables para columnas de conexi n Gire las p...

Page 8: ...te Cuando la cerradura se encuentre en estado de bloqueo gire la manija frontal y el pestillo deber permanecer inm vil En estado de desbloqueo gire la perilla frontal y el pestillo deber retraerse En...

Page 9: ...tente le proporcio nar un men con 3 opciones 1 Function setting presione 1 para ajustes de funciones El asistente le proporcionar un men con 3 opciones 1 Enable Disable passage presione 1 para activar...

Page 10: ...ntrase a num rica de 6 a 8 d gitos deber hacerlo 2 veces confirmando con 14 Restablecer valores de f brica 15 Bot n interno para bloqueo de seguridad 16 Antes de comenzar 17 Registro y acceso Para res...

Page 11: ...a la informaci n de su red Wi Fi y la contrase a de la misma haga clic en Siguiente 4 Con la ayuda de la llave incluida presione el bot n de reinicio en la cerradura durante un segundo y verifique con...

Page 12: ...ella digital se ingresa incorrectamente 5 ve ces seguidas el sistema se bloquear y tomar el registro por cada bloqueo Registro de apertura aqu podr ver el registro de desbloqueos de la cerradura y el...

Page 13: ...la app le solicitar una confirmaci n para realizar esta acci n Ingrese a la interfaz de la cerradura haga clic en Contrase a temporal 1 Puede elegir dos tipos de contrase as temporales como se indica...

Page 14: ...i dica se puede utilizar varias veces dentro del periodo de tiempo establecido Es conveniente para Airbnb y alojamiento residencial Para configurarla haga clic en Contrase a peri dica 1 luego clic en...

Page 15: ...y recepci n de se al Wi Fi Para configurarla haga clic en Contrase a nica 1 luego en A adir 2 2 1 Haga clic en Obtener contrase a 3 por ltimo haga clic en Guardar 4 3 4 4 Importante Copie o anote su c...

Page 16: ...radura incluso si no hay recepci n de se al Wi Fi Para configurarla haga clic en Contrase a peri dica 1 luego presione en A adir 2 Establezca el tiempo de validez 3 luego haga clic en Obtener contrase...

Page 17: ...clic Gesti n de usuarios 1 luego seleccione en la esquina superior derecha 2 En esta ventana puede elegir la opci n Usuario de familia para agregar un usuario com n o administrador con cuenta existent...

Page 18: ...esta ventana puede elegir la opci n Otro usuario para agregar un usuario com n sin una cuenta existente de la app Lloyds Smart 3 ingrese la informaci n luego haga clic en Finalizado 4 Eliminar usuari...

Page 19: ...intrusos se pueden introducir contrase as de camuflaje al momento de abrir su puerta Introduzca cualquier combinaci n de n meros antes o despu s de la contrase aa establecida Por ejemplo si su contra...

Page 20: ...re la cerradura en este ejemplo usaremos Foco inteligente 9 Configure el encendido del foco y la intensidad de iluminaci n Haga clic en Siguiente 10 5 1 2 3 4 6 7 Para crear rutinas con uno o m s disp...

Page 21: ...ne S para comenzar a usar la rutina 12 Podr activar o desactivar la rutina cuantas veces lo desee mediante el interruptor 13 13 12 11 6 V 50 A 4 bater as AA de 1 5 V cada una no incluidas Banda de fre...

Page 22: ...ortable and fun places QUICK INSTALLATION GUIDE Brand Lloyd s Model LC 1342 PLEASE READ THIS INSTALLATION GUIDE BEFORE OPERATING THE PRODUCT Operation is subject to two conditions this appliance may n...

Page 23: ...words with a physical key and from the app by request typing 6 on the lock When the battery voltage is less than 4 8 Vdc a low battery notification will appear in which case replace the batteries as s...

Page 24: ...ate the conventional mode Automatic lock after opening 5 seconds Quick unlocking 0 3 seconds Allows to generate temporary and permanent numeric passwords numbering from 0 to 6 Set six to eight digit n...

Page 25: ...to 93 RH Yes Touch standard 12 bit keyboard 6 8 digits 20 digits 4 8 0 2 Vdc 1 second 4 Technical parameters 5 Installing considerations It is advisable to search for qualified personnel for the insta...

Page 26: ...columns 4 Lock body 5 Latch 6 Connecting cable 7 Spring 8 Rear handle 9 Battery compartment 10 Interface for connecting cable 11 Shortening screws for the connecting columns 12 Battery cover 13 Inter...

Page 27: ...the connecting cable 1 2 3 4 5 A Adjust the size of the lock body according to the location of the hole i n the door 60 mm or 70 mm B Check the opening direction of the door C Choose the latch positi...

Page 28: ...le B Align the steel spindle and connecting screws with the holes in the lock body C Secure the rear handle and front handle with the shortening screws for the connecting columns Turn the knobs and ma...

Page 29: ...ng When the lock is in the locked state turn the front knob and the latch should remain still In the unlocked state turn the front knob and the latch should retract In the locked and unlocked state tu...

Page 30: ...three options 1 Function setting press 1 for function settings The assistant will provide you with a menu with three options 1 Enable Disable passage press 1 to activate deactivate the conventional m...

Page 31: ...ter it twice and confirm with 14 Reset to factory settings 15 Internal button for security lock 16 Before getting started 17 Registration and access To reset to factory settings and delete all users a...

Page 32: ...o to Security 2 then select Smart Lock 3 Enter your Wi Fi network information and password click Next 4 With the help of the included key press the reset button on the lock for one second and verify w...

Page 33: ...is entered incorrectly five times in a row the system will lock and register each se curity lock 5 Opening record view the opening history of the lock and the methods used to open it 6 User management...

Page 34: ...the lock remotely The app will ask for a confirmation to perform this action Enter the lock interface and click on Temporary password 1 You can choose two types of temporary passwords as shown below...

Page 35: ...1 then click on Add 2 2 1 Enter the numeric password or click on Generate randomly if you want the system to generate it for you 3 establish the validity time then click on Save 4 3 4 Important Copy...

Page 36: ...re is no Wi Fi signal reception To set it up click on One time password 1 then on Add 2 2 1 Click on Obtain password 3 and finally click on Done 4 3 4 4 Important Copy or write down your password befo...

Page 37: ...he lock even if there is no Wi Fi signal reception To configure it click on Pe riodic password 1 then click on Add 2 Set the validity time 3 then click on Obtain password 4 and finally click on Done 5...

Page 38: ...the lock interface click on User management 1 then select in the upper right corner 2 In this window you can choose the Family option to add a regular user or administrator with an existing Lloyds Sma...

Page 39: ...corner 2 In this window you can choose the Other user option to add a regular user without an existing Lloyds Smart account 3 enter the information click Done to finish 4 Delete user click on the Me...

Page 40: ...ible Camouflage passwords can be entered when opening your door to protect them from potential in truders Enter any combination of numbers before or after the set password For example if your set pass...

Page 41: ...or or user ID click Next 7 To create routines with one or more smart devices click at the bottom of the main screen on the Smart option 1 then click on Automation 2 Select the icon in the upper right...

Page 42: ...on Run the device 8 Choose the device you want to trigger or execute when the lock is re leased We will use as an example a Smart bulb 9 Set the bulb on and the intensity of illumination Click Next 1...

Page 43: ...1 Select Yes to start using the routine 12 You can activate or deac tivate it as often as you wish using the switch 13 6 V 50 A 4 batteries of AA de 1 5 V each not included Frequency band 2 4 GHz 27 T...

Page 44: ...ORTADOR IMPORTED BY ZUTTO TECHNOLOGIES S A DE C V R F C ZTE161017KT6 Av Ej rcito Nacional No 505 Interior 1602 Colonia Granada C P 11520 Miguel Hidalgo Ciudad de M xico M xico Tel fono Phone 55 684475...

Reviews: