19
Fits a Sharpie
TM
sized marker
Fits a pen
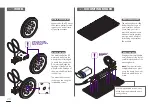
Connect to DC motor shaft
Connect to servo hub
with included #6 screws
MEET THE ACCESSORY
HOW IT WORKS
a23
MECHANICAL ARM
The mechanical arm
attaches to both the servo
hub and the DC motor shaft,
and offers lots of leverage
for pushing, pulling, and
throwing.
To attach the mechanical
arm to the servo hub,
use two of the #6 screws
(included) and a Phillips
head screwdriver (not the
purple screwdriver). Be sure
to screw through the holes
on the servo hub.
To attach the mechanical
arm to the DC motor, line up
the flat edge of the DC motor
shaft with the flat edge of
either of the flatedged holes
on the mechanical arm.
The two large holes on the
end are perfect for holding
pens and markers in place.
USE A PHILLIPS-HEAD
SCREWDRIVER
Connect to servo hub
with included #6 screws
Feet for mounting
boards and shoes
MEET THE ACCESSORY
a24
SERVO MOUNT
The servo mount lets you
attach your servo to a
mounting board or a pair
of littleBits shoes. It's a great
way to keep the servo steady
so the arm can go wild.
HOW IT WORKS
Push the servo in from the
side until it clicks into place.
To keep the servo from
sliding up and down, use
the included screws and a
Phillipshead screwdriver.
USE A PHILLIPS-HEAD
SCREWDRIVER
Summary of Contents for a10
Page 1: ...i GIZMOS GADGETS KIT INVENTION GUIDE...
Page 2: ......
Page 27: ...25 BUILD YOUR CIRCUIT 1 o25 DC MOTOR p1 POWER i5 SLIDE DIMMER...
Page 33: ......
Page 34: ...B...
Page 35: ...C G I Z M O S G A D G E T S 2 N D E D I T I O N...
Page 36: ...D WE INVENT THE WORLD WE WANT TO LIVE IN...
Page 39: ...33 o9 BARGRAPH BUILD YOUR CIRCUIT 1 p1 POWER o13 FAN i5 SLIDE DIMMER...
Page 42: ...36 ASSEMBLE BUBBLEBOT TEMPLATE 6 DETAIL VIEW WANT TO CUSTOMIZE YOUR BUBBLEBOT NOW S THE TIME...
Page 43: ...37 SLIDE THE TEMPLATE ONTO THE FAN TAPE THE TEMPLATE ONTO THE FAN 7 8 USE TAPE...
Page 49: ...43 BUILD YOUR CIRCUIT 1 o11 SERVO p1 POWER i5 SLIDE DIMMER...
Page 58: ...52...
Page 67: ......


