9
QUICK START GUIDE
(CONT.)
Quick, step-by-step guide to get your LiteMat up and running.
© LITEGEAR INC. 2015
www.litegear.com
7. Mounting LiteMat on a stand
Be sure the stand is equipped with a 5/8 inch (16 mm) pin, and then setup the stand. Next, unscrew the 5/8 nch
(16 mm) pin receiver on the Center Mount attached to the LiteMat until it is clear to accept the stand pin. Follow
by tightening the 5/8 inch (16 mm) pin receiver around the stand pin until snug.
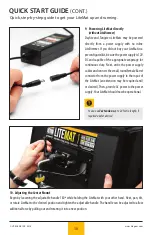
8. Powering LiteMat with LiteDimmer
To control your LiteMat, begin by preparing your
power supply. If you did not buy your LiteMat in
a preconfigured kit, be sure the power supply is
12V DC and capable of the appropriate amperage
for continuous duty. Next, untie the power supply
cables and connect the small, round female
Barrel connector from the power supply to the
LiteDimmer power input connector. Continue by
connecting the LED output of the LiteDimmer to
the input of the LiteMat (an extension may be
required and/or desired). Then, ensure that the
LiteDimmer power switch is set to OFF and provide
AC power to the power supply. On the LiteDimmer,
move the power switch to either the ON or LOW/
ALT position (depending on the LiteDimmer you
are using) and adjust the control(s) to the desired
level(s). Your LiteMat should now be operational.


