


7
Product Overview
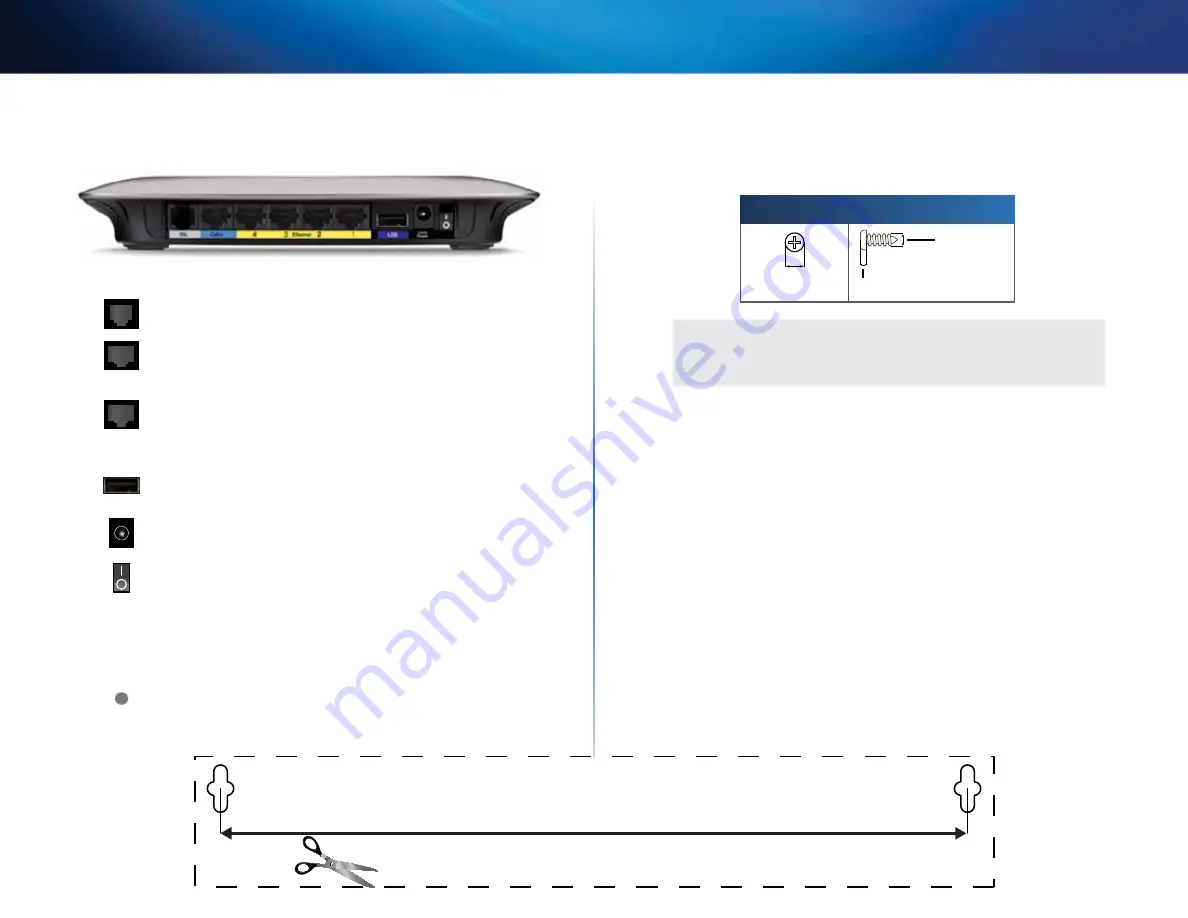
Linksys X2000/X3000
Back
DSL
—Connects to the ADSL line .
Cable
—To use the modem router as only a router, use a
network cable to connect this port to a separate modem’s
LAN/Ethernet port .
Ethernet
—Using Ethernet cables (also called network
cables), these Ethernet ports connect the modem router
to computers and other Ethernet network devices on your
wired network .
USB
—For network-attached storage, connect an external
USB drive to this port .
Power
—The Power port connects to the included power
adapter .
Power button
—Press
|
(on) to turn on the modem router .
(Button not available on North American models .)
Bottom
Reset
—This button allows you to reset the router to
its factory defaults . Press and hold the Reset button for
approximately five seconds .
Wall-mounting placement
The router has two wall-mount slots on its bottom panel . The distance between
the slots is 175 .56 mm . Two screws are needed to mount the router .
Suggested Mounting Hardware
2 .5-3 .0 mm
4-5 mm
1-1 .5 mm
NOTE
Cisco is not responsible for damages incurred by unsecured wall-
mounting hardware .
Follow these instructions:
1.
Determine where you want to mount the router . Make sure that the wall
you use is smooth, flat, dry, and sturdy . Also make sure the location is
within reach of an electrical outlet .
2.
Drill two holes into the wall . Make sure the holes are 175 mm apart .
3.
Insert a screw into each hole and leave 3 mm of its head exposed .
4.
Position the router so the wall-mount slots line up with the two screws .
5.
Place the wall-mount slots over the screws and slide the router down
until the screws fit snugly into the wall-mount slots .
175 mm
Wall-mounting template
Print this page at 100% size .
Cut along the dotted line, and place on the wall to drill precise spacing .


