background image

23

Advanced Features

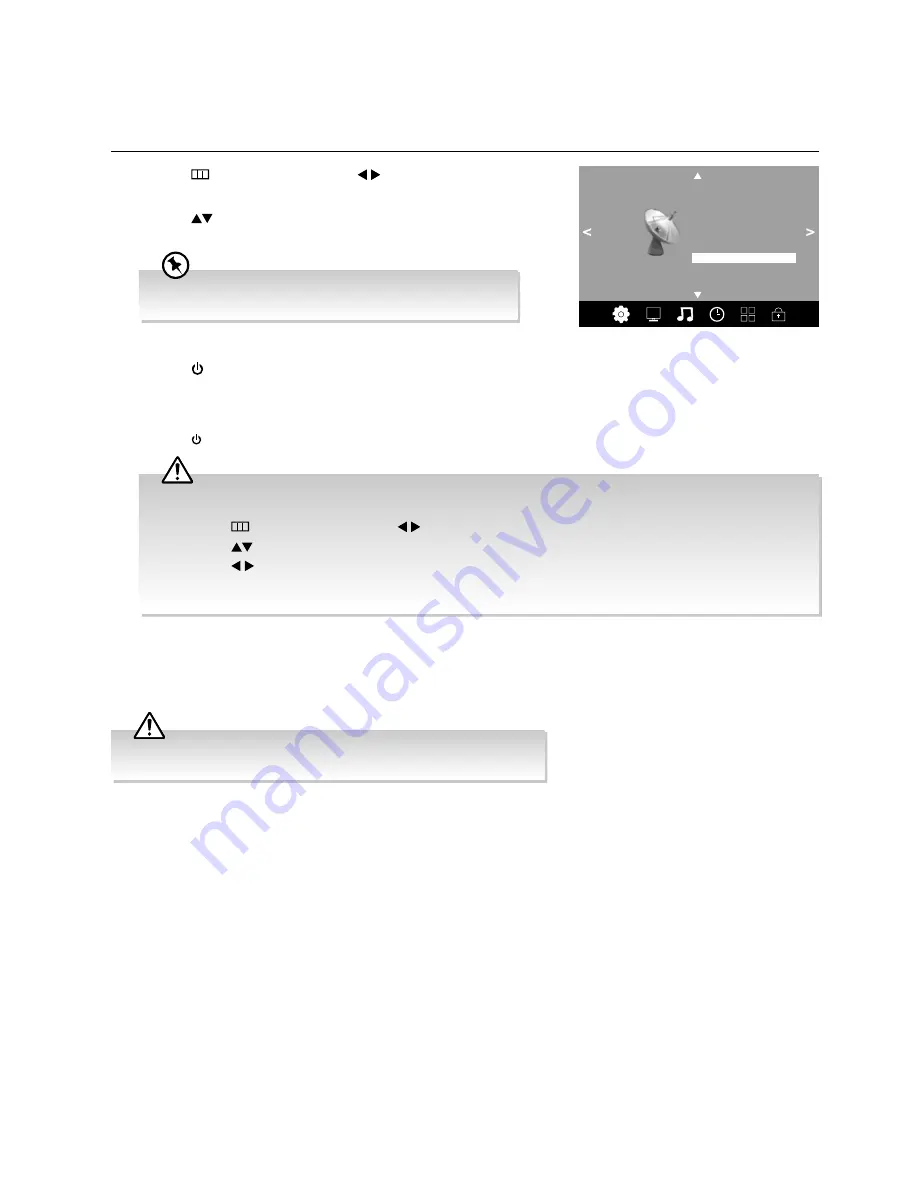
OAD Tuning (DTV Mode)

Allows you to download the latest firmware manually through the DTV signal and allows you to accept or refuse the firmware 

upgrade service. Please follow the steps below if applicable.

1. 

Press the 

 button and then press the     buttons to select the 

Channel

 menu.

2. 

Press the 

 buttons to select 

OAD Tuning

 and then press the 

OK


button to start.

Software Update (USB) (DTV Mode)

This function is only for servicing purposes. Please call our customer care center on 

1300 530 800

 for further details.

Please note that programming incorrect software onto the television can 

compromise the functions of the television and void the warranty.

If you encounter problems after the software update, we recommend that you restore your TV to the factory default 

settings. To do this, follow the steps below:

1.  Press the 

 button and then press the     buttons to select the 

OPTION

 menu.

2.  Press the 

 buttons to select 

Restore Factory Default 

and then press the 

OK

 button.

3.  Press the     buttons to select 

Yes

 to reset the setting.

4.  The TV will restore all settings and go to the first time installation. Follow the first time installation steps (refer to 

page 8-9 for details).

Channel

Auto Tuning
DTV Manual Tuning
ATV Manual Tuning

Signal Information
Software Update (OAD) Off

OAD Tuning

Software Update (USB)

Channel Edit

Ensure the 

Software Update(OAD)

 function is switched to 

"ON"

.

3. 

When the download is complete, the TV will return to standby mode. 

Press the


 button on the remote control to switch on the TV, the TV will 

automatically upgrade the software.

4. 

When the update is complete, the TV will return to standby mode again.

5. 

Press the


 button on the remote control to switch on the TV.

Summary of Contents for L49UTV17a

Page 1: ...49 124cm ULTRA HD LED LCD TV Instruction Manual L49UTV17a 24 Month Manufacturer s Warranty...

Page 2: ......

Page 3: ...16 Connecting an AV Device Using an HDMI Cable 16 Connecting a Soundbar HDMI ARC Audio Return Channel 17 Connecting an Audio Receiver 17 Connecting an AV Device Using Composite Cable 18 Connecting He...

Page 4: ...Mode 35 Switch On Off EPG 35 Select a Programme 35 Connecting a USB Storage Device 36 Viewing Photos 36 Listening to Music 37 Viewing Movies 38 My Text 39 Time Shift Function 40 Recording DTV Programm...

Page 5: ...control Do not put anything near the sensor as its function may be affected 3 Press to select among different input signal sources DTV ATV HDMI1 HDMI2 HDMI3 AV USB Confirmed selection on the OSD menu...

Page 6: ...e insertion of a USB storage device to play video audio photo and text files USB mode and record DTV programmes on to a USB storage device Note This socket do not support 4K source 5 HEADPHONE Connect...

Page 7: ...previous chapter track photo USB mode No function 8 PLAY Start playback USB mode 9 Pause Pause playback USB mode Start the time shift function DTV mode 10 Display the recording list DTV mode 11 Stop t...

Page 8: ...mode 21 EXIT Return to the previous menu in the OSD menus or exit the OSD menu 22 FAV Display the favourite channel list ATV DTV mode 23 VOL Adjust the volume 24 CH Select a channel 25 REC Record the...

Page 9: ...roperty Only use the battery type indicated in this manual When the batteries are exhausted the remote will not function Replace both batteries at the same time with new ones Do not install new batter...

Page 10: ...mains supply until you have completed all the connections Always disconnect the TV from the mains socket when not in use for a long period of time The button on the right bottom panel under the TV fr...

Page 11: ...Belgium Bulgaria Croatia Czech Denmark Finland France Germany Greece Hungary Italy Ireland Luxembourg Country Input Source DTV ATV HDMI1 HDMI2 AV USB HDMI3 OK Channel Selection Press the CH buttons o...

Page 12: ...iance At the end of its working life do not throw this television out with your household rubbish An environmentally friendly method of disposal will ensure that valuable raw materials can be recovere...

Page 13: ...on furniture to reach for the television and or its controls 5 WARNING Do not insert any objects into any openings of the television 6 WARNING Do not touch any moving parts of the television 7 WARNIN...

Page 14: ...NSIDE REFER SERVICING TO QUALIFIED SERVICE PERSONEL DO NOT BLOCK THE VENTILATION SLOTS ON THE BACK COVER RISK OF ELECTRIC SHOCK DO NOT OPEN CAUTION IMPORTANT INFORMATION If a television is not positio...

Page 15: ...u dispose of it please do so according to local regulations The following items are included Instruction Manual Quick Start Guide Remote Control AAA Batteries x 2 TV Stand TV Screw x 4 If you require...

Page 16: ...stand Be sure that no hard or sharp object or anything that could scratch or damage the LCD display comes into contact with it DO NOT exert pressure on the front of the TV at any time because the scr...

Page 17: ...ting holes Be sure to use these supplied screws with your mounting kit when attaching the mounting hooks to the TV set The supplied screws are designed for the TV Use of screws other than those suppli...

Page 18: ...mains socket before switching on the TV 3 Press the button on the right bottom panel under the TV frame or on the remote control to turn on your TV 4 Press the button on the remote control to display...

Page 19: ...al connection with digital optical cable is necessary The HDMI CEC feature has different trade names on different brands The compatibility performance may vary with different CEC enabled devices Pleas...

Page 20: ...to select AV and then press the OK button to confirm Satellite Receiver Satellite antenna cable Rear Bottom View of TV R L VIDEO OPTICAL Video Camera VCR DVD Player Recorder Set top Box Game Console A...

Page 21: ...ning and then press the OK button 3 In the Tune Type menu press the buttons to select DTV ATV DTV ATV Press the button and then press the buttons to select the country where you will operate the TV Pr...

Page 22: ...Manual Tuning ATV Manual Tuning Signal Information Software Update OAD Off OAD Tuning Software Update USB Channel Edit 3 The ATV Manual Tuning screen will pop up Use the buttons to select the followi...

Page 23: ...hat you want to skip when you are selecting channels Press the BLUE button again to undo it e FAV Favourite Press the FAV button to set the selected channel as one of the favourite programmes Press th...

Page 24: ...al DTV viewing if the TV detects the latest firmware from the DTV signal the Over Air Download screen will appear Press the buttons to select Yes No for the upgrade procedure 4 If you select Yes the o...

Page 25: ...ore your TV to the factory default settings To do this follow the steps below 1 Press the button and then press the buttons to select the OPTION menu 2 Press the buttons to select Restore Factory Defa...

Page 26: ...eception Colour Temperature Select among colour temperature Medum Warm User Cool Adjusts the colour components independently to achieve a warm or cool colour for User mode Red Increases red tint Green...

Page 27: ...eption ATV Mode When a programme is selected press the AUDIO button to display the sound information for the selected station Broadcast On Screen Display Mono Stereo Dual MONO NICAM MONO MONO NICAM ST...

Page 28: ...turned off before entering the On Time menu If your SCART device is turned on the On Time menu will default to the SCART device Sleep Timer The sleep timer automatically switches the TV to standby aft...

Page 29: ...Fran ais Italiano OSD Language MENU Audio Languages DTV Mode Allows you to select your desired audio language Available for digital channels if multiple audio languages are broadcast 1 Press the butto...

Page 30: ...ile System Deutsch English Espa ol Fran ais Italiano Subtitle Languages Primary MENU Hearing Impaired Shows information for the hearing impaired in some programmes For DTV channels only if available 1...

Page 31: ...after formatting During Hi Speed formatting of some USB drives you may need to select a smaller Time Shift size than the maximum capacity of the drive as some storage capacity is used in the PVR set...

Page 32: ...le signal data to the TV to ensure the best possible picture results 1 Press the button and then press the buttons to select the OPTION menu 2 Press the buttons to select EDID and then press the OK bu...

Page 33: ...rogrammes The Lock System must be set to On for this function to operate If the Lock System is set to On a valid password must be entered when you access Auto Tuning Manual Tuning Restore Factory Defa...

Page 34: ...ton LOCK Lock System Off Set Password Block Channel Parental Guidance 3 Use the 0 9 buttons to input a 4 digit password to enter the LOCK menu Clear Cancel Please enter password 6 Press the button to...

Page 35: ...LOCK menu 2 Press the OK button to enter Lock System LOCK Lock System Set Password Block Channel Parental Guidance 4 Press the buttons to select Block Channel and then press the OK button 5 A Block Ch...

Page 36: ...K Lock System Set Password Block Channel Parental Guidance The default password is 0000 If you change the password be sure to remember the new password If you forget the new password enter the master...

Page 37: ...and using the buttons to select the desired DTV channel Use the button to move down and use the the buttons to select the desired programme for the selected date and time If the DTV channel shows No I...

Page 38: ...and and the memory size of the connected hard disk Disconnect the USB storage device if it is not in use Supports USB2 0 only This socket do not support 4K source Rear Right Side View of TV HDMI1 ARC...

Page 39: ...the USB mode and then press the OK button 2 Press the buttons to select MUSIC and then press the OK button 6 Press the buttons and then press the OK button to select the function Pause Play Prev Next...

Page 40: ...to return to the previous menu 3 Press the buttons to select your storage device and then press the OK button 6 Press the INFO button to display the function bar Press the buttons and then press the...

Page 41: ...o select the function Prev Page Next Page Prev Next Stop Music Playlist Info Press the EXIT button to exit the function bar 7 Press the EXIT button to return to the previous menu 3 Press the buttons t...

Page 42: ...tton A pop up menu will be displayed Press the button to select YES to stop Time Shift During normal TV viewing you may press the button to pause the live programme if you want to go out for a while e...

Page 43: ...go will be displayed at the top left corner If you want to display the recording progress again press the button 3 If you want to stop recording press the button A pop up menu to be displayed press th...

Page 44: ...th Date and then press the buttons to adjust the end time Mode Press the buttons to select the Auto Once Every Day Weekly 3 After finishing all the recorder adjustments press the OK button to confirm...

Page 45: ...u Playing Recorded Programme You can play a recorded programme from the recorded programme list or from a USB Storage Device 1 Press the button on the remote control and then press the buttons to sele...

Page 46: ...ve minutes No or poor colour or poor picture Adjust the settings in the PICTURE menu Try another channel The problem may be caused by the broadcaster Check if the video cables are connected properly H...

Page 47: ...the Freeview channels available to you If problems persist you may need to get your aerial checked Talk to your retailer or contact your local aerial installer Why do I get blocking on my digital pic...

Page 48: ...o 2TB USB Media Types Photo Files Format JPEG PNG BMP Video Files Format upto Full HD MKV MP4 MPEG4 Audio Files Format MP3 MPG Power supply for remote control DC 3V 2 x AAA size batteries Power consum...

Page 49: ......

Page 50: ......

Page 51: ......

Page 52: ...ublishers cannot be held responsible for the accuracy of the information contained herein or any consequences arising from it Distributed by M E W Australia Pty Ltd 15 Vaughan St Essendon Fields VIC 3...

Reviews: