16
–
17
E
N
KEILER – 25 LRF
· Operating Manual 07 / 2020
When the image is degraded or uneven, it can be
improved by calibration. Calibration enables the
detector temperature background to be equa-
lized and defects in the image to be eliminated.
There are two calibration modes:
manual (M)
and
automatic (A)
. Select the required mode in the
CALIBRATION
section of the
MAIN MENU
.
>
M mode (manual)
The device needs to be calibrated manually.
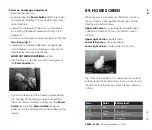
– Short press the
Up
(4) +
Down
(3)
button
for shutter calibration, and long press for
background calibration.
– The lens cap should be closed for back ground
calibration.
>
A mode (automatic)
The device is calibrated autonomously by the
software algorithm. The lens cap need not be se-
cured (the sensor is closed by an internal shutter).
KEILER-25 LRF / KEILER-25 LRF
Pro
Thermal Imagers are
equipped with a function for video recording and
photographing an observed image onto the built-in
memory card. The files of images and videos will
be named after the time, so it is recommended to
synchronize the system time and date in the Settings
of the
APP
before using the camera and video
function. For further information about the
APP
visit:
https://liemke.shop/medien
Photographing
> Take a photograph with a short press of the
Down / Photo
button
(3) in the home screen.
The image freezes for 0.5 seconds with a photo
icon ( ) displayed on the upper-right corner of
the display.
> The picture file is saved to the build-in
memory card.
Video Recording
> In the
home screen
, press and hold the
Down / Photo
button
(3) to start video recording.
> A tooltip
showing the recording time
(showing in MM: SS (minutes: seconds) format) will
appear in the upper right corner of the display.
> The red dot in the tooltip flashes during recording.
> During recording, short press the
Down / Photo
button
(3) to take a photographing also.
10. CALIBRATING
THE SENSOR
11. PHOTOGRAPHING AND
VIDEO RECORDING
NOTE!
Manual shutter calibration and manual
background calibration
are still possible even in mode A.


