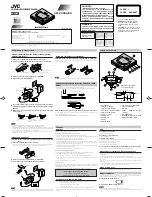
DVD Micro Hi-Fi System
]
USER GUIDE
19
Connecting your portable
USB player
The advantage of connecting your portable USB player through the
system’s USB port is that the portable device can be controlled from the
system. Connect the portable player to the system using a USB cable
(not supplied).
1. Select the USB function:
2.
The display will show
“SEARCHING”, followed by the
number of files displayed:
3. Select a Title MENU :
4. start selected file:
5. Before disconnecting
the
portable USB player, change to
any other function by pressing:
6. Remove :
the USB player
ON PLAYER
FUNC.
B
B
FUNC.
ON REMOTE
INPUT
TITLE
SELECT/ENTER
FUNCTION or
INPUT
Compatible USB Devices
• Devices which require additional program installation when you have connect-
ed it to a computer, are not supported.
• MP3 Player : Flash type MP3 player.
The MP3 player requiring installation of a driver is not supported.
• USB Flash Drive : Devices that support USB2.0 or USB1.1.
USB divice requirement
•
Do not extract the USB device in operating.
• A back up demands to prevent a data damage.
• If you use a USB extension cable or USB hub, the USB device might not be
recognized.
• A device using NTFS file system is not supported. (Only FAT (16/32) file sys-
tem is supported.)
• The USB function of this unit does not support all USB devices.
• Digital camera and mobile phone are not supported.
• This unit is not supported when the total number of files is 1000 or more.
• If the drive of USB device is two or more, a drive folder is displayed on the
screen. If you want to move to the previous menu after you select a folder,
press RETURN.
Listening to music from your
portable player
1. Connect
the portable player by
plugging the unit into
PORT. IN
on
the side of the player:
2. Turn the power on:
3. Select the PORTABLE function:
4. Turn the portable player on and
start it playing:
ON PLAYER
1
1
/
]]
FUNC.
ON REMOTE
POWER
1
1
INPUT
The player can be used to play
the music from many types of
portable player.
CD Synchronized Recording
1. Open the tape door:
2. Insert a blank tape:
3. Select the DVD/CD function:
4. Start the Recording in the
stop mode :
The synchronized recording is
started automatically after
about 7 seconds.
5. To stop a Recording:
ON PLAYER
ON REMOTE
Z
Z
PUSH EJECT
FUNC.
CD SYNC
x
FUNCTION
x
STOP
XD123_63_ENG_AP 2/5/08 12:46 PM Page 19


