15
Chapter 3. System information
Specification
Ch3. System information
- Available Processors
·
Intel® Core™2 Duo / Pentium® Dual
‐
Core / Celeron® Dual
‐
Core / Celeron® Processors (L2 Cache Size:
1MB/2MB/3MB/6MB, FSB:667/800/1066MHZ ) are supported.
The user must not replace or expand the CPU capacity arbitrarily. The CPU capacity differs depends on
model type.
- Main Memory
·
Maximum Capacity: Each slot is 2048MB and can be expanded to 4096MB.
·
SO DIMM Type for Memory Expansion: DDR2/DDR3 SDRAM SO-DIMM(256MB, 512MB, 1024MB, 2048MB)
To use two 2GB memory cards, the machine must run on 64bit OS. 32bit Vista/XP OS does not support 4GB
memory.
32bit Windows Vista/XP OS does not support 4GB memory.
When you use two memory slots, make sure to use the memory from the same company.
- Secondary Storage Devices
·
2.5" Hard Disk Drive (SATA)
※
The hard disk capacity and the type depend on the notebook PC model.
- LCD
·
15.6" HD+ (1600 x 900) w/LED Backlight TFT Color LCD
·
15.6" HD (1366 x 768) w/LED Backlight TFT Color LCD
Some models are equipped with the Glare
‐
type LCD featuring enhanced sharpness. This type of LCD
appears to glare more than other types, but it is a normal phenomenon in the Glare type.
※
The size and the resolution rate of the LCD depend on the notebook PC model.
- Authentication for Anticopy Technology
·
U.S Patent Nos.4,631,603;4,577,216;4,819,908;4,907,093;5,315,448;and 6,516,132. Patent number of
Macrovision.
This product includes the technologies that are possessed by Macrovision and corresponding companies
and protected by the US Patent Law and other related laws. Use of all technologies subject to the copyrig
ts must be approved by Macrovision in advance. Otherwise, the technologies may only be used for intern
al display. Do not disassemble or remodel the product.
- Bluetooth
·
Qcom, QBT400UB
·
Ver2.0 Bluetooth Module
※
Bluetooth is optional, and so it may not be installed in some models.
Summary of Contents for R580 Series U.ARC3BA9
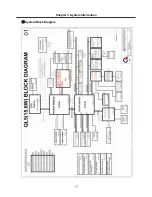
Page 17: ...17 System Block Diagram Chapter 3 System information ...
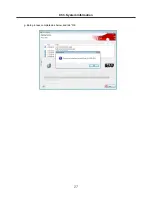
Page 27: ...27 Ch3 System information g Burn process completed as below and tab OK ...
Page 60: ...60 Ch5 Removing and replacing a part 5 Remove the HDD Shield ...
Page 63: ...63 Ch5 Removing and replacing a part 3 Remove the WLAN Module ...
Page 66: ...66 3 Remove the ODD Ch5 Removing and replacing a part 4 Remove the ODD Bezel Bezel ...
Page 69: ...69 69 Ch5 Removing and replacing a part 5 Remove the Keyboard 6 Remove the Retainer ...
Page 71: ...71 71 Ch5 Removing and replacing a part 3 Remove the Display Module ...
Page 74: ...74 Ch5 Removing and replacing a part 3 Remove the Keyboard deck ...
Page 79: ...79 Ch5 Removing and replacing a part 3 Remove the Mainboard Case ...
Page 86: ...86 Ch5 Removing and replacing a part 3 Remove the Hinge Cap ...
Page 98: ...NLCD07 NLCD05 NLCD09 NLCD03 NLCD01 NLCD04 NLCD08 NLCD02 NWEBC01 ...
Page 100: ...NMINI02 NMINI01 NKDECK01 NKDECK02 NRTN01 NKEYBD01 ...
Page 102: ...NMRY01 NMRY01 NMINI04 NTHMO01 NRBS01 NMINI03 NCPU01 NMLB01 ...
Page 105: ...NCVR02 NCVR03 NCVR01 NHDD02 NHDD01 NBATT01 NODD02 NODD01 NBOTM01 NBOTM03 NHDD03 NBOTM02 ...

