- 30 -
SELF-CLEAN
The
SELF-CLEAN
pad is used to start a Self-Clean cycle.
When used with
START TIME
pad, a delayed Self-Clean
cycle may also be programmed. The Self-Clean function has
cycle times of 2, 3, or 4 hours.
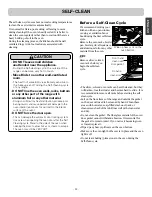
1.
Be sure the clock is set with the
correct time of day, the oven is empty
and the oven door is closed.
2.
Touch
SELF CLEAN
once for a
3-hour clean time or twice for a
2-hour clean time or 3 times for
4-hour clean time. A 3-hour self-clean
time is recommended for use when
cleaning small, contained spills. A self
clean time of 4 hours is recommended
for heavily soiled ovens.
3.
Touch
START.
The
DOOR LOCKED
icon will flash.
4.
Once the
SELF CLEAN
is set, the
oven door will lock automatically. You
will not be able to open the oven door
until the oven is cooled. The lock will
release automatically.
To start an immediate Self-Clean cycle and shut off
automatically
1.
Touch
SELF CLEAN.
Select the
desired self clean time by touching
SELF CLEAN.
2.
Touch
START TIME.
Enter the
desired Self-Clean starting time
using the number
8, 0,
and
0.
3.
Touch
START. DELAY
and
CLEAN
will remain on.
4.
Self-Cleaning cycle will turn on
automatically at the set time.
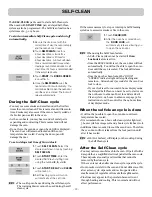
To set a delay start time of 8:00 o’clock
1.
Touch
CLEAR/OFF.
2.
After the oven has cooled down,
the
DOOR LOCK
will
automatically release allowing you
to open the oven door.
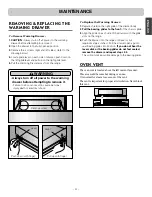
If it becomes necessary to stop or interrupt a Self-Cleaning
cycle due to excessive smoke or fire in the oven:
During the Self-Clean cycle
• You may see some smoke and smell an odor the first few
times the oven is cleaned. This is normal and will lessen in
time. Smoke may also occur if the oven is heavily soiled or
if a broiler pan was left in the oven.
• As the oven heats, you may hear sounds of metal parts
expanding and contracting. This is normal and will not
damage the oven.
• Do not force the oven door open when LOCK is displayed.
The oven door will remained locked until the oven
temperature has cooled. Forcing the door open will
damage the door.
After the Self-Clean cycle
• You may notice some white ash in the oven. Wipe it off with a
damp cloth or a soapfilled steel wool pad after the oven cools.
These deposits are usually a salt residue that cannot be
removed by the clean cycle.
If the oven is not clean after one clean cycle, repeat the cycle.
• If oven racks were left in the oven and do not slide smoothly
after a clean cycle, wipe racks and rack supports with a
small amount of vegetable oil to make them glide easier.
• Fine lines may appear in the porcelain because it went
through heating and cooling. This is normal and will not
affect performance.
When the self-clean cycle is done
• It will not be possible to open the oven door until oven
temperature has cooled.
• It is recommend to use 2 hour self-clean cycle for light soil,
3 hours cycle for average soil, and 4 hours cycle for heavy soil.
• Additional time is needed to cool the oven down. Therefore,
the oven door will not release from the lock position until
after it has cooled.
When using the Self-Clean feature:
• A Self--Clean cycle cannot be started if
Oven
Lockout
feature is active.
• Once the SELF CLEAN is set, the oven door will lock
automatically. You will not be able to open the oven
door until the oven is cooled. The lock will release
automatically.
• Once the door has been locked the “DOOR”
“LOCKED” indicator light will stop flashing and
remain on. Allow about 15 seconds for the oven door
lock to close.
• If your clock is set for normal 12 hours display mode
the Delayed Self-Clean can never be set to start more
than 12 hours in advance.To set for a delayed Self-
Clean cycle 12- 24 hours in advance see page 32 for
instructions to set the control for the 24 hours time
of day display mode.
Note:
•
HS (Hot Surface) will display on the cooktop during
the Self Clean cycle.
Note:
•
The cooktop can be used during the self clean cycle.
The warming drawer cannot be used during the self
clean cycle.
Note:

