


9
ENG
ENGLISH
USING THE MONITOR SET
y
y
"Self Image Setting" Function.
This function provides the user with optimal
display settings.When the user connects
the monitor for the first time, this function
automatically adjusts the display to optimal
settings for individual input signals.(Only
supported in Analog Mode)
y
y
‘AUTO’ Function.
When you encounter problems such as
blurry screen, blurred letters, screen flicker
or tilted screen while using the device or
after changing screen resolution, press the
AUTO function button to improve resolution.
(Only supported in Analog Mode)
NOTE
Self Image Setting Function
Press the power button on the stand base of the
Monitor set to turn the power on. When monitor
power is turned on, the
"Self Image Setting"
Function is executed automatically. (Only
supported in Analog Mode)
y
y
If you use HDMI PC, it can cause compatibility
problem.
y
y
When you want to use two PC in our Monitor,
please connect the signal cable(D-SUB/
HDMI) respectively in Monitor set.
y
y
If you turn the Monitor set on while it is cold,
the screen may flicker. This is normal.
y
y
Some red, green, or blue spots may appear
on the screen. This is normal.
NOTE
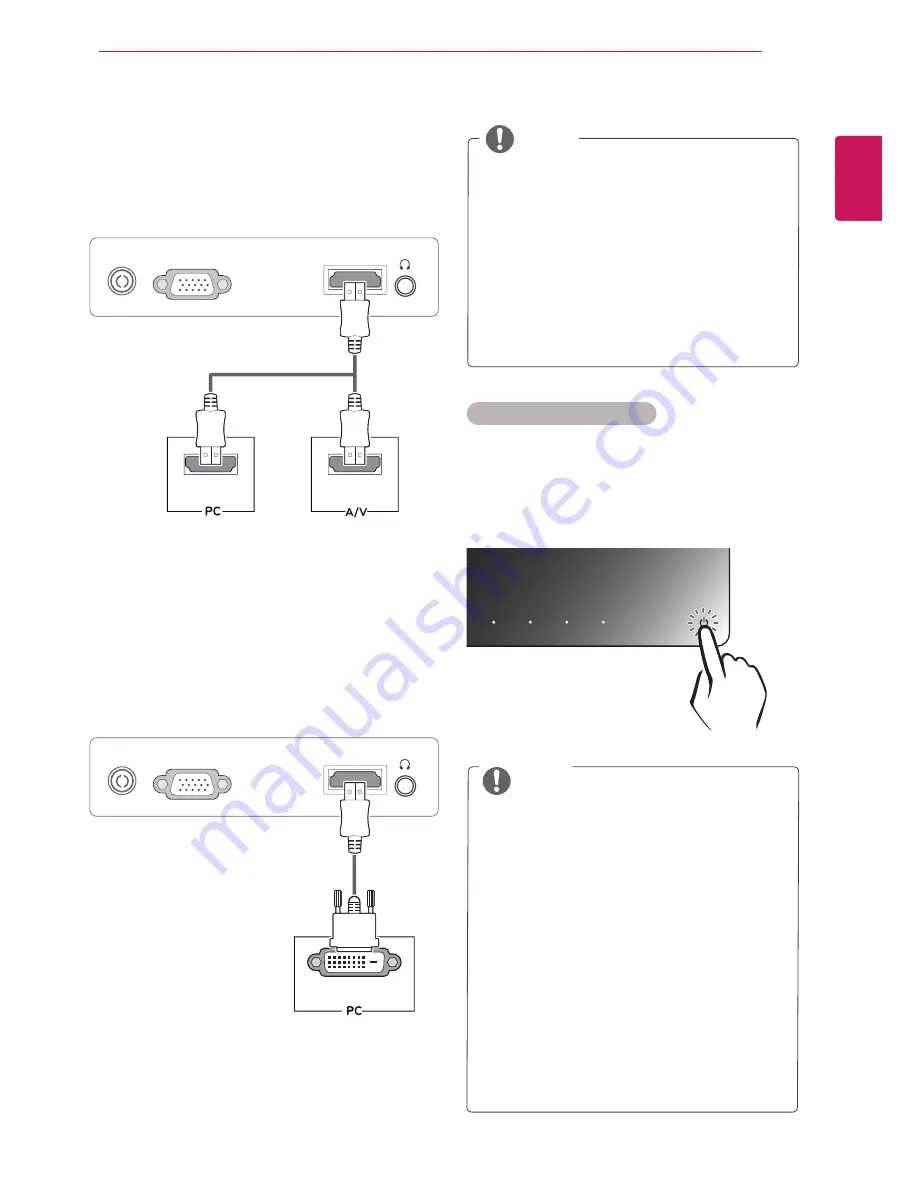
HDMI connection
Transmits the digital video and audio signals from
your PC or A/V to the Monitor set. Connect the PC
or A/V and the Monitor set with the HDMI cable as
shown in the following illustrations.
DVI to HDMI connection
Transmits the digital video signal from your PC to
the Monitor set. Connect the PC and the Monitor
set with the DVI to HDMI cable as shown the
following illustrations.
HDMI
D-SUB
HDMI OUT
HDMI OUT
DC-IN /
䏳㵎幑‣
DVI OUT
HDMI
D-SUB
DC-IN /
䏳㵎幑‣


