34
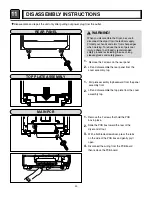
DRYER EXHAUST CHANGE
WARNING!
Before performing this exhaust installation, be sure to
disconnect the dryer from its electrical supply. Protect your
hands and arms from sharp edges when working inside the
cabinet. To reduce the risk of personal injury, adhere to all
industry recommended safety procedures including the use of
long sleeved gloves and safety glasses.
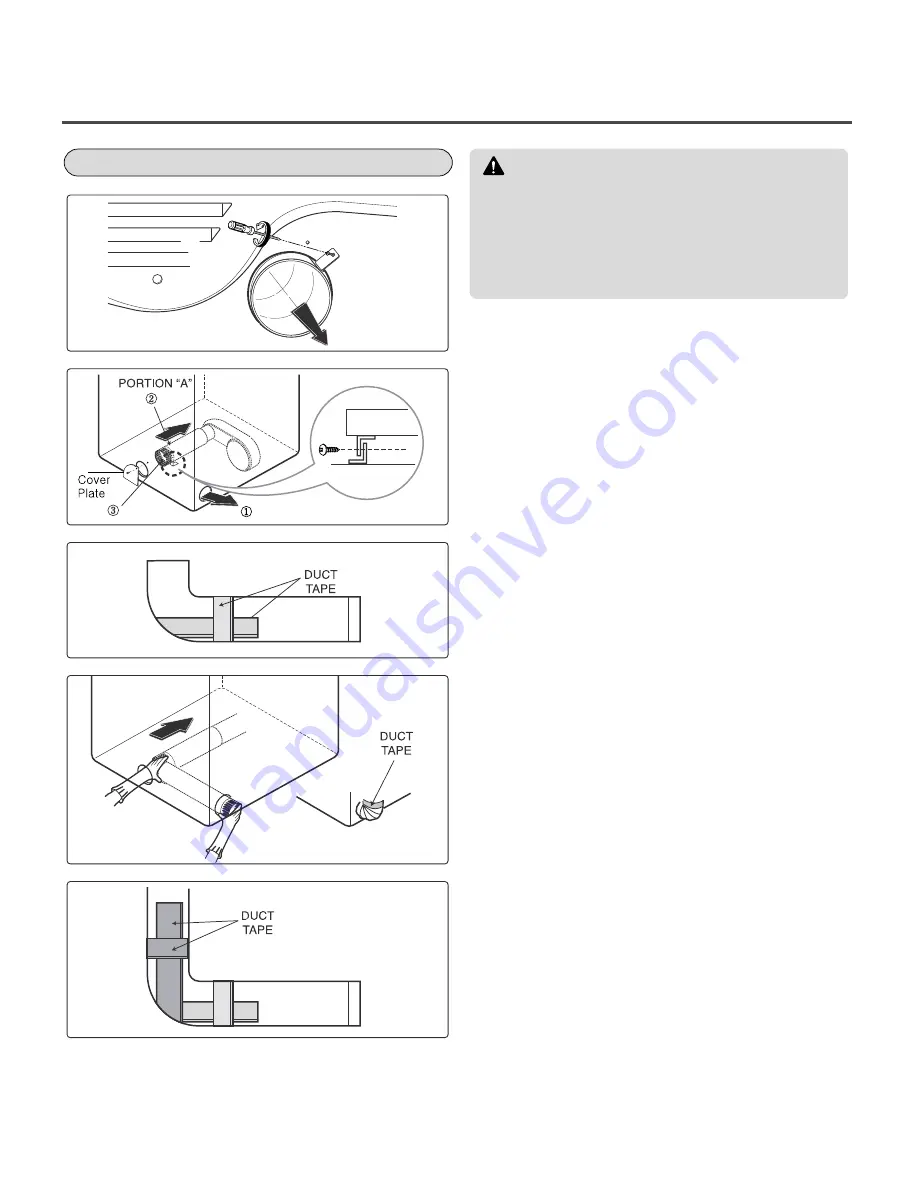
1.
Remove screw and exhaust duct.
2.
Detach and remove the bottom, left or right
side knockout as desired. Attach cover plate to
the back of the dryer with included screw.
4.
Pre-assemble a 4°± elbow with a 4°± duct.
Wrap duct tape around the joint
5.
Insert duct assembly, elbow first, through the
side opening and connect the elbow to the
dryer°Øs internal duct.
3.
Reconnect the new duct [11°± (28 cm)] to the
blower housing, and attach the duct to the
base.

