Operating
17
Oper
ating
3
Other Operations
Programmed Playback
The program function enables you to store your
favorite files from any disc or USB device.
A program can contain 20 tracks/files.
1. Insert a CD or a USB and wait for it to be
ordered.
2. Press
PROGRAM/MEMORY
on the remote
control in stop status.
3. Press
C
/
V
on the remote control or
Y
/
U
on the unit to select a track/file.
4. Press
PROGRAM/MEMORY
again to save and
select a next track/file.
5. Press
d
/
M
to play the programmed music
tracks/files.
6. To clear your selection, press
Z
ENTER
twice.
The programs are also cleared when the disc
or USB device is removed, the unit is powered
off or the function is switched to others.
,
Note
Turn off the sound temporarily
Press
MUTE
@
to mute your unit.
You can mute your unit, for example, to answer
the telephone, the mute icon "
Q
” is blinked in the
display window.
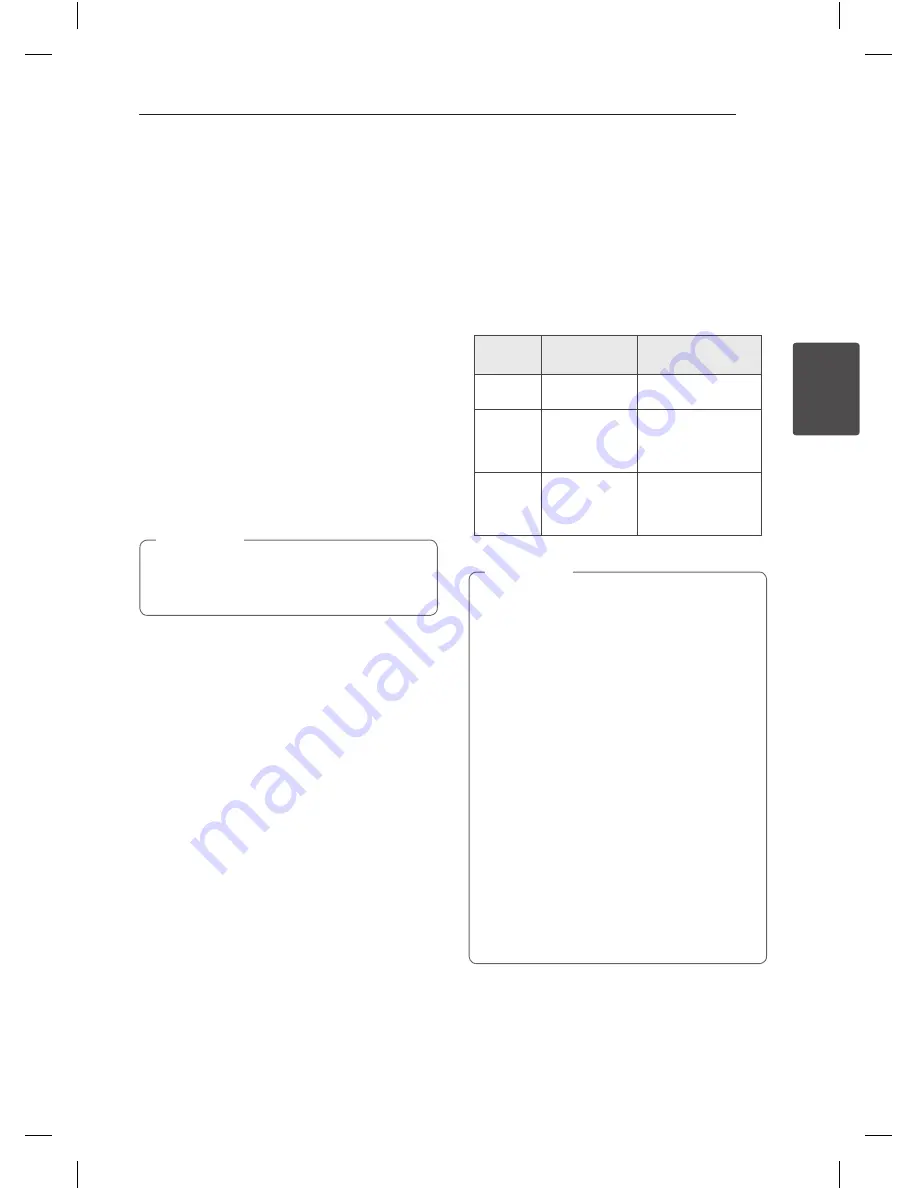
AUTO DJ playback
Auto DJ blends the end of one song into the
beginning of another for seamless playback.
It equalizes volume across tracks/files for
uninterrupted playback.
Press
AUTO DJ
on the remote control
or unit
repeatedly, the display changes as followings.
RANDOM (AUTO DJ RANDOM) -> REPEAT ALL
(AUTO DJ SEQUENTIAL) -> (AUTO DJ OFF)
Mode
Display
Window
Description
OFF
-
(AUTO DJ OFF)
-
RANDOM
RANDOM
(AUTO DJ
RANDOM)
The music is
played randomly
on this mode.
REPEAT
REPEAT ALL
(AUTO DJ
SEQUENTIAL)
The music is
played repeatedly
on this mode.
y
Searching for a section within a track/file
or playing repeatedly or randomly is not
supported on the AUTO DJ mode.
y
During AUTO DJ mode, pressing
PRESET
.
FOLDER
W
/
S
on the remote
control or
FOLDER/FILE SEARCH
on the
unit is not available.
y
If you move to other functions or stop the
music using
I
on the unit (or
Z
ENTER
on
the remote control) on AUTO DJ mode,
AUTO DJ function will be disable.
y
AUTO DJ function is not supported in the
music file whose length is less than 60
seconds.
y
During recording, AUTO DJ function is not
available.
y
If you change a disc while the AUTO DJ
function is activated, the function is
deactivated.
,
Note
Summary of Contents for CM8520
Page 8: ...Getting Started 8 Getting Started 1 Front panel ...
Page 26: ...5 Appendix Appendix 26 Appendix 5 Trademarks and Licenses ...
Page 30: ......
Page 38: ...Comenzando 8 Comenzando 1 Panel frontal CM8520_DCHLLLK_SPA indd 8 2012 02 08 3 42 25 ...
Page 60: ...CM8520_DCHLLLK_SPA indd 30 2012 02 08 3 42 28 ...


