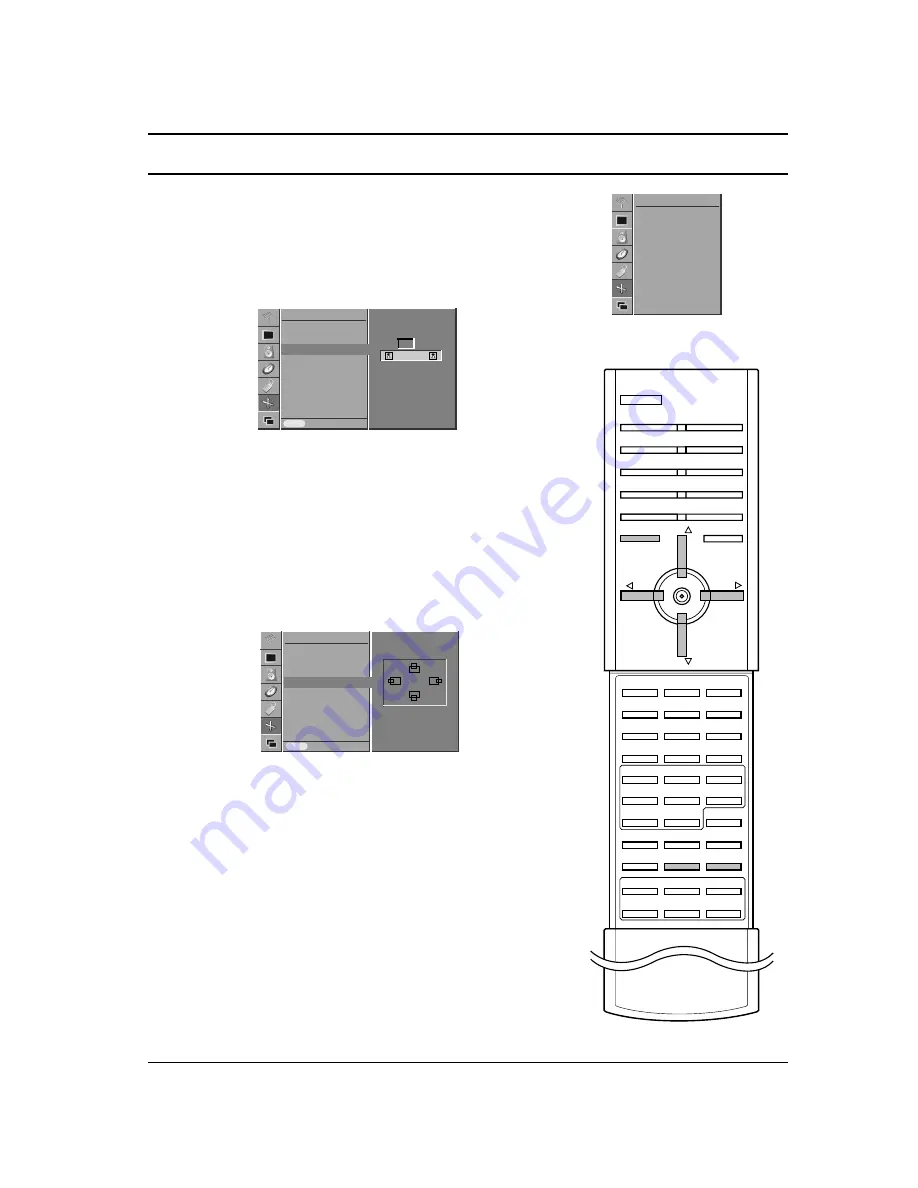
SCREEN Menu
Picture Size Zoom
When enlarging or reducing the picture, the screen may be display
unnatural picture.
1. Press the MENU button and then
D
/
E
button to select the
SCREEN menu.
2. Press the
G
button and then
D
/
E
button to select
Zoom
In/Out
.
3. Press the
G
button and then
F
/
G
button to enlarge or reduce
the picture size.
4. Press the MENU button to save.
You can also enlarge or reduce the picture size with Zoom+/Zoom-
on the remote control and then adjust the main picture position with
the
D
/
E
/
F
/
G
buttons in enlarged picture mode.
Note : The adjustment range of zoom is 100~300.
Screen Position (RGB [PC] mode only)
1. Press the MENU button and then
D
/
E
button to select the
SCREEN menu.
2. Press the
G
button and then
D
/
E
button to select
Position
.
3. Press the
G
button and then
D
/
E
or
F
/
G
button to adjust the
position.
4. Press the MENU button to save.
Manual Configure (RGB [PC] mode only)
If the picture isn’t clear after auto adjustment and especially that
characters are still trembling, adjust the picture phase manually. To
correct the screen size, adjust
Clock
.
1. Press the MENU button and then
D
/
E
button to select the
SCREEN menu.
2.
Press the
G
button and then
D
/
E
button to select
Manual
Config.
.
3.
Press the
G
button and then
D
/
E
button to to select
Phase
or
Clock
.
4. Press the
F
/
G
button to make appropriate adjustments.
5. Press the MENU button to save.
Note :
a. The adjustment range of
Phase
is 0~31.
b. The adjustment range of
Clock
is -50~+50.
23
ZOOM-
ZOOM+
MENU
PR
PR
VOL
VOL
SCREEN menu
Auto Configure
ARC
Zoom In/Out
Position
Manual Config.
Screen Adj.
Reset
YNR
SCREEN
G
G
Auto Configure
ARC
Zoom In/Out
Position
Manual Config.
Screen Adj.
Reset
YNR
Prev.
SCREEN
MENU
Zoom In/Out
G
G
100 %
F
F
G
G
Auto Configure
ARC
Zoom In/Out
Position
Manual Config.
Screen Adj.
Reset
XGA Mode
Prev.
SCREEN
MENU
Position
G
G
D
F
G
E
Summary of Contents for BZ03
Page 44: ......


