20
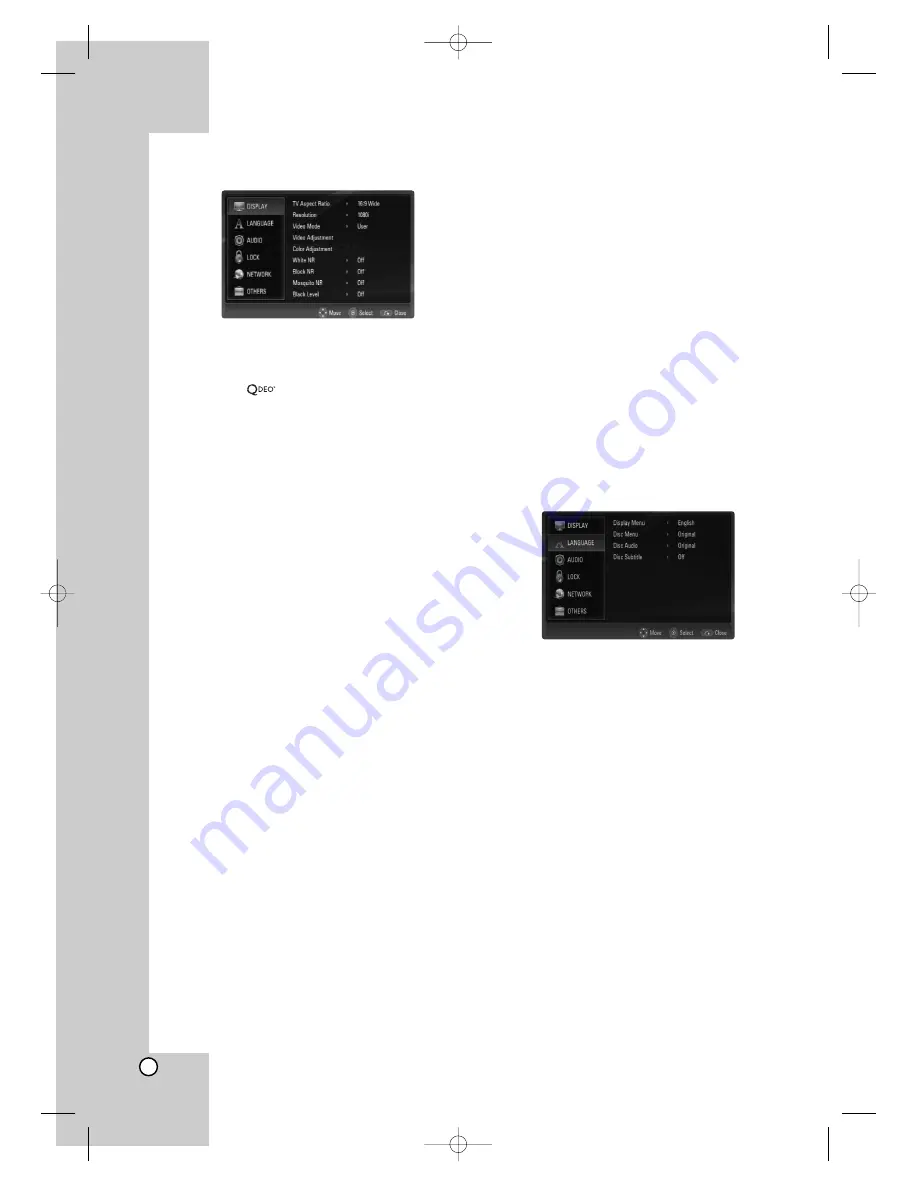
[DISPLAY] Menu (Continued)
Video Mode
Select the video mode during play.
[Default] –
The video is adjusted automati-
cally. Qdeo delivers rich high-definition video
quality through a suite of advanced QuietVideo™
technologies. You cannot adjust other video
adjustment options.
[User] –
You can make further adjustments for
video using [Video Adjustment],
[Color Adjustment], [White NR], [Block NR], and
[Mosquito NR] options.
Video Adjustment
You can adjust Contrast, Brightness, Sharpness or
Color.
1. Select [Video Adjustment] option then press
ENTER.
The menu for video adjustment will appear
2. Use
v
/
V
to select a desired option then use
b
/
B
to adjust the value.
• Select [Default] option then press ENTER to
reset the video adjustment.
• Select [Close] option then press ENTER to exit
the [Video Adjustment] menu.
Color Adjustment
You can adjust picture’s color.
1. Select [Color Adjustment] option then press
ENTER.
The menu for color adjustment will appear
2. Use
v
/
V
to select a desired option then use
b
/
B
to adjust the value.
• Select [Default] option then press ENTER to
reset the color adjustment.
• Select [Close] option then press ENTER to exit
the [Color Adjustment] menu.
White NR (White Noise Reduction)
Enhance the video quality by reducing the white
(random) noise of the digital video.
The higher White NR level makes the video softer.
Block NR (Block Noise Reduction)
Set to [On] to reduce the block noise, which may
appear especially on fast-moving pictures, produced
in the MPEG compression process.
Mosquito NR (Mosquito Noise Reduction)
Set to [On] to reduce the mosquito (scattering) noise
produced in the MPEG compression process.
Black Level
You can adjust the black level of the output signal.
[Off] –
Normal black level. (7.5 IRE)
[On] –
To display deeper, richer black than in
[Off] setting. (0 IRE)
Note:
Black Level control is only valid in component 480i
case.
[LANGUAGE] Menu
Display Menu
Select a language for the Setup menu and on-
screen display.
Disc Menu / Disc Audio / Disc Subtitle
Select the language you prefer for the audio track
(disc audio), subtitles, and the disc menu.
[Original]
– Refers to the original language in
which the disc was recorded.
[Other]
– To select another language, press
number buttons then ENTER to enter the corre-
sponding 4-digit number according to the lan-
guage code list on page 33.
[Off] (for Disc Subtitle)
– Turn off Subtitle.
Note:
Depending on a disc, your language setting may not
be worked for some disc.
BH200-N_AUSALLK_ENG 4/18/08 9:28 AM Page 20


