37
Refrigerant Piping Connections
Due to our policy of continuous product innovation, some specifications may change without notification.
©LG Electronics U.S.A., Inc., Englewood Cliffs, NJ. All rights reserved. “LG” is a registered trademark of LG Corp.
REFRIGERANT PIPING CONNECTIONS
Finishing the Job
Once the Evacuation procedure has been performed, follow the steps below to turn off all valves at the outdoor unit and safely disengage the
manifold valve, along with the vacuum pump. Refer back to the illustrations and tables on the previous pages as you go through the steps below.
Procedure
1. Using a wrench, turn the valve of the liquid stem counter-clock-
wise to fully open the valve (refer back to Figure 57).
2. Turn the gas stem valve counter-clockwise to fully open the valve.
3. Loosen the charge hose connected to the gas side service port
slightly to release the pressure, and then remove the hose.
4. Replace the flare nut and its cap on the gas service port and
fasten the flare nut securely using an adjustable wrench.
• This process is very important to prevent leakage from the system.
5. Replace the valve caps at both gas and liquid side service valves
and then fasten them tightly.
• Once done, this will complete the air purging process with a vacu-
um pump.
Test Run
After leakage testing, and evacuation procedure the system should
be ready to start up for a test run. Follow the guidelines below for
proper procedure.
• Check that all tubing, piping and wiring are properly connected.
• Make sure that the gas and liquid service valves are fully open.
• Start up the system and do a test run.
• As system is up and running verify all is in working order and make
notes as needed to work around any issues that might crop up.
Evacuation
After successful leak testing has been performed, follow Evacuation procedure. Follow the same steps for charge hose hookup to the sys-
tem. See page 35 for proper hookup.
Evacuation of Lines/Finishing Up/Remote Controller
Procedure
1. Confirm that the “Lo” knob of the manifold valve is open. Refer
back to Figure 57.
2. Confirm that the “Hi” knob of the manifold valve is left closed.
3. Run the Vacuum pump.
• Operate pump until the system has been evacuated down to 300
microns.
• Run pump an additional 15 minutes after reaching micron level.
The duration of the operation of the vacuum pump will vary accord-
ing to pipe length and the capacity of the pump. Refer to Table 18 for
accurate time duration.
4. Turn off the pump and leave the connections secured to the two
service valves.
5. Wait 5 minutes.
6. If the system fails to hold 500 microns or less, check all connec-
tions for tight fit and repeat the evacuation procedure.
7. Once, desired vacuum is reached, close the “Lo” knob of the
manifold valve and stop the vacuum pump.
8. Proceed to
Finishing the Job
section, below.
Installing Batteries into Remote Controller
As part of the test run, you will need to insert batteries and power on the remote controller. To insert the batteries follow the steps below. For
information on using the remote controller, refer to its owner’s manual.
Procedure
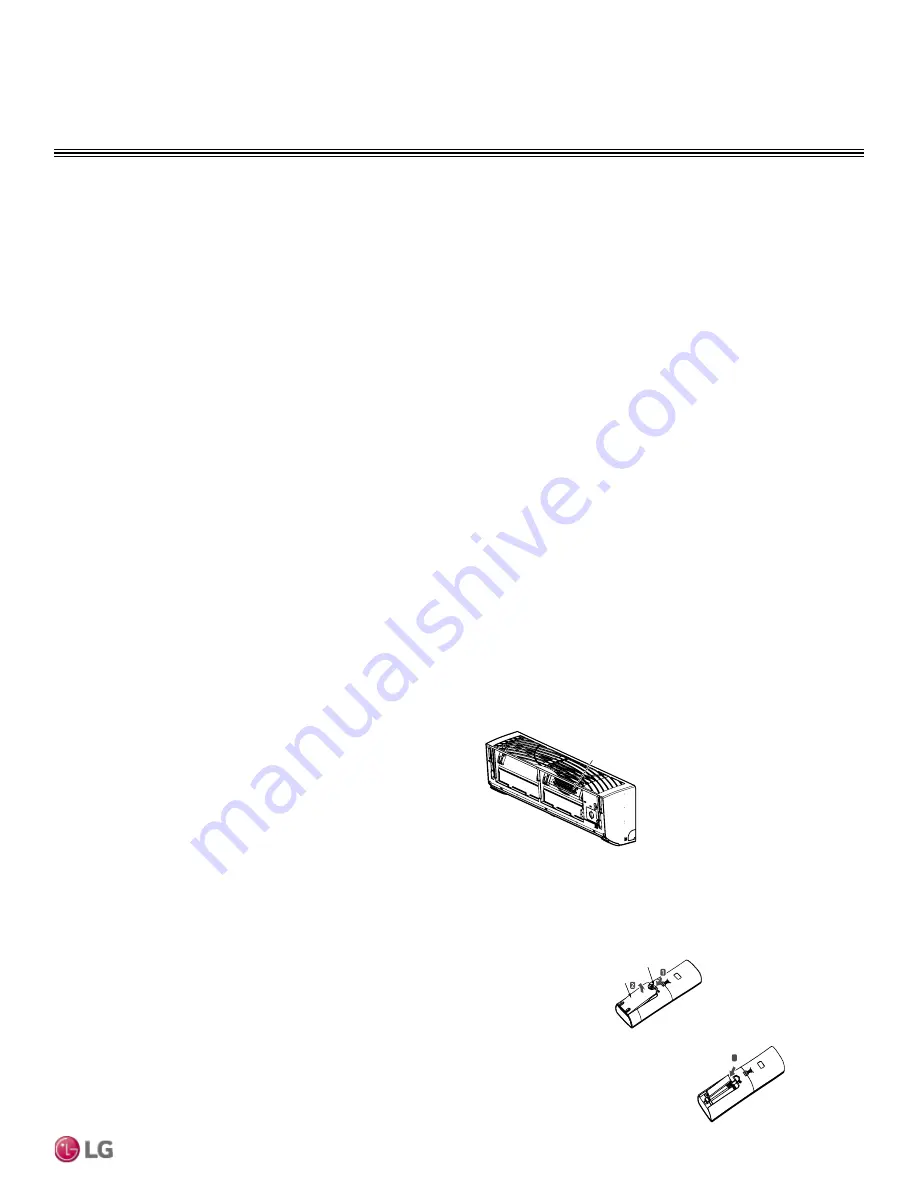
1. The remote controller needs two AAA (1.5V) batteries for operation. Remove the battery
cover from the back of the remote controller (Figure 60).
• Push downward on the tab at the top of the battery cover and then lift up to remove.
2. Insert the two new batteries.
• Align batteries by the (+) and (-) sides.
• The interior battery compartment of the remote controller will have clear markings for the
(+) and (-) placement.
3. Verify that the batteries have “clicked” into the compartment and are firmly engaged with
the contacts on either side of them.
4. Reattached the back cover of the remote controller.
5. Proceed with powering on the remote controller and usage as needed.
Filter Installation
1. Remove the 3M
™
filter from the separately packed plastic bag.
2. Insert the 3M filter into the indoor unit with the logo facing the front.
Figure 59: Location of the Filter
3M filter
1. Push down on tab
2. Lift cover
3. Insert
3
batteries
Single Zone Remote Controller - Rear View
Battery Cover
Tab
Battery
Cover
Figure 60: Remote Controller - Installing Batteries


