background image

2-4

Service Manual

4069-XXX

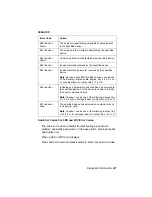
928 Erase Lamps

Models 010/212/414/616/31v/01n/21n/31e/41n/61n
Indicates that the engine has detected that either the 
erase lamp assembly is missing or disconnected. Go to 
the 

“Erase Lamp Service Check (010/212/414/616/31v/

01n/21n/31e/41n/61n)” on page 2-45

.

Models 41b/41e/41l and models 010/212/414/616/31v/
01n/21n/31e/41n/61n at service level B do not have 
erase lamps installed. Go to 

“Printer Serial Label” on 

page 7-2

 to identify the printer service level. Check to 

make sure the correct HVPS is installed if this error 
displays on these models.

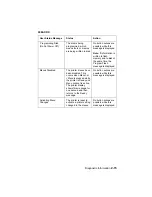
929 Toner Sensor

The toner sensor is not operating properly, the developer 
drive assembly is not operating properly or the print 
cartridge is defective. G
o to the 

“Toner Sensor Service 

Check” on page 2-107

.

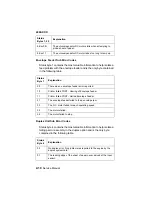
930 Printhead 
Error

The wrong printhead is installed. Replace with the 
correct printhead.

931-935 
Printhead Error

These errors represent a problem with the printhead. Go 
to the 

“Printhead Service Check” on page 2-92

.

932 - Printhead: 
Lost Hsync

933 - Mirror Motor 
Locks/Lost Hsync

934 - Mirror Motor 
Lost Lock

935 - Mirror Motor 
unable to reach 
operating speed.

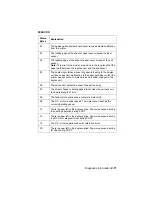
936-937 
Transport Motor

Indicates a problem with the main drive motor. Go to the 

“Main Drive Service Check” on page 2-69

.

936 - Main Drive 
Motor initial lock 
failure

937 - Main Drive 
Motor lost lock

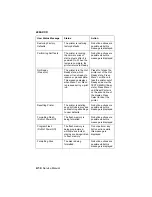
Error Code

Action

Summary of Contents for Optra T

Page 1: ...This is trial version If you want get full version please register it thank you Web site http www adultpdf com E mail support adultpdf com ...

Page 2: ...ark OptraTM T Lexmark and Optra are trademarks of Lexmark International Inc registered in the United States and or other countries Table of Contents Index Safety and Notices Trademarks Start Diagnostics Manuals Menu ...

Page 3: ...ed comments may be addressed to Lexmark International Inc Department D22A 032 2 740 West New Circle Road Lexington Kentucky 40550 U S A Lexmark may use or distribute any of the information you supply in any way it believes appropriate without incurring any obligation to you You can purchase additional copies of publications related to this product by calling 1 800 553 9727 In other countries conta...

Page 4: ...Dead Machine Service Check 2 32 Duplex Option Service Check 2 35 Envelope Feeder Option Service Check 2 38 Erase Lamp Service Check 010 212 414 616 31v 2 45 Fan Service Check 2 46 Fuser Service Check 2 47 Fuser Solenoid Service Check 2 51 Input Sensor Service Check 2 52 Input Tray s Option Service Check 2 53 High Capacity Feeder Input Tray Service Check 2 56 Main Drive Service Check 2 69 Operator ...

Page 5: ...5 Duplex Motor Test 3 5 Duplex Feed 1 Test 3 7 Duplex Feed 2 Test 3 7 Error Log 3 8 Viewing the Error Log 3 8 Clearing the Error Log 3 8 Hardware Tests 3 9 LCD Test 3 9 Button Test 3 9 SDRAM Memory Test 3 10 ROM Memory Test 3 10 Parallel Wrap Test 3 11 Serial Wrap Test 3 12 Input Tray Tests 3 14 Input Tray Feed Test 3 14 Input Tray Sensor Test 3 14 Output Bin Test Standard Bin 3 15 Output Bin Feed...

Page 6: ... 3 Printhead Assembly Adjustment 4 4 Paper Alignment Assembly Adjustment 4 5 Screw Identification Table 4 7 Removal Procedures 4 12 Covers 4 12 Center Pan Assembly 4 16 Controller Board 4 17 Developer Drive Assembly 4 18 Duplex Board 4 19 Duplex Front Cover Assembly 4 19 Duplex Front Cover Door 4 19 Duplex Motor 4 20 Engine Board 4 21 EP Frame Assembly 4 21 Fans 4 22 Fuser 4 24 Fuser Board Hot Rol...

Page 7: ...Tray Assembly 4 49 Outer EMC Shield 4 50 Paper Alignment Assembly 4 51 Paper Input Sensor 4 52 Paper Size Sensing Board 4 53 Pick Roll 4 53 Printhead 4 54 Redrive Assembly 4 55 Right Side Frame 4 56 Smart Cartridge Contacts 4 57 Toner Sensor 4 58 Transfer Roll Assembly 4 59 Upper Paper Deflector Assembly 4 59 Upper Front Cover Hinge Assembly 4 60 Upper Front Cover Interlock Switch Assembly 4 61 Co...

Page 8: ...ted Paper Tray 500 Sheet 7 24 Assembly 10 Main Drive 7 26 Assembly 11 Developer Drive 7 28 Assembly 12 Hot Roll Fuser 7 30 Assembly 13 Belt Fuser 7 34 Assembly 14 Transfer 7 36 Assembly 15 Charging 7 38 Assembly 16 Electronics 7 40 Assembly 17 250 Sheet Tray 7 52 Assembly 18 500 Sheet Tray 7 56 Assembly 19 Duplex 7 60 Assembly 20 Output Expander 7 66 Assembly 21 Envelope Feeder 7 70 Assembly 22 Hi...

Page 9: ...viii Service Manual 4069 XXX ...

Page 10: ...Notices and Safety Information ix 4069 XXX Notices and Safety Information Laser Notices The following laser notice labels may be affixed to this printer as shown Laser Advisory Label ...

Page 11: ...x Service Manual 4069 XXX Class 1 Laser Statement Label ...

Page 12: ...th and Human Services 21 CFR Teil J für Laserprodukte der Klasse I 1 In anderen Ländern gilt der Drucker als Laserprodukt der Klasse I der die Anforderungen der IEC International Electrotechnical Commission 60825 gemäß amtlicher Bestätigung erfüllt Laserprodukte der Klasse I gelten als unschädlich Im Inneren des Druckers befindet sich ein Laser der Klasse IIIb 3b bei dem es sich um einen Galliumar...

Page 13: ...r di classe IIIb 3b all arseniuro di gallio della potenza di 5mW che opera sulla lunghezza d onda compresa tra 770 e 795 nanometri Il sistema laser e la stampante sono stati progettati in modo tale che le persone a contatto con la stampante durante il normale funzionamento le operazioni di servizio o quelle di assistenza tecnica non ricevano radiazioni laser superiori al livello della classe 1 Avi...

Page 14: ...istema e a impressora laser foram concebidos de forma a nunca existir qualquer possiblidade de acesso humano a radiação laser superior a um nível de Classe I durante a operação normal a manutenção feita pelo utilizador ou condições de assistência prescritas Laserinformatie De printer voldoet aan de eisen die gesteld worden aan een laserprodukt van klasse I Voor de Verenigde Staten zijn deze eisen ...

Page 15: ...aserlaitteiden IEC 60825 määrityksen mukainen Luokan I laserlaitteiden ei katsota olevan vaarallisia käyttäjälle Kirjoittimessa on sisäinen luokan IIIb 3b 5 milliwatin galliumarsenidilaser joka toimii aaltoalueella 770 795 nanometriä Laserjärjestelmä ja kirjoitin on suunniteltu siten että käyttäjä ei altistu luokan I määrityksiä voimakkaammalle säteilylle kirjoittimen normaalin toiminnan käyttäjän...

Page 16: ...m avgir stråling i bølgelengdeområdet 770 795 nanometer Lasersystemet og skriveren er utformet slik at personer aldri utsettes for laserstråling ut over klasse I nivå under vanlig bruk vedlikehold som utføres av brukeren eller foreskrevne serviceoperasjoner Avís sobre el Làser Segons ha estat certificat als Estats Units aquesta impressora compleix els requisits de DHHS 21 CFR apartat J pels produc...

Page 17: ...xvi Service Manual 4069 XXX Japanese Laser Notice Chinese Laser Notice ...

Page 18: ... maintenance information for this product has been prepared for use by a professional service person and is not intended to be used by others There may be an increased risk of electric shock and personal injury during disassembly and servicing of this product Professional service personnel should understand this and take necessary precautions Consignes de Sécurité Ce produit a été conçu testé et a...

Page 19: ...riguardanti la manutenzione di questo prodotto sono indirizzate soltanto al personale di assistenza autorizzato Durante lo smontaggio e la manutenzione di questo prodotto il rischio di subire scosse elettriche e danni alla persona è più elevato Il personale di assistenza autorizzato deve quindi adottare le precauzioni necessarie Sicherheitshinweise Dieses Produkt und die zugehörigen Komponenten wu...

Page 20: ...nales durante el desmontaje y la reparación de la máquina El personal cualificado debe ser consciente de este peligro y tomar las precauciones necesarias Informações de Segurança Este produto foi concebido testado e aprovado para satisfazer os padrões globais de segurança na utilização de componentes específicos da Lexmark As funções de segurança de alguns dos componentes podem não ser sempre óbvi...

Page 21: ... algunes peces pot ser que no sempre siguin òbvies Lexmark no es responsabilitza de l us d altres peces de recanvi La informació pel manteniment d aquest producte està orientada exclusivament a professionals i no està destinada a ningú que no ho sigui El risc de xoc elèctric i de danys personals pot augmentar durant el procés de desmuntatge i de servei d aquest producte El personal professional ha...

Page 22: ...Notices and Safety Information xxi 4069 XXX Chinese Safety Information Korean Safety Information Ozone Information This product does not produce measurable amounts of ozone gas ...

Page 23: ...ks used to isolate failing field replaceable units FRUs Diagnostic Aids contains tests and checks used to locate or repeat symptoms of printer problems Printer operation information is provided to enhance the tests and checks Repair Information provides instructions for making printer adjustments and removing and installing FRUs Connector Locations uses illustrations to identify the major componen...

Page 24: ...puter networks The Optra T laser printer is available in the following models Model Name Type Optra T 610 4069 010 Optra T 610n 4069 01n Optra T 612 4069 212 Optra T 612n 4069 21n Optra T612v 4069 31v Optra T612vn 4069 31e Optra T 614 4069 414 Optra T 614 4069 41b Optra T 614n 4069 41e Optra T 614nl 4069 41l Optra T 614n 4069 41n Optra T 616 4069 616 Optra T 616n 4069 61n ...

Page 25: ...Manual 4069 XXX Look at the printer serial label to identify the printer you are working on There are two service levels of Optra T printers Some printers are at a service level B as indicated by the B on the label ...

Page 26: ...Token Ring Ethernet Tri Port Adapter IR Adapter IPDS SIMM Prescribe SIMM TIFF SIMM Barcode SIMM Parallel Interface Card SCS USB Parallel Port Marknet Print Servers 250 and 500 sheet paper trays of A5 letter and legal size 250 Sheet Special Media Tray Assembly 500 Sheet Special Media Tray 2000 Sheet High Capacity Feeder Envelope feeder Duplex option 250 Sheet Duplex option 500 Sheet Hard Disk 2 1 G...

Page 27: ...e printer problem and repair the failure After you complete the repair perform tests as needed to verify the repair Tools Required For Service Flat blade screwdriver 1 Phillips screwdriver 2 Phillips screwdriver T10 Torx Screwdriver 7 0 mm nut driver 5 5 mm wrench Needlenose pliers Diagonal pliers Spring hook Feeler gauges Analog or digital multimeter Parallel wrap plug 1319128 Serial wrap plug 13...

Page 28: ...Amplification by Stimulated Emission of Radiation LCD Liquid Crystal Display LED Light Emitting Diode LVPS Low Voltage Power Supply MROM Masked Read Only Memory NVRAM Nonvolatile Random Access Memory OEM Original Equipment Manufacturer PC Photoconductor POR Power On Reset POST Power On Self Test RIP Raster Imaging Processor ROM Read Only Memory SIMM Single In Line Memory Module SDRAM Synchronous D...

Page 29: ...1 6 Service Manual 4069 XXX ...

Page 30: ...Codes on page 2 2 User status messages provide the user with information on the current status of the printer Ready is displayed on the first line of the display unless Power Saver is invoked and then Power Saver is displayed If a user status message is displayed go to the User Status Messages on page 2 12 User error messages are indicated by a two or three digit error code that provides the user ...

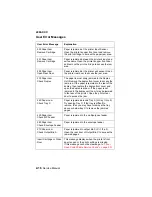
Page 31: ... Replace the engine board Check for correct location of the jumpers on the interconnect board for the model type printer you are servicing Incorrect jumper settings can cause a 902 service error If jumpers are set correctly replace the engine board 903 Paperport Link Driver Error 904 Interface Violation by the controller software 905 Interface Violation by Paperport Device 906 Controller Engine Li...

Page 32: ...user on page 2 50 921 Fuser Error Indicates that the fuser is below standby temperature when the printer is idle Go to the Fuser Service Check on page 2 47 922 Fuser Error Fuser failed to reach standby temperature Go to the Fuser Service Check on page 2 47 For models 31v and 31e go to Belt Fuser on page 2 50 923 Fuser Error Fuser is too hot during printing or when printer is idle Go to the Fuser S...

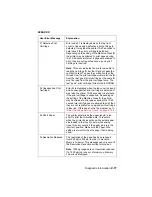
Page 33: ...models 929 Toner Sensor The toner sensor is not operating properly the developer drive assembly is not operating properly or the print cartridge is defective Go to the Toner Sensor Service Check on page 2 107 930 Printhead Error The wrong printhead is installed Replace with the correct printhead 931 935 Printhead Error These errors represent a problem with the printhead Go to the Printhead Service...

Page 34: ...created by a defective code overlay SIMM a code upgrade a defective IPDS or a prescribe SIMM These should be checked before replacing the controller board 941 Controller Font CRC Replace the controller board 943 Controller Font Version Indicates that the controller code and FONT ROM are incompatible 944 Controller Board Failure Replace the controller board 945 Controller Board Failure ASIC Failure...

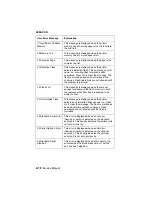
Page 35: ...fix the problem replace the controller board 963 RAM in slot 3 is Bad Replace the DIMM in slot 3 If this does not fix the problem replace the controller board 964 Emulation Error Indicates a failure within the Download Emulation which is programmed into the code overlay SIMM The specific error is as follows 964 Download Emulation CRC Failure Checksum Failure 965 Download Emulation Outdated The Dow...

Page 36: ...vice 983 device Invalid command received by the specified device 984 device Invalid command parameter received by the specified device Note Service Errors 980 thru 984 device can be one of the following engine board duplex tray x 1 2 3 4 or 5 envelope feeder or output bin x 1 2 or 3 990 device Indicates an equipment check condition has occurred in the specified device but the device is unable to i...

Page 37: ... paper through the printer and the second sheet is ready to arrive at the sensor 84 xx 01 Video information has not started on the page at the input sensor within two inches after activating the input sensor flag 84 xx 02 The media takes too long to complete a pass through the input sensor 84 xx 04 This can occur when a sheet of paper is in the machine during POST and the input sensor flag has tri...

Page 38: ...and never deactivated A sheet of paper may still be over the sensor or the flag is still activated 84 xx 0F Paper Tray 2 pass thru sensor is not activated and never deactivated A sheet of paper may still be over the sensor 84 xx 10 The main motor is stalled or the incorrect main motor is installed in the printer 84 xx 11 The paper activated the input sensor too soon 84 xx 13 The paper activated th...

Page 39: ...DC motor stalls when attempting to pick a sheet of paper 8E xx 11 The autocompensator DC motor takes too long to ramp up Status Byte 1 Explanation 00 There was no envelope feeder error reported 10 Printer failed POST Homing of Envelope feeder 11 Printer failed POST Halted Envelope Feeder 21 The envelope feeder failed to feed envelope jam 30 The D C motor failed to reach operating speed 32 The moto...

Page 40: ...er has not sent a command to send a sheet of paper to the duplex unit 06 The exit sensor detected a sheet of paper too early 07 The sheet of paper s trailing edge did not clear the exit sensor in the desired length of time 08 The feed motor experienced a complete motor stall 0E The D C motor is under speed The motor never reached the correct operating speed 13 There is paper left in the duplex opt...

Page 41: ... for the values Press Menu until Reset Printer is on the second line of the display Press Select to Reset the printer Busy The printer is busy receiving or processing data or printing data Note The printer indicator light blinks while the printer is processing data Press Stop to take the printer out of Busy The Not Ready message is displayed No more data is processed but the printer processes all ...

Page 42: ... values Press Menu until Reset Printer is on the second line of the display Press Select to reset the printer Printing Directory List A directory of the flash and disk contents is processing or printing because Print Directory is selected from the menu Press Stop to take the printer out of Ready The Not Ready message is displayed No more data is processed but the printer processes all paper curren...

Page 43: ... Menu or Menu to take the printer out of Ready and enter the TESTS MENU Busy state Press Menu until Reset Printer is on the second line of the display Press Select to reset the printer Resetting Printer The printer is deleting any print jobs in process and restoring all settings to user defaults No button actions are possible while this message is displayed Formatting Flash Do Not Power Off The fl...

Page 44: ...essage is displayed Menus Disabled The printer menus have been disabled This occurs when Menu or Menu is pressed while the printer is Ready and Menu Lockout is active The printer display shows this message for one second and then returns to the Ready message No button actions are possible while this message is displayed Activating Menu Changes The printer is reset to activate a printer setting cha...

Page 45: ... duplex then replace the duplex front cover and open the duplex rear door If the paper is not jammed in the duplex unit then it may be jammed in the rear of the printer Open the printer rear door to access the jam 24X Paper Jam Check Tray X Paper is jammed around Tray X X tray 1 thru 5 Try opening Tray X If the tray is difficult to remove then you may have to remove the tray above or below tray X ...

Page 46: ...rint cartridge is detected It may take the printer 10 20 seconds to determine if the print cartridge is supported Depending on the setting of the Machine Class ID the printer may be allowed to print pages during this 10 20 second interval If pages are allowed to print then they are not reprinted once a good print cartridge is inserted If this does not fix the problem go to Smart Cartridge Service ...

Page 47: ... free space in the flash memory to hold the resources that have been requested to be written to flash 53 Unformatted Flash This message is displayed when the printer detects an unformatted flash at power on Press Go to clear the message The flash is marked as bad and normal operation continues Flash operations are not allowed until the flash is formatted 54 Standard Serial Error This error is disp...

Page 48: ... Go to clear the message The disk is marked defective and normal printer operations continue Disk operations are not allowed with a defective disk The Format Disk menu is not shown 62 Disk Full This error code is displayed when there is not enough free space on the disk to hold the resources that have been requested to be written to the disk This message displays for both resource and PostScript D...

Page 49: ...ngine flash code module has failed a CRC check Press Go to clear the message The microcode data is discarded and must be re transmitted from the host computer 88 Toner Low This message displays when toner low occurs and the toner low alarm is activated Press Go to clear this message User Message Explanation Toner Low If the toner cartridge is low then Toner Low displays The Toner Low condition cle...

Page 50: ...splays Also note that Empty status is not displayed for the Envelope Feeder or Multipurpose Feeder Tray X Low If any of the input trays are low then Tray X Low displays where X designates which tray 1 through 5 displays If multiple trays are low they are prioritized in the following order Tray 5 4 3 2 1 Note Tray X Low clears whenever Tray X goes empty or Tray X is removed When Tray X is reinserte...

Page 51: ...hed to PCI connector X Infrared Standard Infrared port if available Infrared X Infrared Port X X 1 2 3 is attached to PCI connector X User Status Message Explanation Check Output Bin X Connection Check Output Bin X X 1 2 or 3 Check Env Feeder Connection Check Envelope Feeder Option Connection Check Tray X Connection Check Tray X X 1 2 3 4 or 5 Check Duplex Connection Check Duplex Option Connection...

Page 52: ...ain turn the printer off remove the option and call for service User Status Message Explanation Turn Printer OFF to Enable Option This message displays when a printer option Input Tray Output Bin or Envelope Feeder has been attached while the printer is powered On In order to use the option the printer must first be powered off and back on again Data loss results if print jobs are active when the ...

Page 53: ...they all turn off 6 Performing Self Test appears on the display The 2000 sheet high capacity option elevator tray moves to the uppermost position if installed The duplex option is checked if installed The output expander option exit rollers turn if installed 7 Busy appears on the display 8 The fuser lamp turns on The fuser takes longer to warm up from a cold start than a warm start All models exce...

Page 54: ...ntinuously displays all diamonds sounds 5 beeps and does not complete POST Go to the Operator Panel Service Check on page 2 70 Paperfeed problems Base printer or Integrated 250 Paper Tray Go to the Paper Feed Service Check on page 2 89 Paper jams at exit of Redrive Assembly No Duplex Option installed Go to the Paper Feed Service Check on page 2 89 Paper jams at exit of Redrive Assembly Duplex Opti...

Page 55: ...ity Toner on backside of printed page Go to Print Quality Toner on backside of printed page on page 2 105 Print quality Vertical black bands on edge of copy Go to Print Quality Black bands on outer edges of the page on page 2 101 Unable to clear a 32 Unsupported Print Cartridge User Error Message Go to Smart Cartridge Service Check on page 2 106 Symptom Action The printer does not recognize the hi...

Page 56: ...Go to the Input Tray s Option Service Check on page 2 53 Symptom Action Paper feed problem with Duplex Go to the Duplex Option Service Check on page 2 35 Paper jams at Paper Removal Tray Go to the Duplex Option Service Check on page 2 35 Paper skews in the Duplex Option Go to the Duplex Option Service Check on page 2 35 Paper fails to pass from lower option thru the Duplex Option Go to the Duplex ...

Page 57: ...cular area of the printer or option Paperfeed Problems with error message Use the Sub Error Codes For 9XX and 2XX Error Codes on page 2 7 to help diagnose the problem Print Quality Problems Go to Print Quality Test Pages on page 3 24 and print a test page to help diagnose problems before changing any settings or working on the printer Use the resident diagnostics test provided to help isolate a pr...

Page 58: ...Carefully remove the roll by pressing outward and to the right on the charge roll link arm and remove the charge roll from the right side charge roll bearing 3 Remove the charge roll from the left side charge roll bearing and remove the roll from the printer Leave the paper wrapped around the charge roll until it is reinstalled FRU Action 1 Charge Roll Assembly Check the charge roll for correct in...

Page 59: ... assembly bearing for signs of wear or contamination Excessive contamination could cause intermittent charging of the charge roll If incorrect replace the link assembly Check for continuity of the right link assembly from the bearing to the charge roll high voltage contact on the right side frame If incorrect replace the link assembly Make sure the charge roll bushing is installed and operating co...

Page 60: ...ion If incorrect repair as necessary Disconnect the cover open switch cable from J4 at the engine board and measure the voltage at J4 3 It measures approximately 5 V dc If the voltage is incorrect replace the engine board If the voltage is correct check the voltage at J4 1 If the voltage measures greater than 1 0 V dc replace the engine board If the voltage is correct check the continuity between ...

Page 61: ...ith another connector mounted on the left side frame assembly Some force may be required to pull the LVPS loose from the connector 2 Gently remove the LVPS supply using caution not to damage the printed circuit board Pull the LVPS out far enough to reach the fuser lamp cable 3 The fuser lamp cable uses a locking type of connector system Unlock the fuser lamp cable connector disconnect the cable an...

Page 62: ... replace the engine board If incorrect go to step 6 6 LVPS Fuse F1 Remove the LVPS from the printer and check fuse F1 Replace the fuse if the fuse is blown 7 LVPS Fuse F1 Continues to blow after LVPS installed in the printer Replace fuse F1 if necessary Turn the LVPS on off switch Off and connect the AC line cord and turn the LVPS On CAUTION Before checking fuse F1 turn the LVPS Off and disconnect...

Page 63: ...t one cable at a time until you find the defective assembly Service Tip A short or low resistance load that is attached to the engine board can cause the LVPS to overcurrent and shut the 5 V dc supply down to 0 V dc Service Tip Check the engine board for burn marks or other damage especially R20 R21 R22 and R23 located next to the upper left engine board mounting screw If this screw is overtighten...

Page 64: ... between the motor case and pins J3 1 through J3 4 If no problem is found check the D C servo motor pins J1 1 and J1 2 to the motor housing for a short If a short is found replace the motor assembly If no short is found replace the system board 2 Autoconnect Cables Connectors Check the autoconnect cables for damage to the cables or the pins in the connectors If damaged replace the cable s If no da...

Page 65: ...put Sensor Flag Run the Duplex Sensor Test from the diagnostics menu If the test fails check the input sensor cable at J5 on the system board for correct installation If no problem is found replace the FRUs in the following order input sensor assembly duplex option system board 3 Paper Exit Sensor and Flag Check the duplex exit sensor for correct installation and free movement of the sensor flag C...

Page 66: ...the system board Check for any shorts between each pin of the motor cable and the motor housing If shorts are found replace the motor Check the resistance of the stepper motor between J3 1 Stpmtr A to J3 2 Stpmtr A The resistance measures approximately 10 ohms The resistance between J3 3 Stpmtr B to J3 4 Stpmtr B measures approximately 10 ohms If the resistance is incorrect replace the stepper mot...

Page 67: ...ption that is recognized Note If a 260 Paper Jam Check Envelope message displays check the Sub Error Codes For 9XX and 2XX Error Codes on page 2 7 Printer does not recognize the envelope feeder as an attached input option FRU Action 1 Envelope Feeder Check to make sure the envelope feeder is correctly installed and mated to the autoconnect at the front of the printer 2 Front Autoconnect on Printer...

Page 68: ...ge replace the damaged cable connector assembly Disconnect the autoconnect cable at J1 on the envelope system board and measure the following voltages J1 3 measures 5 V dc J1 5 measures 5 V dc J1 7 measures 24 V dc If any of the voltages are incorrect replace the autoconnect cable connector If the voltages are correct replace the envelope system board FRU Action ...

Page 69: ...nsor flag Note It may be necessary to use a small tool to actuate the sensor flag because it is located under the front cover Be careful not to damage the flag If the test fails check the flag for any signs of damage or binds If incorrect replace the flag If the flag is operating correctly check the voltage at J3 3 The voltage measures approximately 5 V dc If incorrect replace the envelope system ...

Page 70: ... and operation If incorrect repair or replace the flag 2 Envelope Out Hopper Input Sensor Check the sensor to make sure it is installed correctly and the sensor cable is properly connected to the envelope system board If correct perform the Envelope Feed Sensor Test to check both the sensor and flag If the test fails remove any envelopes in the hopper turn the printer off and disconnect J3 from th...

Page 71: ...ure the voltage at J4 6 The voltage measures approximately 5 V dc If incorrect disconnect J4 and measure the voltage again If incorrect replace the envelope feeder system board If correct replace the D C motor assembly FRU Action 1 Main Drive Belt Check the belt for correct installation and for signs of damage Replace as necessary 2 Gears Check all the gears for correct installation and for signs ...

Page 72: ...ent may be too narrow 2 Weight Assembly Check the weight assembly to make sure it moves up and down freely without any binds Also check to make sure the weight assembly rests on all the rear kick rollers when the hopper is empty Replace the weight assembly if it is damaged or does not operate properly 3 Envelope Edge Guide Check the envelope edge guide to make sure it is not warped or set too clos...

Page 73: ...e feeder option 2 Deflector Gap Adjustment Check the deflector gap adjustment The adjustment may be too narrow FRU Action 1 Envelopes Check the envelopes being used in the feeder Check for signs of the envelopes being stuck together or signs of glue Check to make sure the flaps are not interleaved 2 Deflector Check the deflector gap adjustment The adjustment may be too wide 3 Restraint Roll Bias S...

Page 74: ...ness to connector J10 on the engine board for correct installation If incorrect repair as necessary Check the front harness to erase lamp assembly for correct installation If incorrect repair as necessary 2 Engine Board Remove the controller board and toner cartridge from the machine Ground pin J10 15 The erase lamps turn on The lamps can be observed through the front of the machine with the cover...

Page 75: ...ce the fan and cable assembly 2 Engine Board Check to make sure the auxiliary fan cable is seated on connector J7 on the engine board If correct check for 24 V dc on J7 1 on the engine board If incorrect replace the engine board If correct replace the fan assembly Note When the printer is in warm up the voltage at J7 1 measures approximately 12 V dc When the printer is running the voltage measures...

Page 76: ...rmly seated in the two rear connectors Both the right and left lock down screws must be tight Service Tip Set the Fuser Temperature to NORMAL before starting this service check 3 Error Code 927 Fan runs Check the voltage at J1 1 on the engine board The voltage measures 5 V dc static 0 V dc fan running If incorrect replace the main fan If this does not fix the problem replace the engine board 4 Err...

Page 77: ...he continuity of the lamp If incorrect replace the lamp If correct replace the fuser cover assembly 3 LVPS LVPS to Fuser Auto Docking Connector Fuser AC Cable Turn the printer off Remove the fuser assembly Turn the printer power on Measure across the AC fuser cable pins for line voltage with the cable connected If incorrect turn the printer off and disconnect the power cord Check the continuity of...

Page 78: ...hermistor circuit for the fuser assembly The voltage on J2 6 on the engine board measures approximately 5 V dc If incorrect replace the engine board If correct check the continuity of the DC fuser cable fuser board to auto docking connector in the fuser assembly and the DC fuser cable engine board to auto docking connector in the printer If there is no continuity replace the cable If there is cont...

Page 79: ...Action 1 Engine Board EP Autoconnect Cable Engine Board to Fuser Error code 924 indicates the engine board detects an open circuit in the thermistor circuit for the fuser assembly The voltage on J2 6 on the engine board measures approximately 5 V dc If incorrect replace the engine board If correct check the continuity of the DC fuser cable engine board to auto docking connector in the printer If t...

Page 80: ...tion of the fuser solenoid can be observed by removing the redrive assembly Check for proper mechanical operation of the solenoid and associated hardware link and so on If correct check the resistance of the solenoid between J4 1 and J4 2 The resistance measures between 5 ohms and 10 ohms If incorrect replace the solenoid assembly 2 Fuser Control Board The solenoid receives power from the engine b...

Page 81: ...voltage at CN3 18 on the LVPS The voltage measures approximately 42 V dc If the voltage is correct replace the interconnect board assembly If the voltage is incorrect replace the LVPS 4 Fuser DC Cable Engine Board to Fuser Board Cable Engine Board Check for continuity of the DC fuser cable that is attached between J2 on the engine board and J1 on the fuser control board If the cable does not measu...

Page 82: ... of the input sensor cable section of the front wiring harness If incorrect replace the harness If correct replace the input sensor assembly FRU Action 1 Tray X option System Board or Compensator Assembly or Autoconnect Cable Check the autoconect cables and connectors for any signs of damage Replace if necessary Check the cables for continuity If incorrect replace the compensator assembly cable If...

Page 83: ...check the sensor for correct installation and the flag for proper operation Also check the sensor cable to make sure it is correctly connected to the option system board If incorrect replace the tray x option pass thru sensor assembly 2 Power Takeoff Shaft and Spring Bevel Gear Feedroll Gear Drive Roll Assembly Wear Plate Drive Shaft Bearings and Skewed Backup Roller Check these parts for signs of...

Page 84: ...for smooth and correct operation Paper low sensor for correct installation on the autocompensator housing Paper low sensor cable for signs of cuts pinched wiring or other damage especially at connector J5 on the system board If no problem is found replace the paper low sensor assembly If this does not correct the problem replace the option system board FRU Action 1 Paper Out Sensor Flag Check the ...

Page 85: ...rect paper size setting and the rear paper guides are in the correct locations for the size of paper installed in the high capacity feeder tray Service Tip Check the other paper sources to be sure they are operating correctly FRU Action 1 Autoconect Cables Tray X System Board Check the autoconnect from the printer or option above tray x Check for signs of cuts pinched wiring or damage to the conta...

Page 86: ...lly using the AC line cord from the AC wall outlet and does not work when using the AC jumper from the HCIT check the AC jumper cord If defective replace the cord If not defective check the AC input and output receptacles and wiring harness in the HCIT Repair or replace the receptacles or AC wiring harness as required NOTE Make sure the ground wire is installed correctly from the AC wiring harness...

Page 87: ...ected to the high capacity feeder tray option board assembly 2 Base Printer or option mounted above Check the option or base printer autoconnect for signs of damage Repair the high capacity option autoconnect as necessary 3 LVPS 2000 Sheet Option Option System Board Check the voltages at J11 2 and J11 4 The voltage measures 24 V dc If the voltage is correct replace the high capacity system board a...

Page 88: ... internal wiring from the input appliance receptacle If incorrect replace as necessary If correct replace the LVPS If the voltages are correct check the stepper motor for shorts from the motor housing to each pin on the motor connector If you find a short between any pin and the motor housing replace the motor assembly If no shorts are found replace the high capacity feeder option control board Ch...

Page 89: ... check the sensor for correct installation and the flag for proper operation Also check the sensor cable to make sure it is correctly connected to the option system board If incorrect replace the tray x option pass thru sensor assembly 2 Power Takeoff Shaft and Spring Bevel Gear Feedroll Gear Drive Roll Assembly Wear Plate Drive Shaft Bearings and Skewed Backup Roller Check these parts for signs o...

Page 90: ...nect the paper low switch cable from J3 on the high capacity system board Short pins 1 and 2 together while observing the sensor test on the display If the display does not change replace the high capacity feeder system board If the display changes check the continuity of the switch If incorrect replace the switch If correct replace the switch cable FRU Action 1 Paper Out Sensor Flag Check the pap...

Page 91: ...t switch If incorrect replace the switch If correct check the switch cable If incorrect replace the cable If correct replace the high capacity feeder option control board 2 High Capacity Feeder Control Board Disconnect the lower limit switch cable and check the voltage at J2 1 orange The voltage measures approximately 5 V dc If incorrect replace the high capacity feeder option control board FRU Ac...

Page 92: ...e sure the paper in tray is within specifications FRU Action 1 Autocompensator Assembly Check the autocompensator pick arm rollers for sign of glazing toner or other buildup Replace as necessary 2 Wear Strips Check the wear strips for glazing or contamination Replace as required It is advisable to replace all four wear strips at the same time ...

Page 93: ...ck the cables damaged or loose wires Disconnect the motor Check for a short between each pin and the motor housing If a problem is found replace the motor assembly If no problem is found measure the resistance between the following pins on the motor cable connector Pins 1 brown and pin 2 Yellow The resistance measures between approximately 7 5 and 10 5 ohms If incorrect replace the motor assembly ...

Page 94: ...ng J1 1 Brown approximately 0 V dc J1 2 yellow approximately 0V dc Motor Running Forward J1 1 Brown Approximately 0 V dc J1 2 Yellow Approximately 24V dc Motor Running Reverse J1 1 Brown Approximately 24 V dc J1 2 Yellow Approximately 0 V dc If any of the voltages are incorrect disconnect the motor and measure the resistance between J 1 and J 2 The resistance measures between 7 5 and 10 5 ohms If ...

Page 95: ...position does not measure continuity when selected replace the paper size switch assembly If the switch assembly is operating correctly replace the high capacity feeder option control board FRU Action 1 High Capacity Feeder Option Control Board Check the voltages on the board at J4 1 red and J4 3 blue The voltages measure approximately 5 V dc If incorrect disconnect J4 from the board and measure t...

Page 96: ...Sensor Check the continuity of the sensor cable If incorrect replace the cable If correct replace the top optical sensor assembly FRU Action 1 Paper Low Switch Paper Low Switch Cable High Capacity Feeder Option Control Board Run the sensor diagnostics for tray X X the number that represents the high capacity input tray If the test fails check the voltage at J3 1 grey The voltage measures approxima...

Page 97: ... for any signs of damage or contamination 3 Drive Pulley Check the drive pulley for any signs of wear binds or damage to the pulley or pulley shaft Make sure the pulley turns freely on the pulley shaft 4 Motor Drive Belt Tray Drive Belt Check the DC motor drive belt for any signs of damage Check to make sure the belt is tracking correctly on the drive pulley idler pulley and motor pulley Check the...

Page 98: ...Drive Assembly Excessive noise or vibration Remove the controller board and run a Diagnostic Print Test in the continuous mode Check the main drive assembly for any excessive noise or vibration Determine if the noise is in the main drive toner cartridge fuser or main drive gearbox Look for any loose or worn parts in the developer drive assembly main drive gearbox or fuser Repair as necessary 2 Mai...

Page 99: ... J12 4 5 V dc static 0 V dc when main drive motor running J12 5 5 V dc static 0 V dc when main drive motor running J12 6 5 V dc static 2 5 V dc when main drive motor running J12 7 5 V dc static 0 V dc when main drive motor running J12 8 5 V dc static 5 V dc when main drive motor running J12 11 5 V dc static 0 V dc when main drive motor running If the voltage is incorrect replace the FRUs in the fo...

Page 100: ...work Check the voltage at J11 5 The voltage measures approximately 5 V dc with the controller board removed If incorrect replace the engine board If correct check the continuity of the operator panel cable If incorrect replace the cable If correct replace the operator panel assembly FRU Action 1 Operator Panel Cable Check for proper installation of the cable at the engine board J11 and at the oper...

Page 101: ...ged then run the Flash Test on page 3 3 If the test fails replace the FLASH DIMM If the problem continues replace the controller board DRAM Memory Option s This service check is the same as the flash memory option service check with the following exception Run the SDRAM Memory Test on page 3 10 from the menu if the SDRAM Memory DIMM is correctly installed and not broken or damaged If the test fail...

Page 102: ...g or testing section WARNING This can be a very lengthy test depending on the disk size This test leaves the hard disk unformatted The servicer or user must reformat the disk using the Format Disk Menu operation This is a destructive type of test All the data on the disk is destroyed and should not be performed on a known good disk Network Card Option Note The network is installed on the controlle...

Page 103: ...unless the flag is in the up position or out of the sensor slot a Remove Paper Standard Bin message is not displayed FRU Action 1 Engine Board Printer fails to display Remove Paper Standard Bin message Output Bin Sensor Test fails Check the voltage at J6 3 It measures 5 V dc when the flag is in the sensor and 0 V dc when the flag is out of the sensor If the voltage does not change replace the sens...

Page 104: ...ricity buildup Printer does not recognize one or more output expander options as being installed Service Tip If more than a single output expander option is installed check each one to see if the printer recognizes any single option as being installed If the printer recognizes any of the output expander options then the base printer autoconnect system is operating correctly and the problem is in t...

Page 105: ...cts for damage especially the connector pins Remove the left and right side covers Remove the front control board cover Check the cables at J1A J1B J2A and J2B on the control board to make sure they are attached securely and correctly Remove the output expander and check the voltages on the output bin autoconnect located on the top left rear of the printer Go to Autoconnect Top on page 5 19 If the...

Page 106: ...ges can also occur prior to the output expander pass thru sensor FRU Action 1 Output Expander Drive Belt Drive Pulley Drive Belt Idler Pulley Belt Tension Spring Check to ensure the output expander drive belt is correctly installed on the drive pulley and belt idler pulley Check the belt tension spring to make sure it is not loose or broken Repair as necessary 2 Mechanical Linkage DC Motor Assembl...

Page 107: ...ag Check the flag for correct operation binding broken parts or interference from the sensor cable If incorrect repair as necessary FRU Action 1 Pass Thru Sensor and Flag Assembly Control Board Check the sensor flag for proper operation If correct check to make sure the pass thru sensor cable is correctly connected to J3 on the control board Disconnect the pass thru sensor cable from J3 on the con...

Page 108: ...tor case for shorts If either the resistance is incorrect or a short is found replace the motor mechanical linkage assembly Note If the DC motor is shorted it may also be necessary to replace the control board 2 Output Expander Control Board Disconnect the motor cable J4 and check the voltages at J4 on the board Note Use caution not to short to adjacent pins on the connector J4 1 Motor Idle 24 V d...

Page 109: ...properly Make sure the option s are installed correctly and the machine is configured correctly before attempting to service the high capacity output stacker option Go to High Capacity Output Stacker Board on page 5 22 to identify the correct jumper location at J6 for the upper and lower units FRU Action 1 Dual Output Bin X Sensor Assembly Control Board Check for correct installation of the sensor...

Page 110: ...ose or damaged FRU Action 1 High Capacity Stacker Option Check the autoconnects cables and connectors of the option for any signs of loose or damaged parts 2 High Capacity Output Stacker Mechanical Linkage Assembly Remove the left and right side covers and check all four autoconnects for damage especially the connector pins Remove the output option and check the voltages on the standard output bin...

Page 111: ...s thru sensor is correctly connected to J3 on the lower control board Disconnect the pass thru sensor cable and check the voltage at J3 3 The voltage measures approximately 5V dc If incorrect check the voltage at J3 2 The voltage measures approximately 0V dc If incorrect replace the sensor assembly If this does not fix the problem replace the lower control board 2 High Capacity Output Stacker Driv...

Page 112: ...unit FRU Action 1 Dual Output Bin Sensor Flag Upper Assembly Check the flag for correct operation binding broken parts or interference from the sensor cable If incorrect repair as necessary FRU Action 1 Upper Pass Thru Sensor Flag Assembly Upper Control Board Check the flag for correct operation binding broken parts or interference from the sensor cable If incorrect repair as necessary If correct ...

Page 113: ...lso check to make sure the ESD brush is not loose or damaged FRU Action 1 5 Bin Mailbox Option Check the autoconnects cables and connectors of the option for any signs of loose or damaged parts 2 Mechanical Linkage Assembly Remove the left and right side covers and check the two autoconnects for damage especially the connector pins Remove the output option and check the voltages on the standard ou...

Page 114: ...3 The voltage measures approximately 5V dc If incorrect check the voltage at J5 2 The voltage measures approximately 0V dc If incorrect replace the sensor assembly If this does not fix the problem replace the control board FRU Action 1 Top Pass Thru Sensor Flag Assembly Control Board Check the flag for correct operation binding broken parts or interference from the sensor cable If incorrect repair...

Page 115: ...e problem replace the control board Note This sensor is in a normally open position with the flag out of the sensor slot FRU Action 1 Bin X Sensor Bin X Sensor Cable Bin X Sensor Flag Bin X Sensor Flag Control Board Check the sensor flag for binds broken or missing parts If correct check the bin sensor for correct installation in the side of the tray If the bin sensor is installed correctly check ...

Page 116: ...bly Control Board Check the solenoid for any binds Make sure the solenoid is contacting the latch correctly If incorrect repair as necessary If the solenoid appears to be operating mechanically check the resistance of the solenoid It measures between 30 and 50 ohms If incorrect replace the failing solenoid assembly If correct replace the control board 3 Mechanical Linkage Motor Assembly If the DC ...

Page 117: ...s If either the resistance is incorrect or a short if found replace the mechanical linkage DC motor assembly Note If the DC motor is shorted it may also be necessary to replace the control board 2 Control Board Disconnect the motor cable J2 from the control board and check the voltages at J2 on the board Note Use caution not to short adjacent pins on the connector as damage to the board could resu...

Page 118: ...lers or binds Replace the alignment assembly if any problem is found 2 Inner Deflector Check the inner paper deflector for correct installation If the deflector is bowed or not fitting correctly replace the deflector FRU Action 1 Pass Through Sensor Check the pass through sensor for correct installation and operation 2 Autocompensator Assembly The autocompensator pick roll shaft assembly is not pr...

Page 119: ...t the paper Also the autocompensator motor may be failing If this problems continues replace the autocompensator assembly Double Feeding Paper Note If double feeding paper occurs mostly from the bottom of the stack check for missing or damaged restraint pads in the tray FRU Action 1 Paper Paper is usually the primary cause of a double feeding paper problem Flex the paper before placing the paper i...

Page 120: ...bly Check to ensure the media that is being fed through the multipurpose tray assembly meets recommended paper specifications Parallel Port Service Check Run the Parallel Wrap Test on page 3 11 Note The Parallel Wrap Test is designed to check the parallel port hardware by using a wrap plug P N 1319128 and invoking the Parallel Diagnostic Test This test helps isolate the printer from the parallel c...

Page 121: ...the engine board If incorrect replace the defective cable The voltage at J8 4 measures approximately 5 V dc If incorrect replace the engine board The voltage at J3 7 measures approximately 24 V dc If incorrect replace the engine board If correct replace the printhead assembly 2 Error Code 934 Mirror Motor Lost Lock Error Code 935 Mirror Motor unable to reach operating speed These error codes indic...

Page 122: ...settings as indicated Be sure and note the original settings so you can return the printer to the original customer printer setup Print Resolution Set to 300 dpi print quality problems should be checked at different resolution settings Print Darkness Set to NORMAL Toner Saver Set to OFF PQET Set to OFF Fuser Temperature Set to NORMAL Test the printer using plain paper 20 lb An incorrect printer dr...

Page 123: ...ncorrect replace the contact with one from the HV contact kit Screws are included to attach the contacts to the right side frame in the HV contact kit 3 Charge Roll Conductive Bushing Check to make sure the charge roll bushing is correctly installed in the right charge roll arm 2 HVPS Check the voltages on J10 1 thru J10 8 If incorrect replace the engine board 3 HVPS Cable Part of Front Harness Ca...

Page 124: ...dc Printer Printing J10 5 measures 24 V dc In the voltages at J10 5 are incorrect replace the engine board 4 Front Cable Harness HVPS Section Check the front cable harness at J10 on the engine board and at CN1 on the HVPS to make sure the harness is connected properly If connected properly check the continuity of the cable harness If there is no continuity replace the front cable harness 5 Printhe...

Page 125: ...oll bearings or transfer roll Check the gearbox assembly for correct operation Check the transfer roll for binds or a contaminated shaft or bearings Blurred print can also be caused by incorrect feeding from one of the input paper sources paper trays duplex or envelope feeder Check the high voltage contacts to ensure they are not bent corroded or damaged Replace as necessary Symptom Action 1 Rando...

Page 126: ... by a defective gear in the main drive gearbox assembly Replace the main drive gearbox assembly 3 Lines spaced 38 26 mm 1 506 inch apart This can be caused by defective gear s in the main drive gearbox Replace the FRUs in the following order main drive gearbox reference edge 4 Lines spaced 44 64 mm 1 757 inch apart Replace the FRUs in the following order developer drive assembly main drive gearbox...

Page 127: ... at the end of life 7 Lines spaced 49 74 mm 1 958 inch apart Replace the FRUs in the following order redrive assembly fuser assembly 8 Lines spaced 51 02 mm 2 009 inch apart Replace the transfer roll 9 Lines spaced 52 23 mm 2 056 inch apart Replace the redrive assembly 10 Lines spaced 76 53 mm 3 013 inch apart Replace the FRUs in the following order alignment assembly main drive gearbox assembly 1...

Page 128: ...cannot be cleaned Try another printhead if all other attempts fail to correct a background problem 3 Transfer Roll Assembly Check the high voltage contact from the HVPS to the transfer roll Check the transfer arm assembly right side bearing for any signs of contamination pitting or a loose cable to the bearing If any problems are found replace the defective part Check the transfer roll shaft for a...

Page 129: ...If there is no continuity replace the harness cable If there is continuity replace the HVPS If this does not correct the problem replace the engine board If J10 2 voltage is incorrect or if the voltage remains at 0 V dc check the continuity of the front harness cable J10 2 line If there is no continuity replace the harness cable If there is continuity replace the HVPS If this does not correct the ...

Page 130: ...the charge roll contact for any signs of damage and for proper connection to the HVPS and print cartridge Print Quality Black bands on outer edges of the page This print quality problem appears as vertical black bands on one or both sides of the copy and can be wide narrow light or dark FRU Action 1 Charge Roll Counterbalance Springs If the problem is just on one side of the page check the charge ...

Page 131: ...ard Printer Idle J10 8 measures 0 V dc Printer Printing Test Page J10 8 voltage changes from 0 V dc to 4 V dc If the voltage does not vary check the continuity of line J10 8 in the front cable harness If there is no continuity replace the cable harness If there is continuity replace the HVPS If this does not correct the problem replace the engine board Turn the printer Off and check the resistance...

Page 132: ...r buildup or any other contamination Clean with a soft cloth or replace the lens and lamp assembly which are provided together in a kit If the lens is clean then check the erase lamp assembly for failed erase lamps If defective replace the erase lamp assembly 2 Hot Roll Fuser Assembly Check the fuser assembly for signs of toner contamination The hot roll especially might cause toner to be retained...

Page 133: ...fer Roll Arm Assembly Check the right side transfer roll arm assembly bearing for any signs of wear or contamination Also check to ensure the transfer cable is firmly attached to the bearing If incorrect replace the right side transfer arm assembly Check the connection of the transfer roll assembly cable to the transformer on the HVPS board Check the continuity of the cable from the bearing to the...

Page 134: ... fuser hotroll or backup roll Check the fuser hotroll and backup roll for any noticeable buildup of toner Repair as necessary 2 Belt Fuser 31v 31e Toner buildup on the belt can cause toner to be carried out on the backside of the media If any toner buildup is present on the belt replace the belt fuser assembly 3 Transfer Roll Transfer Plate Assembly Check the transfer roll for any signs of toner b...

Page 135: ...acts Service Tip An intermittent 32 Unsupported Cartridge User Error Message can be caused by poor contact between the smart cartridge contacts in the upper front cover and the smart chip Also check for proper seating of the smart cartridge cable to the engine board FRU Action 1 Smart Cartridge Contact Smart Cartridge Ground Contact Check both contacts to make sure they are properly installed and ...

Page 136: ...ce check is intended to be used when a 929 Service Error displays 4 Smart Cartridge Cable Engine Board Check the voltage on the smart cartridge contact The voltage measures approximately 5 V dc when not writing data to the engine board If data is being written the voltage measures approximately 12 V dc If incorrect disconnect the cable from J21 on the engine board and check the voltage on J21 1 Th...

Page 137: ... all models at service level B may display if an incorrect level HVPS is installed in a printer that has the 2 Front Harness Cable Check the toner sensor portion of the front harness cable to make sure it is properly seated into the toner sensor If correct at both the sensor and engine board J10 check the continuity of the cable If incorrect replace the cable 3 Toner Sensor The toner sensor cable ...

Page 138: ... locked in the down position If the arm is not locked down check to ensure the arm is not broken and will lock into the EP frame correctly Check the left transfer arm assembly spring for proper operation 3 Right Transfer Arm Assembly Check the right transfer arm assembly to make sure it is fastened and locked in the down position If the arm is not locked down check to make sure the arm is not brok...

Page 139: ...he printer runs the print test If the voltage is incorrect check the continuity of line J10 3 in the front cable harness to the HVPS If there is no continuity replace the cable harness If there is continuity replace the HVPS If the problem continues replace the engine board Note This error displays if the incorrect level HVPS is installed FRU Action ...

Page 140: ...1 Turn the printer off 2 Press and hold the Go and Return buttons 3 Turn the printer on 4 Release the buttons when Performing Self Test displays on the operator panel The tests display on the operator panel in the order shown Print Registration Print Tests Hardware Tests Duplex Tests If installed Input Tray Tests Output Bin Tests Five Bin Mailbox Test Base Sensor Test Printer Setup Error Log EP Fa...

Page 141: ...eturn to the Device Tests menu Disk Test Clean WARNING This test destroys all data on the disk and should not be attempted on a good disk Also note that this test may run approximately 1 1 2 hours depending on the disk size To run the Disk Test Clean Test 1 Select Disk Test Clean from the Device Tests menu Files will be lost Go or Stop message displays to warn the user that all contents on the dis...

Page 142: ...lect Flash Test from the Device Tests menu The power indicator blinks while the test is running Flash Test Test Passed message displays if the test passes and the power indicator turns on solid Flash Test Test Failed message displays if the test fails and the power indicator turns on solid 2 Press Go or Return Stop to return to the Device Tests menu Disabling Download Emulations Error Code 964 Dow...

Page 143: ...es Continues until Return Stop is pressed The paper you choose to print the page on should be either Letter or A4 To run the Duplex Quick Test 1 Select Duplex Quick Test from the menu 2 Select Single or Continuous The single Duplex Quick test cannot be canceled The printer attempts to print the Quick Test Page from the default paper source If the default paper source only supports envelopes then t...

Page 144: ...e sensor switch is closed CL closed displays when the sensor switch is open OP Open displays Duplex input sensor Duplex exit sensor Press Return Stop to exit the test Duplex Motor Test This test lets you test the duplex unit s paper feed drive system and verify that the power and velocity values are acceptable To run the Duplex Motor Test 1 Select Motor Test from the Duplex Tests menu The duplex m...

Page 145: ...rive belt from the duplex D C motor and run the motor test again For the duplex D C motor to pass the test the following results must display AA 00 BB in the range of 29 through 3E inclusively hex CC in the range of 35 through 51 inclusively hex DD in the range of 0C through 13 inclusively hex For the duplex drive system to pass the test the following results must display AA 00 BB in the range of ...

Page 146: ...ar Paper message displays when the paper reaches paper stop position 1 and the power indicator turns on solid Duplex Feed 2 Test This test feeds a blank sheet of paper to the duplex paper stop position 2 To run the Duplex Feed 2 Test 1 Select Duplex Feed 2 from the Duplex Test menu The power indicator blinks while the paper is feeding Duplex Feed 2 Feeding message displays while the paper is feedi...

Page 147: ...nsecutive positions in the log are entered All 2xx and 9xx error messages are stored in the error log To view the Error Log 1 Select Display Log from the Error Log menu The Error log displays on three screens as only four entries display at a time 2 To move to the next screen press Menu to move forward or Menu to move backward 3 Press Return Stop to exit the Error Log Clearing the Error Log To cle...

Page 148: ...est To run the LCD Test 1 Select LCD Test from the Diagnostic menu The LCD test continually executes the LCD display test 2 Press Return Stop to cancel the test Button Test To run the Button Test 1 Select Button Test from the Diagnostic menu With no buttons pressed several OP Open appear on the display 2 Press each button one at a time and a CL Closed displays in place of an OP The proper operatio...

Page 149: ...g 999 999 F represents the of time the memory test has failed and finished with errors Initially 00000 displays with the maximum fail count being 99 999 Once the maximum pass count or fail count is reached the test is stopped the power indicator is turned on solid and the final results display If the test fails the message SDRAM Error displays for approximately three seconds and the failure count ...

Page 150: ...rdware Each parallel signal is tested To run the Parallel Wrap Test 1 Disconnect the parallel interface cable and install the wrap plug P N 1319128 2 Select the Parallel Wrap Test from the menu The power indicator blinks indicating the test is in progress The test runs continuously until canceled Each time the test finishes the screen updates If the test passes the Pass Count increases by 1 howeve...

Page 151: ...lid and the final results display Press Return Stop to exit the test Serial Wrap Test This test is used to check the operation of the Serial Port Hardware using a wrap plug Each signal is tested To run the Serial Wrap Test 1 Disconnect the serial interface cable and install the wrap plug 2 Select the appropriate Serial Wrap Test from the menu Serial Wrap Serial 1 Wrap Serial 2 Wrap or Serial 3 Wra...

Page 152: ...nterrupt Error Status Error Receive Data Interrupt Error Transmit Data Interrupt Error Transmit Empty Error Threshold Error Receive Data Ready Error Break Interrupt Error Framing Error Parity Error Overrun Error Data Error Data 232 Error Data 422 Error FIFO Error DSR Error DSR PIO Error DSR Interrupt Error CTS Error CTS PIO Error CTS Interrupt Error Once the maximum count is reached the test stops...

Page 153: ...ther Single feeds one sheet of media from the selected source or Continuous continues feeding media from the selected source until Return Stop is pressed 4 Press Return Stop to exit test Input Tray Sensor Test This test is used to determine if the input tray sensors are working correctly To run the Input Tray Sensor Test 1 Select the Sensor Test from the Input Tray Test menu Input Tray Empty OP Pa...

Page 154: ...g is in the sensor 4 Press Return Stop to exit the test Output Bin Feed Test Note If the Configure Bins printer setting is link rather than mailbox the printer selects its own internal bin linking regardless of which output bin is selected for the feed test This test is to verify that media can be fed to a specific output bin No information is printed on the media because the printhead is not turn...

Page 155: ...sensor is closed CL displays and when the sensor is open OP displays 3 Press Return Stop to exit the test Output Bin X Sensor Test Output Expander or High Capacity Output Stacker To run the Output Bin X Sensor tests 1 Select Output Bin tests from the menu 2 Select Output Bin tests Sensor Tests 3 Select Sensor Tests Output Bin X 4 Press Return Stop to exit the test The following is displayed Output...

Page 156: ... selector P1 5 bin mailbox first passthru sensor P2 5 bin mailbox second passthru sensor L EM indicates 5 bin x empty L NL bin contains media but the bin is not near full on full L NF indicates bin is near full L FL indicates bin is full Base Sensor Test This test is used to determine if the sensors located inside the printer are working correctly The following sensors can be checked Toner Optical...

Page 157: ...h mailbox output diverter Also if more than one 5 bin mailbox option is installed the test checks all of the diverters installed on the printer When the test is selected from the diagnostic menu the following is displayed Diverter Test Running This is a single test The test terminates upon completion ...

Page 158: ...the margin value to be changed press Select until the margin value pair you want to change is blinking 4 To change the margin value press either Menu or Menu When the value you want is displayed press Select to save the value 5 To exit the Registration menu press Return To verify the margin values are correct you must print the Quick Test Page from the registration screen Press Go to print the tes...

Page 159: ...it is the first digit to be changed 2 Press either Menu or Menu until the value you want displays 3 Press Select to move to the next digit press Menu or Menu until the value you want displays Continue with each digit until you set the page count You can skip any digit by pressing Select 4 Press Select to save the new page count in NVRAM 5 Press Return Stop to exit the Diagnostic menu Viewing the P...

Page 160: ...determined using hardware sensors The Configuration ID is originally set at the factory when the printer is manufactured however it requires resetting whenever you replace the engine board and can be set on the operator panel However the Configuration ID is the only diagnostic function displayed until a valid ID is entered To set the Configuration ID 1 Enter the Diagnostic Mode 2 Select Configurat...

Page 161: ...exit the menu without restoring the settings to the factory default values select Do Not Restore Sometimes this is used to help correct print quality problems Fuser Temperature This adjustment can be used to help solve some customer problems with paper curl on low grade papers and or problems with letter heads on some types of media The fuser temperature can be adjusted as follows NORMAL LOWER LOW...

Page 162: ...s is to verify that the printer can print on media from each of the installed input options Each of the installed options is listed in the following order in the menu Tray 1 Tray 2 if installed Tray 3 if installed Tray 4 if installed Tray 5 if installed Multipurpose Feeder if installed Envelope Feeder if installed For each input source selected you have the following choice Single prints the Print...

Page 163: ...ancel the test Check each Test Page from each source to assist in Print Quality and Paper Feed problems Print Quality Test Pages The purpose of this diagnostic function is to allow printing of the print quality test pages with the toner cartridge lockout function disabled The print quality test consists of three pages Page one contains a mixture of graphics and text Pages two and three only contai...

Page 164: ... panel code level smart option code levels font versions and so on Values for the Quality Menu settings used to print the pages Printing Menu Settings Page Note This test page must be printed on letter legal or A4 paper To print the Menu Settings Page 1 Select the TESTS MENU 2 Select Print Menus from the TESTS MENU The page contains the following information A list of all the printer settings cont...

Page 165: ... stack increasing the normal force and drive force until the bending strength of the paper is overcome and the paper bends and moves up the dam Once this critical threshold is achieved the normal force remains at a level just high enough to reliably feed the paper Rather than having a fixed spring force for feeding all weights of paper like the D roll this device has its own mechanical logic for p...

Page 166: ...not to be considered an adjustment for feeding problems Autoconnect System Paper Tray Options Envelope Feeder and Output Expander Operations Electrical Autoconnect Cabling and Connectors The printer options make electrical connection automatically or autoconnects requiring no external cables when the option is mechanically installed under the printer Communication between the option and the base p...

Page 167: ...ly made when the option is installed below the printer The paper input sensor is located in the rear of the duplex unit under the input paper guide The rear cover open switch is located on the rear cover assembly The paper exit sensor is located on the left frame assembly The jam removal tray open switch is located at the end of the left frame assembly There are no switches in the level 2 duplex o...

Page 168: ...he thermistor is connected to the fuser control board connector J2 1 and J2 2 and from J2 to J1 2 and J1 3 on the fuser control board to J2 6 and J2 7 on the engine board J2 6 TEMPIN and J2 7 TEMPIN are connected to module PLCC U9 U9 monitors the change in thermistor resistance and sends a signal HEATON from J20 A25 through the interconnect board to CN3 9 on the LVPS to signal the triac to turn th...

Page 169: ...he result is a sharp detack angle between the belt and the exiting media This eliminates the need for detack fingers The flattening of the belt in combination with the reduced pressure between the belt and the back up roller allows the belt fuser to print on many different types of media without requiring a solenoid thumper to keep the media from wrinkling A specific type of media that is affected...

Page 170: ...aper is jammed between the printer s input and exit sensors This condition can be caused by the paper exiting the input sensor too late or jamming in the fuser assembly prior to activating the exit sensor flag in time or not at all Error Message 202 Paper Jam Open Rear Door This message indicates the paper is jammed at the printer exit sensor This can be caused by the paper arriving at the sensor ...

Page 171: ...r and has not reached the base machine input sensor or has not reached the input sensor in time Error Message 260 Paper Jam Check Envelope Feeder An envelope is jammed in the envelope feeder or has not reached the base machine input sensor Error Message 27x Paper Jam Check Bin x Paper is jammed in output bin x X bin 1 thru 3 Generally this message appears when the paper has not cleared the exit se...

Page 172: ...ctricity in your body to the machine Hold the ESD sensitive part by its edge connector shroud cover do not touch its pins If you are removing a pluggable module use the correct tool Do not place the ESD sensitive part on the machine cover or on a metal table if you need to put down the ESD sensitive part for any reason first put it into its special bag Machine covers and metal tables are electrica...

Page 173: ... page 4 19 to access the drive belt idler pulley 2 Loosen the idler pulley mounting screw and position the idler to provide 3 mm 5 mm drive belt deflection 3 Tighten the idler pulley mounting screw being careful to maintain the adjustment 4 Reassemble the duplex unit To do the duplex motor belt adjustment 1 Do the removal procedure Duplex Motor on page 4 20 to access the motor mounting screws but ...

Page 174: ...he printer s overall performance such as pages per minute but can help in reducing the amount of curl of some printed media thus improving media stacking in the output bin 1 Enter the Diagnostic Mode 2 Select EP SETUP from the Diagnostic Menu 3 Select GAP ADJUST 4 The range of the GAP adjustment is 0 to 255 Adjust the gap setting by using the Menu button to select the value If GAP 0 displays it in...

Page 175: ...elf Test displays 4 Select Registration from the menu 5 Select Quick Test Page The test page should only be printed on letter or A4 paper from Tray 1 The Quick Test Page consists of alignment diamonds horizontal lines that can be used for skew adjustment page count setting printer serial number code levels and print registration settings 6 Check the Quick Test Page for any sign of skew by checking...

Page 176: ...Registration on page 3 19 Do the reference adjustment if you are sure the margins are set correctly 1 Loosen the locknut on the inside rear of the alignment assembly 2 Remove the two screws holding the alignment assembly to the left side frame 3 Back the reference adjustment screw out far enough to allow the alignment assembly to be removed from the printer It is not necessary to completely remove...

Page 177: ...e range specified in Print Registration on page 3 19 The reference screw can be adjusted without loosening the locknut Turn the screw a few turns and print a copy of the Quick Test Page as you check the diamonds on the left margin Continue adjusting the screw as you check the results of each adjustment on a new test page until you obtain the results you want ...

Page 178: ... correct screw type in each location during reassembly Reference Number Screw Type Location Purpose Qty M3 5x8 mm Thread Cutting right side frame to center pan attach 1 toner level sensor mounting 1 charge roll mounting 1 main drive gearbox mounting 3 EP module to left and right side frame attach 9 developer drive assembly mounting 2 stacker duct to frame mounting 2 cartridge hold down assembly mo...

Page 179: ...ach 2 M3 5x12 mm Thread Cutting engine board shield to left frame attach 1 paper alignment assembly mounting 2 toner cartridge guide track mounting 2 left side frame to center pan attach 3 right side frame to center pan attach 2 deflector mounting 2 M3x5 mm Taptite INA cover 2 screws per cover attach 6 interconnect board mounting 5 Reference Number Screw Type Location Purpose Qty ...

Page 180: ...board ground attach 2 controller board to inner shield mounting 2 controller board back mounting 2 engine board to interconnect shield ground attach 1 lower stacker duct mounting 1 ground cables to ground center pan front attach 1 cable clip main drive gearbox BTM mounting 2 fuser screw mounting 7 M3x8 mm Taptite LVPS mounting 2 auto compensator hanger bracket mounting 1 Reference Number Screw Typ...

Page 181: ... attach 1 M3x6 mm Taptite Panhead stacker duct mounting 1 engine board mounting 2 controller to shield mounting 2 controller board mounting 2 in pan mounting 2 shield ground attach 1 LVPS mounting 2 fuser cover mounting 2 cable clip mounting 2 outer shield mounting 6 ina cover mounting 4 Reference Number Screw Type Location Purpose Qty ...

Page 182: ...Plastite Thread Forming right side cover mounting 1 right side frame to pan attach 3 left side frame to pan attach 1 M3x6 mm SEMS Machine Screw with washer fuser board mounting 1 M3 5x12 mm Plastite Thread Forming with washer printhead to EP frame mounting 3 Reference Number Screw Type Location Purpose Qty ...

Page 183: ... the printer Make sure your fingers are not under the printer when you lift or set the printer down Note Some removal procedures require removing cable ties You must replace cable ties during reassembly to avoid pinching wires obstructing the paper path or restricting mechanical movement Covers Left Door 1 Open the upper and bottom front covers 1 Press the two left door latch buttons A and open th...

Page 184: ...Repair Information 4 13 4069 XXX Right Cover 1 Open the upper and bottom front covers 2 Release the cover latch A and remove the right cover mounting screw B ...

Page 185: ...4 14 Service Manual 4069 XXX 3 Remove the redrive assembly 4 Remove the right side cover mounting screw B 5 Remove the right side cover ...

Page 186: ...n 4 15 4069 XXX Upper Front Cover 1 Raise the upper front cover 2 Remove the upper front cover mounting screws A 3 Rotate the cover upward to allow the rear cover hinges to clear the mounting slots and remove the cover ...

Page 187: ...3 Remove the rear paper deflector 4 Press the fuser wiper cover latch and remove the cover 5 Remove the paper full sensor flag assembly from the mounting bracket 6 Remove the mounting screws A and remove the cover Center Pan Assembly 1 Remove the left and right side frames 2 Remove the pan assembly ...

Page 188: ... the inner EMC shield 2 Remove the controller board mounting screw A 3 Remove the controller board mounting screws C 4 Remove the controller board parallel port mounting screws B 5 Remove the serial port mounting screws if present 6 Remove the controller board ...

Reviews: