7
From the printer home screen, release the print job.
•
For confidential print jobs, touch
Held jobs
> select your
user name >
Confidential
> enter the PIN > select the print
job > configure the settings >
.
•
For other print jobs, touch
Held jobs
> select your user
name > select the print job > configure the settings >
.
For Macintosh users
Using AirPrint
1
With a document open, choose
File
>
.
2
Select a printer, and then from the drop-down menu following
the Orientation menu, choose
PIN Printing
.
3
Enable
Print with PIN
, and then enter a four
‑
digit PIN.
4
Click
.
5
From the printer home screen, release the print job. Touch
Held jobs
> select your computer name >
Confidential
> enter
the PIN > select the print job >
.
Using the print driver
1
With a document open, choose
File
>
.
2
Select a printer, and then from the drop-down menu following
the Orientation menu, choose
Print and Hold
.
3
Choose
Confidential Print
, and then enter a four
‑
digit PIN.
4
Click
.
5
From the printer home screen, release the print job. Touch
Held jobs
> select your computer name >
Confidential
> select
the print job > enter the PIN >
.
Maintain the printer
Attaching cables
CAUTION—SHOCK HAZARD:
To avoid the risk of
electrical shock, do not set up this product or make any
electrical or cabling connections, such as the power cord,
fax feature, or telephone, during a lightning storm.
CAUTION—POTENTIAL INJURY:
To avoid the risk of fire
or electrical shock, connect the power cord to an
appropriately rated and properly grounded electrical
outlet that is near the product and easily accessible.
CAUTION—POTENTIAL INJURY:
To avoid the risk of fire
or electrical shock, use only the power cord provided with
this product or the manufacturer's authorized replacement.
CAUTION—POTENTIAL INJURY:
To reduce the risk of fire,
use only a 26 AWG or larger telecommunications (RJ-11)
cord when connecting this product to the public switched
telephone network. For users in Australia, the cord must
be approved by the Australian Communications and Media
Authority.
Warning—Potential Damage:
To avoid loss of data or printer
malfunction, do not touch the USB cable, any wireless network
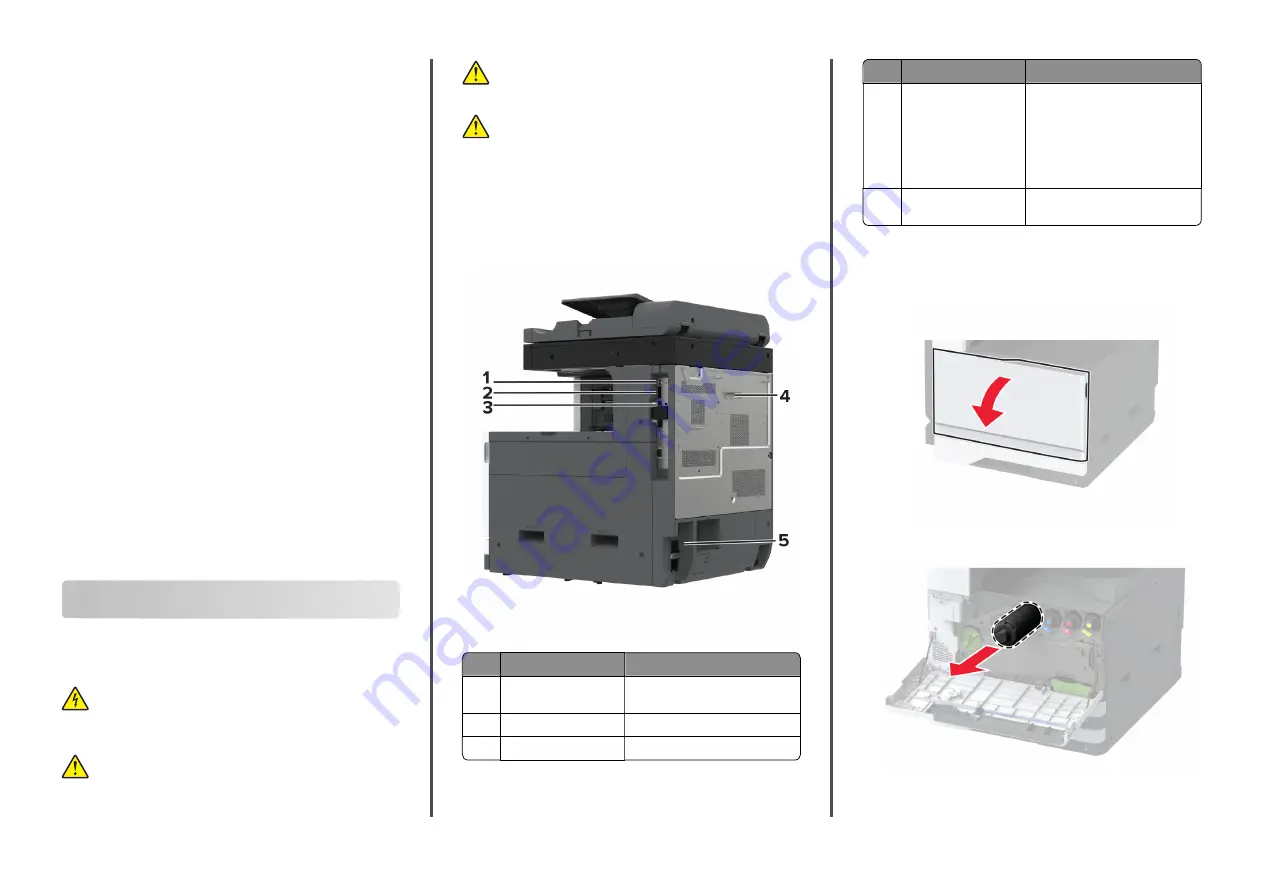
adapter, or the printer in the areas shown while actively printing.
Printer port
Function
1
USB port
Attach a keyboard or any
compatible option.
2
USB printer port
Connect the printer to a computer.
3
Ethernet port
Connect the printer to a network.
Printer port
Function
4
LINE port
Note:
Available only
when a fax card is
installed.
Connect the printer to an active
telephone line through a standard
wall jack (RJ
‑
11), DSL filter, or VoIP
adapter, or any other adapter that
allows you to access the
telephone line to send and
receive faxes.
5
Power cord socket
Connect the printer to a properly
grounded electrical outlet.
Replacing the toner cartridge
1
Open the front door.
2
Remove the used toner cartridge.
3
Unpack the new toner cartridge, and then remove all the
packing material.
7


