background image

Notes:

View the printer IP address on the printer home screen. The
IP address appears as four sets of numbers separated by
periods, such as 123.123.123.123.

If you are using a proxy server, then temporarily disable it to
load the Web page correctly.

2

Click 

Settings

 > 

Paper Menu

.

3

Change the paper size and type settings for the trays you are linking.

To link trays, make sure the paper size and type for the tray
match that of the other tray.

To unlink trays, make sure the paper size or type for the tray
does 

not

 match that of the other tray.

4

Click 

Submit

.

Note: 

You can also change the paper size and type settings using the

printer control panel. For more information, see 

“Setting the paper

size and type” on page 1

.

Warning—Potential Damage: 

Paper loaded in the tray should match

the paper type name assigned in the printer. The temperature of the
fuser varies according to the specified paper type. Printing issues
may occur if settings are not properly configured.

Creating a custom name for a paper type

1

From the home screen, navigate to:

 > 

Paper Menu

 > 

Custom Names

2

Type a custom paper type name, and then apply the changes.

3

Touch 

Custom Types

, and then verify if the new custom paper type

name has replaced the custom name.

Assigning a custom paper type

Using the Embedded Web Server

Assign a custom paper type name to a tray when linking or unlinking
trays.

1

Open a Web browser, and then type the printer IP address in the
address field.

Notes:

View the printer IP address on the printer home screen. The
IP address appears as four sets of numbers separated by
periods, such as 123.123.123.123.

If you are using a proxy server, then temporarily disable it to
load the Web page correctly.

2

Click 

Settings

 > 

Paper Menu

 > 

Custom Types

.

3

Select a custom paper type name, and then select a paper type

Note: 

Paper is the factory default paper type for all user

defined

custom names.

4

Click 

Submit

.

Using the printer control panel

1

From the home screen, navigate to:

 > 

Paper Menu

 > 

Custom Types

2

Select a custom paper type name, and then select a paper type

Note: 

Paper is the factory default paper type for all user

defined

custom names.

3

Touch 

.

Printing

Printing a document

1

From the printer control panel, set the paper type and size to match
the paper loaded.

2

Send the print job:

For Windows users

a

With a document open, click 

File

 > 

Print

.

b

Click 

Properties

Preferences

Options

, or 

Setup

.

c

Adjust the settings, if necessary.

d

Click 

OK

 > 

Print

.

For Macintosh users

a

Customize the settings in the Page Setup dialog:

1

With a document open, choose 

File

 > 

Page Setup

.

2

Choose a paper size or create a custom size to match the
paper loaded.

3

Click 

OK

.

b

Customize the settings in the Print dialog:

1

With a document open, choose 

File

 > 

Print

.

If necessary, click the disclosure triangle to see more
options.

2

From the print options pop

up menus, adjust the settings,

if necessary.

Note: 

To print on a specific paper type, adjust the

paper type setting to match the paper loaded, or select
the appropriate tray or feeder.

3

Click 

Print

.

Adjusting toner darkness

1

From the home screen, navigate to:

 > 

Settings

 > 

Print Settings

 > 

Quality Menu

2

Adjust the toner darkness setting, and then save the changes.

Printing from a flash drive

Notes:

Before printing an encrypted PDF file, you are prompted to type
the file password from the control panel.

You cannot print files for which you do not have printing
permissions.

1

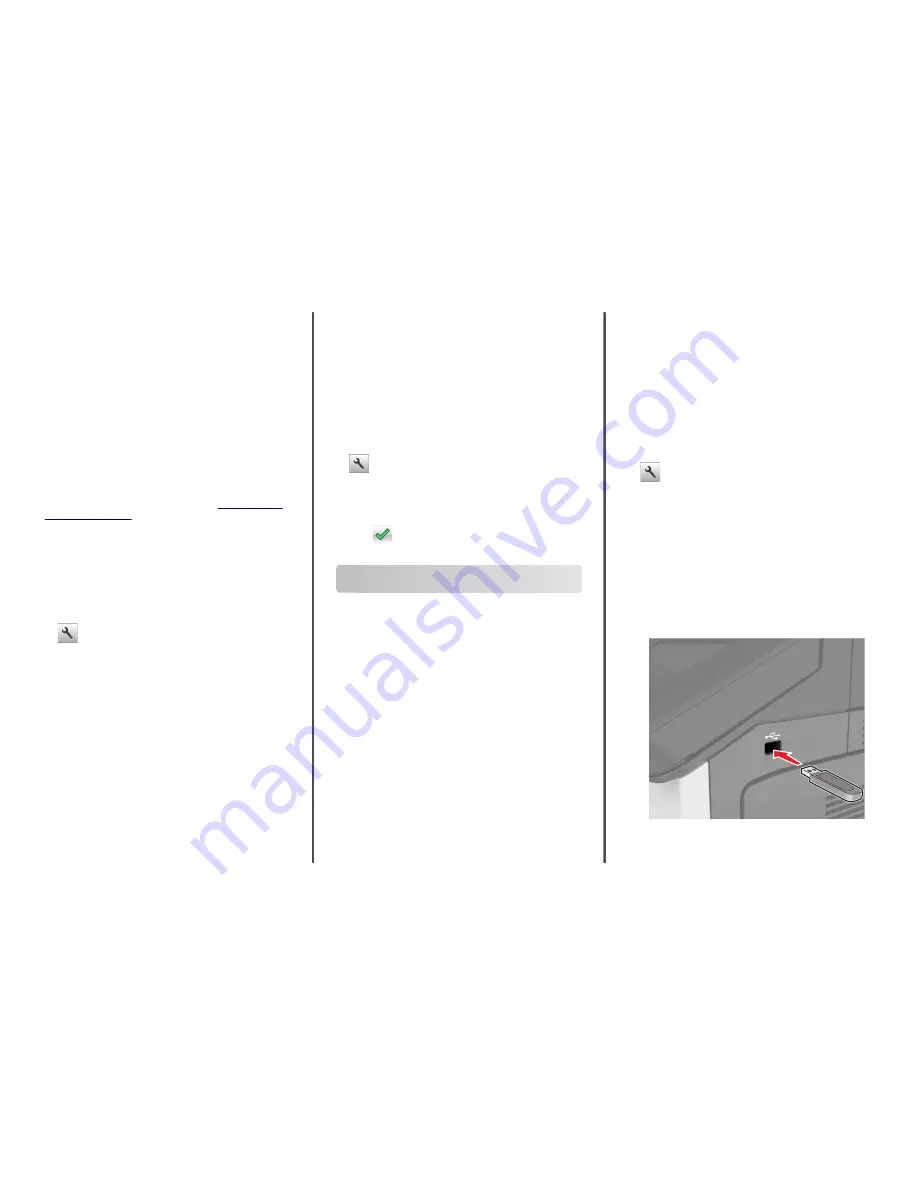
Insert a flash drive into the USB port.


4

Summary of Contents for MS911

Page 1: ... printing Solid green The printer is on but idle Blinking red The printer requires user intervention Sleep button light Printer status Off The printer is off idle or in Ready state Solid amber The printer is in Sleep mode Blinking amber The printer is entering or waking from Hibernate mode Blinking amber for 0 1 second then goes completely off for 1 9 secondsinaslow pulsing pattern The printer is ...

Page 2: ... the printable side faceup Notes Load printable side facedown for duplex printing Load pre punched paper with the holes toward the front or the left side of the tray Load letterhead with the header on the left side of the tray Make sure that the paper is below the maximum fill line on the edge of the paper tray Overfilling may cause paper jams 5 Insert the tray 6 From the control panel set the pap...

Page 3: ...g edge orientation load letterhead faceup with the header on the right side of the feeder Two sided printing Note For long edge orientation load letterhead faceup with the header on the left side of the feeder Loading prepunched paper One sided printing Two sided printing Load envelopes with the flap side down Warning Potential Damage Never use envelopes with stamps clasps snaps windows coated lin...

Page 4: ...ing a proxy server then temporarily disable it to load the Web page correctly 2 Click Settings Paper Menu Custom Types 3 Select a custom paper type name and then select a paper type Note Paper is the factory default paper type for all user defined custom names 4 Click Submit Using the printer control panel 1 From the home screen navigate to Paper Menu Custom Types 2 Select a custom paper type name...

Page 5: ... any other file system are not supported Recommended flash drives File type Many flash drives are tested and approved for use with the printer For more information contact the place where you purchased the printer Documents pdf xps Images dcx gif jpeg or jpg bmp pcx tiff or tif png Canceling a print job Canceling a print job from the printer control panel 1 From the printer control panel touch Can...

Page 6: ...D 4 Door F 5 Trays 6 Door H 7 Finisher bins 8 Door J Area name Control panel message What to do Multipurpose feeder x page jam clear jammed paper from multipurpose feeder 200 xx Remove the jammed paper from the feeder Door C trays x page jam open door C and clear all jammed paper 2yy xx Open door C and then remove the jammed paper Pull out the tray and then remove the jammed paper x page jam slide...

Page 7: ...aper 2yy xx 1 Open door C Make sure that it does not hit any cable attached to the printer 2 Remove the jammed paper from any of the following locations Note Make sure that all paper fragments are removed CAUTION HOT SURFACE The inside of the printer might be hot To reduce the risk of injury from a hot component allow the surface to cool before touching it Fuser area Below the fuser area Duplex ar...

Page 8: ... cable attached to the printer 3 Remove the jammed paper from any of the following locations Note Make sure that all paper fragments are removed CAUTION HOT SURFACE The inside of the printer might be hot To reduce the risk of injury from a hot component allow the surface to cool before touching it Fuser area Below the fuser area Duplex area Above the duplex area 8 ...

Page 9: ...r 24y xx 1 Open door D and then remove the jammed paper Note Make sure that all paper fragments are removed 2 Open the optional tray and then locate the jammed paper 3 Remove the jammed paper Note Make sure that all paper fragments are removed 4 Close the tray and door D x page jam slide the 3000 sheet tray and open door D 24y xx 1 Slide the 3000 sheet tray 2 Open door D and then remove the jammed...

Page 10: ...per Note Make sure that all paper fragments are removed 3 Open door F and then remove the jammed paper Note Make sure that all paper fragments are removed 4 Close door F 5 Open door C Make sure that it does not hit any cable attached to the printer 6 Remove the jammed paper from any of the following locations Note Make sure that all paper fragments are removed CAUTION HOT SURFACE The inside of the...

Page 11: ...rs G H and J and clear jammed paper Leave paper in bin 4yy xx 1 Open door G and then remove the jammed paper Note Make sure that all paper fragments are removed 2 Open door J and then lift handle J1 to its upright position 3 Open door H 4 Remove the jammed paper from any of the following locations Note Make sure that all paper fragments are removed 11 ...

Page 12: ...d paper between the finisher bins then remove the paper Areas H1 and H2 Areas H3 and H4 Area H6 5 Close Door H 6 Open door C and then remove the jammed paper Note Make sure that door C does not hit any cable attached to the printer 12 ...

Page 13: ...agments are removed If necessary turn spinner wheel G1 downward to feed jammed paper into the finisher bin and then remove the paper 3 Slide the finisher back into place 4 Open door C and then remove the jammed paper CAUTION HOT SURFACE The inside of the printer might be hot To reduce the risk of injury from a hot component allow the surface to cool before touching it Notes Make sure that door C d...

Page 14: ...hen slide the finisher to the left 3 Remove the staple cartridge holder 4 Use the metal tab to lift the staple guard and then remove any loose staples 5 Press the staple guard down until it clicks into place 6 Press the staples against the metal bracket Note If the staples are at the rear of the cartridge then shake the cartridge downward to bring the staples near the metal bracket 14 ...

Page 15: ...pen door H and rotate knob H6 clockwise Leave paper in bin 426 xx 428 xx If the jammed paper is located under door G then open the door and remove the paper 1 Open door J and then lift handle J1 2 Open door H 3 Remove the jammed paper from any of the following locations Note Make sure that all paper fragments are removed Door J 15 ...

Page 16: ...sher bins then remove the paper Areas H1 and H2 Areas H3 and H4 Area H6 4 Using handle H5 pull out the booklet maker 5 Remove the jammed paper from any of the following locations Note Make sure that all paper fragments are removed Area H8 Area H9 16 ...

Page 17: ...f the printer might be hot To reduce the risk of injury from a hot component allow the surface to cool before touching it Notes Make sure that door C does not hit any cable attached to the printer Make sure that all paper fragments are removed If the 3000 sheet tray is installed then slide the tray to the right to open the door 9 Close door C 17 ...

Reviews: