10
ENGLISH
GETTING TO KNOW YOUR CAMERA
CONTENTS OF THE PACKAGING
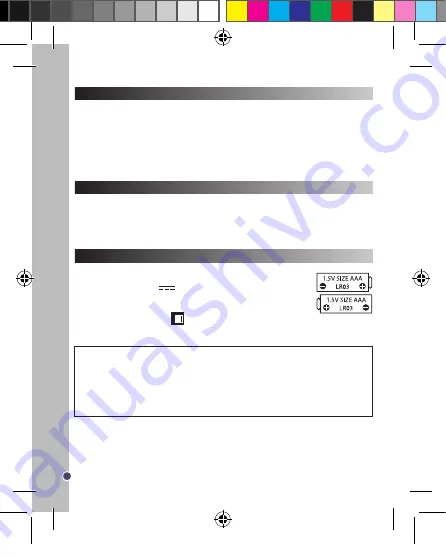
INSERTING NEW BATTERIES
1. Flashlight
2. Self-timer LED
3. Camera lens
4. Viewfinder
5. LCD screen
6. LED
7. Power/Menu button
8. Strap hole
1 x DJ028 digital camera / 1 x USB cable
1 x hand strap / 1 x installation CD-ROM / 1 x instruction manual
WARNING:
All packaging materials, such as tape, plastic sheets, wire ties and tags are not part of
this product and should be discarded for your child’s safety.
1. Make sure the camera is off.
2. Slide open the battery door.
3. Insert 2 x LR03/AAA 1,5V
type batteries (not included) observing the
polarity indicated inside the battery compartment.
4. Close the battery compartment.
Note:
When the low battery icon
displays in the top right-hand corner of the
LCD screen, replace the batteries.
9. Left/Play back button
10. Up button
11. Right/Display on or off button
12. Down/Flash button
13. Shutter button
14. Tripod hole (tripod not included)
15. Battery compartment
16. USB connector port
Non-rechargeable batteries are not to be recharged. Rechargeable batteries are to be removed
from the product before being charged. Rechargeable batteries are only to be charged under
adult supervision. Different types of batteries or new and used batteries are not to be mixed.
Only batteries of the same or equivalent type as recommended are to be used. Batteries are to
be inserted with the correct polarity. Exhausted batteries are to be removed from the product.
The supply terminals are not to be short circuited. Do not throw batteries into a fire. Remove the
batteries if you are not going to use the product for a long period of time.
WARNING:
Malfunction or loss of memory may be caused by strong frequency interference or
electrostatic discharge. Should any abnormal function occur, remove the batteries and insert them
again.
Important note:
All the files stored in the unit’s memory will be lost when replacing the batteries.
Make sure you transfer the files to your computer before changing the batteries.
1. Insert the CD Software (included) into your CD-ROM drive.
2. In the main menu, click “Install MAGIX Photo Manager 10” and wait during the extraction.
3. Select your language and click “OK”.
4. “The MAGIX Photo Manager 10 configuration” window displays. Follow the onscreen instructions
and press “Install” to begin the installation.
5. Once you have finished installing, the “MAGIX Photo Manager 10” shortcut will appear on the desk
of your computer.
6. To start using “MAGIX Photo Manager 10”, double click on the shortcut. The pictures taken with the
camera automatically appear on the home screen.
System requirements (minimum configuration):
Microsoft® Windows® 2000 XP I Vista® I 7. PC
with Intel® Pentium® or AMD® Athlon® 700 MHz or higher, 256 MB RAM, 120 MB hard disk space
for program files, SVGA graphics card with min. 4 MB RAM, (min. resolution 1024 x 600, 16-bit high-
color), Microsoft® compatible mouse.
Note:
To enjoy unlimited use of “MAGIX Photo Manager 10” and “MAGIX Video easy SE”, you need
to register first.
INSTALLING THE VIDEO SOFTWARE (Magix Video easy SE)
INSTALLING THE PHOTO SOFTWARE (Magix Photo Manager 10)
1. Insert the CD Software (included) into your CD-ROM drive.
2. In the main menu, click “Install MAGIX Video easy SE” and wait during the extraction.
3. Follow the onscreen instructions and press “Install” to begin the installation.
4. To launch “Magix Video easy SE” double clik on the shortcut.
System requirements:
Intel® Pentium 4 or AMD® Athlon® 1 GHz and higher, 512 MB RAM, 400
MB free hard disk memory and a DVD drive for program installation, graphics card with a screen
resolution of at least 1024 x 768, sound card.
Supported devices:
Video, TV, or graphics cards with video input.
TURNING THE CAMERA ON AND OFF
Press and hold the Power button (7) to turn the camera on or off. When you turn the camera on a
beep will sound and the LCD screen lights up.
Note:
The camera will auto power off 30 seconds of inactivity.
DJ028seriesIM1182_V04.indb 10
18/04/2012 4:49 PM


