QUICKSTART GUIDE
//
DGT 260
//
Lewitt Control Center Software
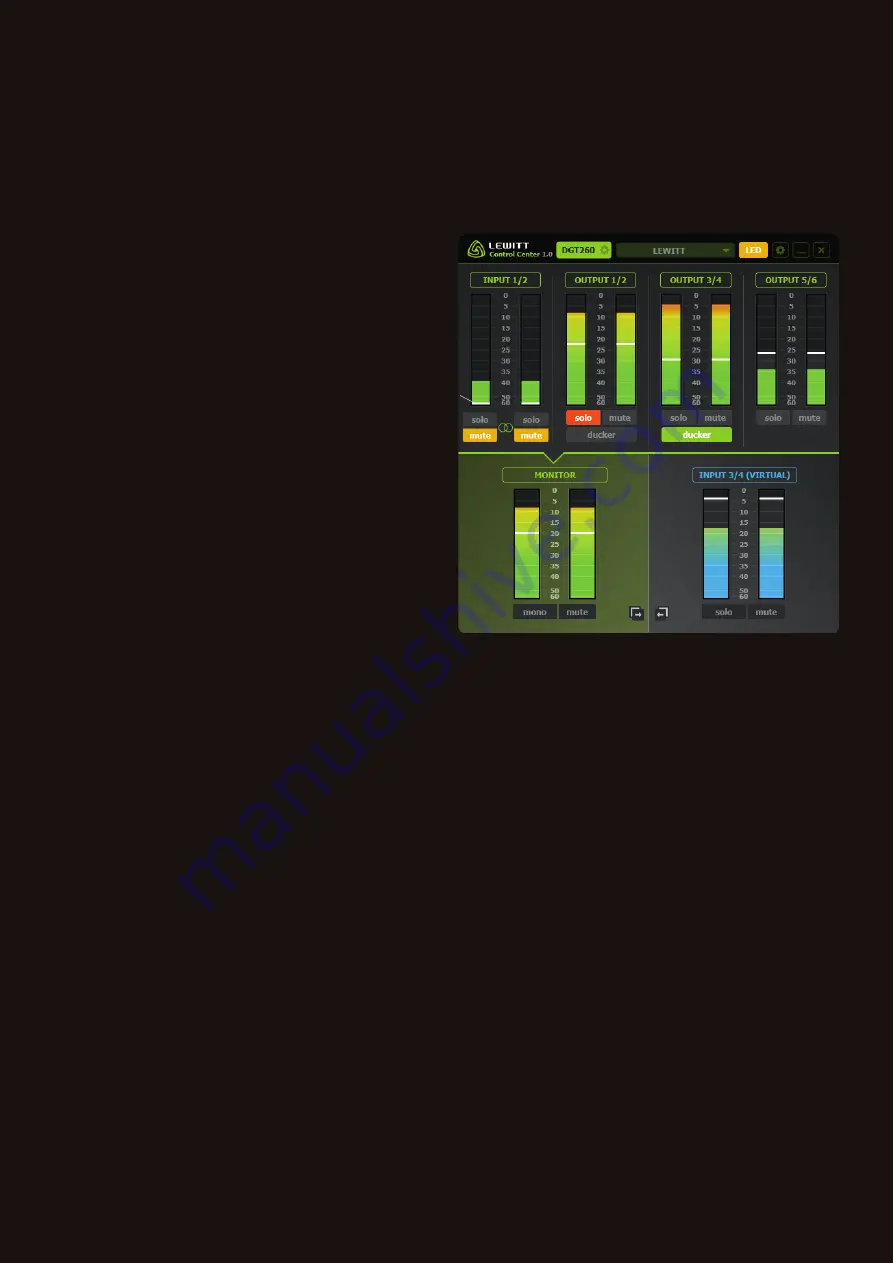
The Control Center Software allows you to manage different sound sources and create two independent mixes. One mix for
monitoring and another one to record or stream. It also allows you to set every parameter of your DGT 260 without touching the
microphone, and you can adapt the LED color scheme to your personal taste.
//
Control Center’s User Interface
1
Microphone settings
//
Remote control your microphone.
2
Global presets
//
Load or store presets.
3
LED settings
//
Adapt the LED illumination to your taste.
4
Software settings
//
Activate channel linking and check for
updates.
5
Minimize
//
Hide user interface.
6
Close
//
Close the window.
7
Channel name
//
Rename channel names by clicking into the
name fi eld.
8
FADER
//
Change volume for this channel.
9
SOLO
//
Listen to this channel only - INPUT 3/4 VIRTUAL mix
will not be affected.
10
MUTE
//
Mute channel.
11
DUCKER
//
Use the DUCKER DSP to lower volume of this
channel (for example music playback) when talking into the
microphone.
12
MONO
//
Signal will be mono-summed.
13
MONITOR MIX
//
Click in this area (13) to access MONITOR mixer. This is your personal headphone mix!
14
INPUT 3/4 (VIRTUAL) - BROADCAST MIX
//
Click in this area (14) to access the INPUT 3/4 (VIRTUAL) mixer, it is used to
send the mix to other applications. This mix is recorded or streamed to your audience!
15
COPY
//
Copy mix settings from MONITOR mix to INPUT 3/4 (15a) or copy INPUT 3/4 to MONITOR mix (15b).
//
Analog and Virtual I/O
INPUT 1/2 (ANALOG)
//
This is the microphone input.
INPUT 3/4 (VIRTUAL)
//
Use this input to select your mix in other applications like any DAW (Samplitude, Pro Tools, Cubase, ...),
internet stream/broadcast applications and VoIP services like Skype and QQ.
MONITOR
//
This is the DGT 260 headphone output.
OUTPUT 1/2, OUTPUT 3/4, OUTPUT 5/6
//
Use these outputs to route different sources (processed vocals from DAW/VST
rack, audio player, web browser, communication from Skype or QQ,..) to the Control Center. Mix those channels and send them to
MONITOR and/or INPUT 3/4 (VIRTUAL).
//
Virtual mixing console with 2 mixes
MONITOR
(green color scheme)
//
This is your personal mix, it will be sent to the headphone output. Click anywhere on the
bottom left area (13) to access your personal mix. All source signals metering color will be green (see Figure 3a).
INPUT 3/4 VIRTUAL
(blue color scheme)
//
This mix is meant to be used by other applications to record or stream to the
internet. Click anywhere on the bottom right area (14) to access your broadcast mix. All source signals metering color will be blue
(see Figure 3b).
Please note that the sources of the two mixes do not differ, both mixes are sharing the same sources. They differ only in the set
levels of the different channels.
9
10
11
12
15a 15b
13
14
Figure 2
1
2
3
4 5 6
7
8


