background image

Sky conditions are usually defined by two atmospheric characteristics, seeing, or the steadiness 
of the air, and transparency, light scattering due to the amount of water vapor and particles in 
the air. When you observe the Moon or planets, and they appear as though water is running over 
them, you probably have bad "seeing" because you are observing through turbulent air. In 
conditions of good seeing, the stars appear steady, without twinkling. Ideal transparency is when 
the sky is inky black and the air is unpolluted

Observations

Travel to the best site that is reasonably accessible. It should be away from city lights, and 
upwind from any source of air pollution. Always choose as high an elevation as possible; this will 
get you above some of the lights and pollution and will ensure that you aren't in any ground fog. 
Sometimes low fog helps by blocking light pollution if you get above it. Try to have an 
unobstructed view of the horizon, especially the southern horizon if you are in the Northern 
Hemisphere and vice versa. Remember that the darkest sky is usually at the zenith, directly 
above your head. Do not try to observe anything that passes near hills or buildings along its 
route. Even extremely light winds can cause major air turbulence as they flow over the top of a 
building or a wall. When observing from a pavement, your steps may cause slight tremors and 
vibrations of the telescope. Pavements may also be exuding heat stored throughout the day, 
which will also decrease the quality of your views. Observing through a window is not 
recommended because the window glass will distort images considerably. And an open window 
can be even worse, since warmer indoor air will escape out the window, causing turbulence 
which also affects images. All in all, astronomy is an outdoor activity. These telescope models 
need at least 10 minutes in the open to adapt to the outside temperatures. 

Choosing the right time for observations

The best conditions will have still air, and obviously, a clear view of the sky. Some clouds may be 
present, as often broken clouds provide excellent seeing. Do not view immediately after sunset. 
After the sun goes down, the ground is still cooling, causing air turbulence. As the night goes on, 
not only will the seeing improve, but air pollution and ground lights will often diminish as well. 
The best time for observations is early morning. Objects are best observed as they cross the 
meridian, which is an imaginary line that runs through the Zenith, due North-South. This is the 
point at which objects reach their highest points in the sky, and negative atmospheric effects are 
reduced to their minimum.

Eye adaptation

Try to avoid any electric lights for 30 minutes prior to observing. This allows your pupils to dilate 
to their maximum diameter. To avoid fatigue, observe with both eyes open. It is recommended to 
cover the eye you are not using with your hand or an eye patch. Use peripheral vision on dim 
objects, as the center of your eye is the least sensitive to low light levels. When viewing a dim 
object, don't look directly at it. Instead, look slightly to the side, and the object will appear 
brighter.

Weather conditions

Summary of Contents for Skyline 102?1000 AZ

Page 1: ...Refractor telescopes Levenhuk Levenhuk Skyline 76х700 AZ Levenhuk Skyline 70х700 AZ Levenhuk Skyline 102х1000 AZ Skyline 80х400 AZ User Guide ...

Page 2: ...gned for high resolution viewing of astronomical objects With their precision optics you will be able to locate and enjoy hundreds of fascinating celestial objects including the planets the Moon and a variety of deep sky galaxies nebulas and star clusters If you have never owned a telescope before we would like to welcome you to amateur astronomy Take some time to familiarize yourself with the nig...

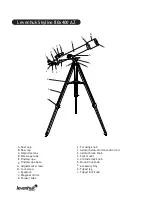
Page 3: ...crew Eyepiece Diagonal mirror Focuser tube Focusing knob Azimuth slow motion control rod Azimuth lock knob Fork mount Altitude lock knob Mount lock knob Accessory tray Tripod leg Tripod lock knob A B C D G L H I J K 1 2 3 4 5 E F a b c Levenhuk Skyline 80х400 AZ A В С D Е F G H I J K L 1 2 3 4 5 a b c ...

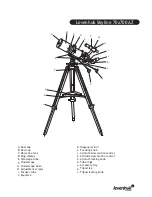
Page 4: ...Finderscope Finderscope base Adjustment screws Focuser tube Eyepiece Diagonal mirror Focusing knob Azimuth slow motion control Altitude slow motion control Azimuth locking knob Tube rings Accessory tray Tripod leg Tripod locking knob Levenhuk Skyline 70х700 AZ A В С D Е F G H I J K L 1 2 3 4 a b c ...

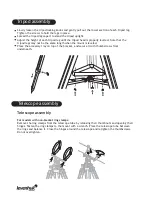
Page 5: ...ame length when the mount is leveled Place the accessory tray on top of the bracket and secure it with thumbscrews from underneath Tripod assembly Telescope assembly Telescope assembly For models with non bracket ring clamps Remove the ring clamps from the telescope tube by releasing their thumb nuts and opening their hinges Fasten the ring clamps to the mount with a wrench Place the telescope tub...

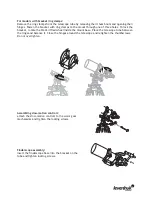
Page 6: ...cket rotate the black riffled wheel inside the mount base Place the telescope tube between the rings and balance it Close the hinges around the telescope and retighten the thumbscrews Do not overtighten Assembling slow motion controls attach the slow motion controls to the worm gear mechanisms and tighten the locking screws Finderscope assembly insert the finderscope base into the bracket on the t...

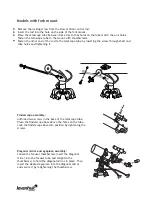
Page 7: ...e telescope tube Place the finderscope base above the holes on the tube Lock the finderscope base into position by tightening the screws Models with fork mount Remove the locking screw from the slow motion control rod Insert the rod into the hole on the side of the fork mount Place the telescope tube between fork arms so that holes on the tube match the arm holes Fasten the telescope tube to the m...

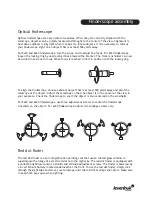
Page 8: ...ards away and point the telescope at the object Adjust the telescope so that the object is in the center of the view in your eyepiece Check the finderscope to see if the object is also centered on the crosshairs For 5x24 and 6x24 finderscopes use three adjustment screws to center the finderscope crosshairs on the object For 6x30 finderscopes adjust two windage screws only Red dot finder The red do...

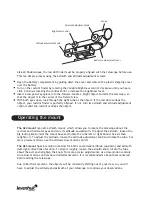
Page 9: ...allows you to rotate the telescope about the vertical and horizontal axes and vary its altitude and azimuth To adjust the azimuth loosen the big locking knob under the mount base and rotate the tube left or right about the axis then retighten it To adjust the altitude loosen the altitude adjustment knob and rotate the tube For more precise motions use the altitude slow motion control The AZ3 mount...

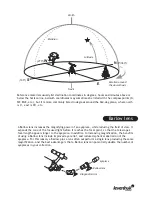
Page 10: ... lens often outperform a single lens producing the same magnification And the best advantage is that a Barlow lens can potentially double the number of eyepieces in your collection Barlow lens Reference materials usually list declination coordinates in degrees hours and minutes above or below the horizon line Azimuth coordinates may sometimes be listed with the compass points N SW ENE etc but it i...

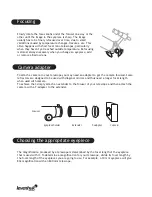
Page 11: ...apter to get the camera focused Some refractors are designed to be used with diagonal mirrors and thus need a longer focal length when used with camera To achieve that simply attach an extender to the focuser of your telescope and then attach the camera with a T adapter to the extender Camera adapter The magnification produced by a telescope is determined by the focal length of the eyepiece that i...

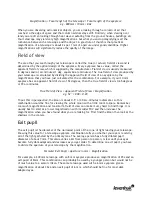
Page 12: ... or 39 arc minutes True Field of View Apparent Field of View Magnification e g 52 80X 0 65 To put this in perspective the Moon is about 0 5 or 30 arc minutes in diameter so this combination would be fine for viewing the whole moon with a little room to spare Remember too much magnification and too small a field of view can make it very hard to find things It is usually best to start at a lower mag...

Page 13: ... decrease the quality of your views Observing through a window is not recommended because the window glass will distort images considerably And an open window can be even worse since warmer indoor air will escape out the window causing turbulence which also affects images All in all astronomy is an outdoor activity These telescope models need at least 10 minutes in the open to adapt to the outside...

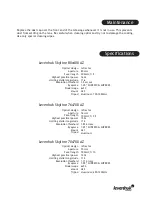
Page 14: ...not to damage the coating Use only special cleaning wipes Optical design Aperture Focal length Highest practical power Limiting stellar magnitude Resolution threshold Eyepiece Mount Tripod refractor 76mm 700mm f 9 2 152x 11 9 1 82 arcsec 1 25 SUPER10 SUPER25 AZ1 aluminum Levenhuk Skyline 80х400 AZ Levenhuk Skyline 76х700 AZ Optical design Aperture Focal length Highest practical power Limiting stel...

Page 15: ...t No guarantee is provided in cases the product was used for purposes other than that intended or has mechanical damages scratches cracks optics damages as well as in cases the product is broken down due to impact damages squeezing or stretching or the product has been disassembled or repaired by unauthorized personnel This warranty does not cover components and or accessories with limited use per...

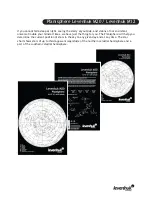
Page 16: ...ant universe trouble your mind at times we have just the thing for you The Planisphere will help you determine the current position of stars in the sky on any given day and at any time The star chart shows stars of up to third apparent magnitude of the northern celestial hemisphere and a part of the southern celestial hemisphere ...

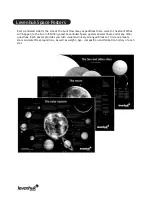
Page 17: ...he Moon What will happen to the Sun in 8 billion years Levenhuk Space posters answer these and many other questions Each poster provides you with visual and nicely arranged blocks of trivia on planets stars and satellites proportions as well as weight age composition and formation history of each star ...

Page 18: ...for Levenhuk Ltd Long Island City NY 11101 USA Levenhuk is a registered trademark of Levenhuk Ltd Copyright 2006 2012 Levenhuk Ltd All rights reserved The Levenhuk series of cleaning tools is all you need to keep your optics clean and durable and to maintain its excellent quality ...

Reviews: