background image


17 


above the Remote devices panel showing whether the  Autoscan functionality is turned ON or 

OFF. The following information is displayed for all devices that appear in the lower panel. 


Device Name 

column shows the default device name, which may be user re-defined. A user can 

change the  name by either using the rename button or by clicking on the name and editing 

in-place. An icon is usually shown with the name. By default, the icon is always accompanied by 

a device name. 


MAC Address 

column shows the Remote device’s MAC address. 


Password 

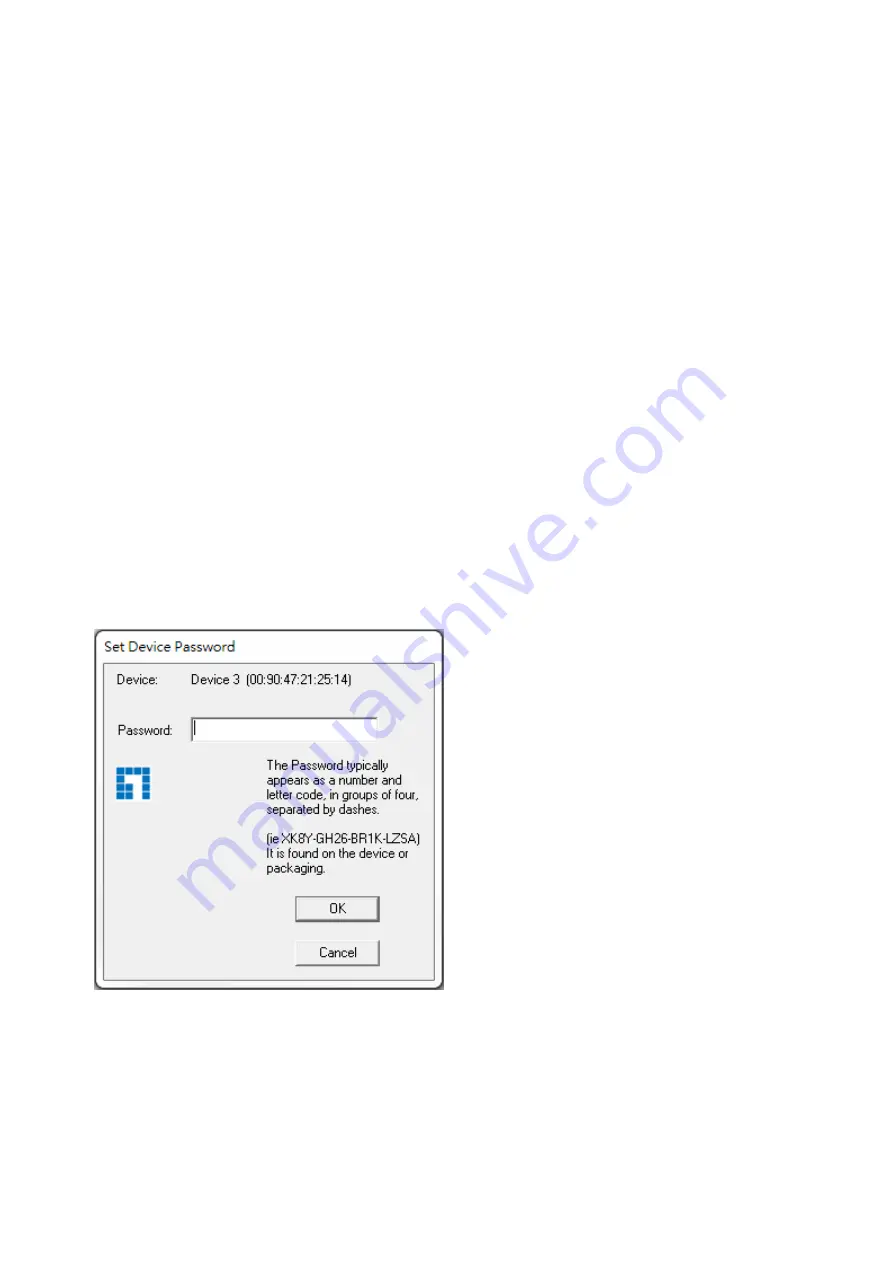
column by default is blank and ‘Enter Password’ button can be used to enter it.   

To set the 

Password 

of the device (required when creating a private network), first select the 

device by clicking on its name in the lower panel and then click on the Enter Password button. A 

dialog box will appear as shown in Figure 3-3 to type the password. The selected device name is 

shown above the password field and the password can be verified by hitting the OK button. The 

Password field accepts the Device password in any case  formats, with  or without dashed 

between them. If a device was not found, the user will be notified along with the suggestions to 

resolve common problems. This process might take a few seconds to get completed. 


Figure 3-3: Set Device Password 

Summary of Contents for PLI-3211

Page 1: ...LevelOne User Manual PLI 3211 200Mbps Powerline 4 Port Switch Ver 1 0...

Page 2: ...on of Powerline Utility 7 2 3 Uninstallation of Configuration Utility 14 3 1 Main Tab 15 3 2 Privacy Screen 20 3 3 Diagnostics Screen 21 3 4 About Screen 22 Chapter 4 Individual HomePlug AV Network St...

Page 3: ...he following two conditions 1 This device may not cause harmful interference 2 This device must accept any interference received including interference that may cause undesired operation CE This equip...

Page 4: ...Plug AV Network Interface RJ 45 10 100Base T Ethernet support 200Mbps Power Line Port Security 128 bit AES Link Encryption with Key Management Frequency Band 2 28Mhz Modulation Schemes OFDM Symbol Mod...

Page 5: ...Status Lights Power On This HomePlug Ethernet Bridge is receiving electrical power Off Power off PLC Link The PLC power line Link light will indicate the overall speed of your network with 3 colors Re...

Page 6: ...ins 4 Ethernet ports Left Casing and Buttons The left casing contains a recessed Reset button a Security button Security This button is designed to generate an individual HomePlug AV network group und...

Page 7: ...Adaptor has three LEDs indicator PWR Turn on when connected to AC power supply PL Turn on when detected and connected with another HomePlug adaptor within the network 1 4 Turn on when connected to the...

Page 8: ...our PC s Ethernet port to the Powerline Ethernet Adapter s LAN Ports and connect the supplied RJ45 Ethernet cable from your xDSL Cable Modem s Ethernet port to the Powerline Ethernet Adapter s LAN Por...

Page 9: ...ng this utility 1 In order to install insert Configuration Utility CD ROM into the computer s CD ROM drive The program shall run automatically Alternatively this can also be done manually by double cl...

Page 10: ...8 4 Click Setup button to continue 5 Click Next button to continue...

Page 11: ...9 6 Click Next button to continue 7 Click I Agree button to continue...

Page 12: ...10 8 Click Install button to continue 9 Click Flish button to continue...

Page 13: ...11 10 Click Next button to continue 11 Click I Agree Next button to continue...

Page 14: ...12 12 Click Next button to continue 13 Click Next button to continue...

Page 15: ...5 nnected lo 16 You can see your device working well The top panel of the screen shot shows a Homeplug device connected locally to your computer The bottom panel shows one device connected remotely to...

Page 16: ...ll the Configuration Utility go to the Control Panel of your system 2 Open the Add Remove Programs 3 Select and double click on the Powerline Utility in the Add Remove Programs Properties 4 Follow the...

Page 17: ...e Utility will use a Graphical User Interface GUI with limited user selectable options 3 1 Main Tab In order to start the utility double click the utility icon on desktop Figure 3 1 shows the main scr...

Page 18: ...connected to the local device the utility will automatically scan the power line periodically for any other HomePlug devices If no local HomePlug devices are discovered the status area above the conne...

Page 19: ...n by default is blank and Enter Password button can be used to enter it To set the Password of the device required when creating a private network first select the device by clicking on its name in th...

Page 20: ...the user to enter both a device name and the password If a device was not found the user will be notified and suggestions to resolve common problems will be presented Figure 3 4 Add Remote Device Note...

Page 21: ...g devices connected to the Powerline network By default the utility automatically scans every few seconds and updates the display screen A typical screen after naming and supplying passwords might app...

Page 22: ...he main screen as Private Figure 3 6 Privacy Screen The Set Local Device Only button can be used to change the network name network password of the local device If a new network password is entered al...

Page 23: ...d to communicate over HomePlug on the Powerline network It shall include the following Operating System Platform Version Host Network Name User Name MAC Address of all NICs Network interface card conn...

Page 24: ...is available from the diagnostics screen Device Alias Name Device MAC Address Device Password Device Last known rate Device Last Known Network name HomePlug chipset manufacturer name Date device last...

Page 25: ...23 Figure 3 8 About dialog screen...

Page 26: ...g a new network Network AB The procedure is as follows 1 Press and hold the Security button on Bridge A for 10 seconds Release it when the Power light flashes The password to Bridge A has just been er...

Page 27: ...ashes The password to Bridge C has just been erased It must now be linked to your network to adopt the new network security key 2 Press and hold the security button on Bridge A for 2 seconds The Power...

Page 28: ...r light flashes The password to Bridge B has just been erased and removes itself from Bridge A C 2 Press and hold the Security button on Bridge D for 2 seconds 3 Within 120 seconds after the Power lig...

Page 29: ...y degrade network performance or completely stop network signals This HomePlug AV Ethernet Bridge should not be used on GFI protected outlets as some outlets will filter out HomePlug Powerline signal...

Reviews: