


Level One Printer Servers
Preparing for TCP/IP Printing
To create a TCP/IP remote printer, Microsoft
TCP/IP Printing Support
must be installed. If
it is already installed, proceed to
Adding a TCP/IP Remote Printer
. Otherwise, the
procedure to install TCP/IP printing support is as follows.
Windows NT 3.51
1.
Start the
Network
option in Control Panel. When the Network Settings dialog box
appears, click the
Add Software
button to display the
Add Network Software
dialog box.
2.
Select
TCP/IP Protocol And Related Components
in the Network Software list box,
and then click the
Continue
button.
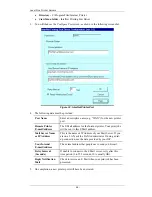
3.
In the
Windows NT TCP/IP Installation Options
dialog box, check the
TCP/IP Network
Printing Support
option.
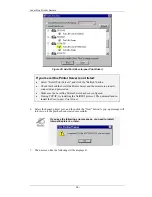
4.
Click the
OK
button. Windows NT Setup will display a message asking for the full
path to the Windows NT distribution files. Provide the appropriate location and click
the
Continue
button. All necessary files will be copied to your hard disk.
5.
If you did not check the
Enable Automatic DHCP Configuration
option in the
Windows
NT TCP/IP Installation Options
dialog box, you must complete all the required TCP/IP
configuration procedures manually.
6.
After you finish configuring TCP/IP, the
Network Settings
dialog box will reappear,
click the
Close
button and then restart your computer for the changes to take effect.
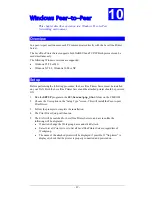
Windows NT 4.0
1.
Go to Start-Settings-Control Panel-Network.
2.
Click the
Service
option and ensure that
Microsoft TCP/IP Printing
is enabled. If it is
not enabled, select the
Add
option and enable it as usual.
3.
If you added services in step 2, reboot the computer for the changes to take affect.
Adding a TCP/IP Remote Printer
Windows 3.51
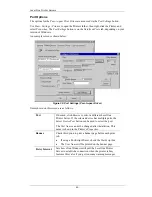
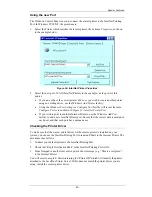
1.
From the
Printer
menu in
Print Manager
, select
Create Printer
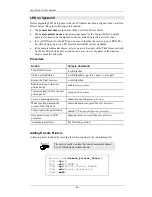
2.
In the resulting dialog box, enter data as follows:
Printer Name
Enter a name (up to 32 characters). This name appears in
the title bar of the printer window.
Driver
Select the appropriate driver for the attached printer.
Description
Enter a printer description for other network users to
reference.
Print To
Select
Other
.
3.
A
Print Destinations
dialog box will appear after selecting
Other
. In the
Available
Print Monitor
list, select
LPR Port
, then
OK
.
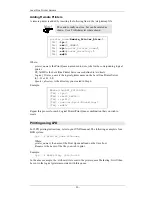
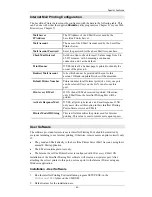
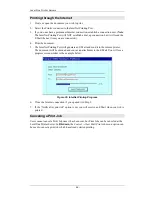
4.
An
Add LPR compatible printer
window will appear. Enter data in the fields as follows:
Name Or Address Of Host
Enter the IP address of the LevelOne Printer
- 54 -


